Why You’ll Love This Roasted Garlic Gravy
Imagine adding a rich, flavorful touch to your favorite meals with this simple roasted garlic gravy. It’s packed with the warm, nutty essence of roasted garlic that makes every bite unforgettable. Whether you’re a busy parent whipping up a quick dinner or a food enthusiast exploring new flavors, this gravy fits right into your routine.
One of the standout features is its ease of preparation. This roasted garlic gravy recipe is straightforward, requiring minimal ingredients and simple steps that can be completed within 30 minutes, making it perfect for quick meals or last-minute additions. Plus, roasted garlic brings health benefits like antioxidants that support your heart and boost your immune system, turning this into a smarter choice compared to heavier sauces.
It’s also incredibly versatile, adapting to various dietary needs such as vegan or gluten-free options by swapping a few ingredients. The roasting process gives garlic a mellow, sweet flavor that elevates everything from mashed potatoes to meats. That’s why roasted garlic gravy is a game-changer for home cooks like you, adding a burst of taste without the hassle.
To learn more about how ingredients like garlic enhance your meals, check out this resource on the health benefits of garlic. This can inspire you to experiment with more recipes on your cooking journey.
Jump to:
- Why You’ll Love This Roasted Garlic Gravy
- Essential Ingredients for Roasted Garlic Gravy
- How to Prepare the Perfect Roasted Garlic Gravy: Step-by-Step Guide
- Dietary Substitutions to Customize Your Roasted Garlic Gravy
- Mastering Roasted Garlic Gravy: Advanced Tips and Variations
- How to Store Roasted Garlic Gravy: Best Practices
- FAQs: Frequently Asked Questions About Roasted Garlic Gravy
- Why is my roasted garlic gravy pale instead of brown?
- How do I prevent lumps when making roasted garlic gravy?
- What’s the best way to prepare garlic for roasted garlic gravy?
- Can I make roasted garlic gravy in advance and store it?
- How can I add richness to my roasted garlic gravy?
- Roasted Garlic Gravy
- Ingredients
- Instructions
- Last Step:
- Notes
- Nutrition
- Did you make this recipe?
Essential Ingredients for Roasted Garlic Gravy
Gathering the right ingredients is key to making roasted garlic gravy that tastes amazing. Start with fresh, high-quality items to get that perfect balance of flavors. This section breaks down everything you need, focusing on the roasted garlic and gravy components for a seamless recipe.
For the roasted garlic part, you’ll use these exact ingredients:
- 1 head garlic, cut crosswise
- 1 tablespoon olive oil
- Salt and pepper to taste
Now, for the gravy itself, here’s the full list with precise measurements:
- 3 tablespoons unsalted butter
- 3 tablespoons flour
- 1 1/3 cups chicken stock
- Salt and pepper to taste
This setup keeps things simple yet effective, using staples you might already have in your kitchen. I’ve included options for special dietary needs, like using plant-based oils for vegan versions or gluten-free flour to make it work for everyone.
Special Dietary Options:
- Vegan: Swap chicken stock with vegetable broth and use a plant-based alternative to butter for a creamy texture.
- Gluten-free: Replace flour with a gluten-free blend to thicken without issues.
- Low-calorie: Opt for low-sodium stock and cut back on butter for a lighter take.
Don’t forget how olive oil plays a role; it’s not just for roasting but adds a smooth richness, as highlighted in resources about its perks. For more on that, explore the benefits of olive oil to see why it’s a smart choice.
How to Prepare the Perfect Roasted Garlic Gravy: Step-by-Step Guide
Getting roasted garlic gravy right is all about following clear steps that anyone can handle. Start by preheating your oven and gathering your tools for a smooth process. This guide walks you through each part, ensuring your gravy turns out flavorful every time.
First, roast the garlic by preheating the oven to 375˚F. Place the garlic head halves cut side up on a piece of foil, drizzle with 1 tablespoon olive oil, and season lightly with salt and pepper. Wrap the foil around the garlic and roast for 40 to 45 minutes until the cloves are soft and slightly caramelized, then let it cool for about 10 minutes.
For the gravy, squeeze the roasted garlic cloves from the head into a small bowl and mash with a fork to make a smooth paste. Melt 3 tablespoons unsalted butter in a pot over medium heat and whisk in 3 tablespoons flour until smooth, about 2 minutes. Add the garlic paste and whisk until smooth, then gradually whisk in 1 1/3 cups chicken stock until no lumps remain.
Lower the heat to medium-low, season with salt and pepper, and simmer while whisking occasionally to avoid burning, until the gravy thickens and coats the back of a wooden spoon, about 7 to 8 minutes. If you’re adapting for dietary needs, swap ingredients as you go. For more advanced techniques, check out our section on Mastering Roasted Garlic Gravy to take your skills up a notch.

Dietary Substitutions to Customize Your Roasted Garlic Gravy
Making roasted garlic gravy your own is easy with a few tweaks. Whether you’re aiming for a vegan version or something lighter, these changes keep the flavor intact. Think of it as tailoring the recipe to fit your lifestyle without losing that garlic goodness.
Protein and Main Component Alternatives:
- Replace chicken stock with vegetable broth for vegan or vegetarian preferences.
- Use mushroom broth for a deeper, umami-rich flavor that works well in plant-based dishes.
- Incorporate nutritional yeast instead of traditional thickeners to add a cheesy note for vegan options.
Vegetable, Sauce, and Seasoning Modifications:
- Add sautéed mushrooms or caramelized onions to boost texture and taste.
- Swap soy sauce with tamari or coconut aminos to keep it gluten-free.
- Mix in smoked paprika or fresh herbs like thyme to change up the flavor based on what you have on hand.
These swaps make roasted garlic gravy adaptable for busy parents or diet-conscious folks. It’s all about making mealtime enjoyable and healthy.
Mastering Roasted Garlic Gravy: Advanced Tips and Variations
Once you nail the basics, it’s time to level up your roasted garlic gravy. Try pro techniques like slow-roasting the garlic for a sweeter depth or blending the gravy for extra smoothness. These tweaks can turn a simple recipe into something special for food enthusiasts.
Flavor variations let you play around, such as adding rosemary or sage for an herbal twist, or a splash of white wine for more complexity. Presentation matters too, so drizzle the gravy over plates and top with roasted garlic cloves or parsley for a nice look. If you’re planning ahead, make the base and store it in the fridge, then reheat with broth to keep it fresh.
Here are some quick tips in a table for easy reference:
| Tips | Benefits |
|---|---|
| Whisk flour and stock slowly | Prevents lumps for a smooth finish |
| Keep whisking while simmering | Avoids burning and ensures even cooking |
| Ensure garlic is fork-tender | Delivers the best caramelized flavor |
Adding a splash of cream can make it richer, or use beef stock for a deeper color. This builds on the core recipe for endless possibilities.
How to Store Roasted Garlic Gravy: Best Practices
Proper storage keeps your roasted garlic gravy tasting great for days. Start by letting it cool completely before putting it away to maintain its texture. This is ideal for working professionals who like to prep meals in advance.
Refrigeration: Store cooled gravy in an airtight container for up to 4 days to keep it fresh and ready to use. Freezing: Pour gravy into freezer-safe containers or bags, leaving space for expansion; it can be frozen for up to 3 months without losing quality. Reheating: Thaw refrigerated or frozen gravy in the fridge overnight, then warm it gently on the stove over low heat while stirring often.
Meal prep considerations include making larger batches to freeze in portions, which helps with quick assembly later. This way, you save time and enjoy flavorful meals anytime. Storing right ensures the gravy stays as delicious as when you first made it.

FAQs: Frequently Asked Questions About Roasted Garlic Gravy
Why is my roasted garlic gravy pale instead of brown?
How do I prevent lumps when making roasted garlic gravy?
What’s the best way to prepare garlic for roasted garlic gravy?
Can I make roasted garlic gravy in advance and store it?
How can I add richness to my roasted garlic gravy?

Roasted Garlic Gravy
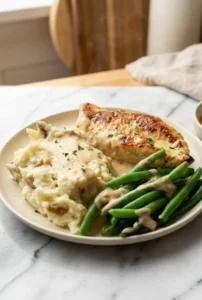
🧄 Transform your holiday meals with this incredibly flavorful roasted garlic gravy that delivers deep, caramelized garlic notes and velvety smooth texture in every spoonful
🥘 Master the art of perfect gravy with this foolproof recipe that roasts garlic to sweet perfection and creates a rich, restaurant-quality sauce that will have everyone asking for seconds
- Total Time: 1 hour 20 minutes
- Yield: 4-6 servings
Ingredients
– 1 head garlic cut crosswise
– 1 tablespoon olive oil
– Salt and pepper to taste
– 3 tablespoons unsalted butter
– 3 tablespoons flour
– 1 1/3 cups chicken stock
– vegetable broth to replace chicken stock
– plant-based alternative to butter for a creamy texture
– gluten-free blend to thicken without issues
– low-sodium stock for a lighter take
Instructions
1-First, roast the garlic by preheating the oven to 375˚F. Place the garlic head halves cut side up on a piece of foil, drizzle with 1 tablespoon olive oil, and season lightly with salt and pepper. Wrap the foil around the garlic and roast for 40 to 45 minutes until the cloves are soft and slightly caramelized, then let it cool for about 10 minutes.
2-For the gravy, squeeze the roasted garlic cloves from the head into a small bowl and mash with a fork to make a smooth paste. Melt 3 tablespoons unsalted butter in a pot over medium heat and whisk in 3 tablespoons flour until smooth, about 2 minutes. Add the garlic paste and whisk until smooth, then gradually whisk in 1 1/3 cups chicken stock until no lumps remain.
3-Lower the heat to medium-low, season with salt and pepper, and simmer while whisking occasionally to avoid burning, until the gravy thickens and coats the back of a wooden spoon, about 7 to 8 minutes. If you’re adapting for dietary needs, swap ingredients as you go. For more advanced techniques, check out our section on Mastering Roasted Garlic Gravy to take your skills up a notch.
Last Step:
Please leave a rating and comment letting us know how you liked this recipe! This helps our business to thrive and continue providing free, high-quality recipes for you.Notes
🧄 For the best flavor, make sure the garlic is fork tender and caramelized – this brings out the natural sweetness and creates a deeper, more complex taste in your gravy
🥛 Adding a splash of cream at the end can enhance the richness and create an even more luxurious texture for special occasions
🍖 For a deeper brown color and richer flavor, use beef stock instead of chicken stock, or substitute the butter with pan drippings from roasted meat
- Prep Time: 10 minutes
- Cooling Time: 10 minutes
- Cook Time: 1 hour
- Category: Sauce/Gravy
- Method: Roasting and Stovetop Cooking
- Cuisine: American
- Diet: Can be made vegetarian with vegetable stock
Nutrition
- Serving Size: 1/3 cup
- Calories: 120
- Sugar: 0.2g
- Sodium: 1416mg
- Fat: 10g
- Saturated Fat: 5g
- Unsaturated Fat: 5g
- Trans Fat: 0.3g
- Carbohydrates: 6g
- Fiber: 0.2g
- Protein: 2g
- Cholesterol: 18mg


Made this roasted garlic gravy for Sunday dinner and everyone loved it.
I used low-sodium vegetable stock to keep it vegetarian and added a splash of soy sauce for depth.
Would it work to make it a day ahead and reheat gently, or does the texture change? 😊