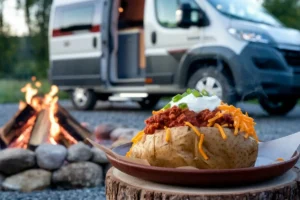
The reason these nachos stay crisp over a campfire
Most campfire nachos end up as a sad, soggy pile. The culprit is almost always a single thick layer of chips buried under wet toppings and direct flame. You can avoid that completely by changing two things: how you stack the pan and where you place it over the fire.
The fix is a two layer build. Spread half the chips, then half the cheese, beans, and meat, then repeat. This way the cheese melts into the middle before the bottom chips have time to steam. A large disposable aluminum pan helps here. It spreads heat evenly across the base, unlike a deep bowl or a flimsy foil tray that concentrates heat in one spot. Medium campfire heat is the other key. If the flames are licking the pan, the top cheese will brown before the center gets warm. Keep the pan on a grill grate over medium coals, and you will get evenly melted cheese with chips that stay crunchy from the first bite to the last.
Jump to:
- The reason these nachos stay crisp over a campfire
- What each topping is doing in the pan
- Getting the campfire heat right before the cheese goes on
- Build the base in two thin layers
- Cook over medium heat, not flames
- Finish when the cheese is bubbling through the middle
- Make it vegetarian without losing the hearty part
- Use ground turkey or chicken for a lighter version
- Make them gluten free with the right chips
- Add more heat without changing the method
- Storage and Reheating
- Answers to the questions worth asking
- FAQs
- What are camping grilled nachos?
- How do you keep nachos from getting soggy on a campfire?
- What is the best cheese for camping nachos?
- How long do you cook nachos over a campfire?
- Can you make camping nachos in a foil packet?
- What are good toppings for campfire nachos?
- Camping Grilled Nachos
- Ingredients
- Instructions
- Last Step:
- Notes
- Nutrition
- Did you make this recipe?
What each topping is doing in the pan
Every ingredient in these campfire nachos has a job, and knowing that job helps you build a better pan. Here is a quick breakdown of what goes in and why.

- Thick tortilla chips. They hold up under the weight of cheese and beef. Thin chips work if you spread them loosely, but sturdy chips are safer for camping.
- Shredded Mexican cheese blend (Monterey Jack and cheddar). This mix melts smoothly and has the right richness. Pre shredded works, but shredding your own gives a creamier melt.
- Drained black beans. They add body without waterlogging the chips. Always drain and rinse them well before layering.
- Seasoned ground beef. Cook and season the beef before it goes into the pan. Ground turkey or meatless crumble are good swaps.
- Salsa, sour cream, jalapeño, cilantro, and lime. These go on after the cheese melts. Adding them early guarantees soggy chips, so keep them off until serving.
The lime is not optional in my kitchen. A squeeze over the hot nachos cuts through the richness and wakes up every other flavor.
Getting the campfire heat right before the cheese goes on
Heat management is what separates crispy campfire nachos from a burned mess. You do not need a thermometer or any special gear. You just need to follow a few simple rules for building, cooking, and adapting the pan to your group.
Build the base in two thin layers
Start with half the chips. Spread them in a single loose layer, then add half the cheese, half the beans, and half the beef. Repeat the same order with the remaining ingredients. The layers should look full but not packed down. Compressed nachos trap steam and turn the bottom layer into a paste. Keep the stack light so hot air can move through the pan.
Cook over medium heat, not flames
Set the aluminum pan on a grill grate over medium heat, not directly in the flames. You should hear a gentle sizzle, not a furious crackle. Watch the cheese at the edges. If it starts browning quickly, the fire is too hot. Move the pan to a cooler part of the grate or raise it slightly. Foil packets need the same treatment: keep them away from direct flame contact to avoid burning the chips before the cheese melts.
Finish when the cheese is bubbling through the middle
Cook for 8 to 10 minutes, but trust your eyes more than the clock. The cheese should be fully melted and bubbling in spots across the center, not just at the rim. Once you see that, pull the pan off immediately. A hot aluminum pan keeps cooking for another minute after it leaves the grate, so do not walk away.
Make it vegetarian without losing the hearty part
Skip the beef and double the black beans, or swap in seasoned pinto beans for a softer, creamier bite. The smoky flavor from the campfire and the melted cheese make the pan feel just as filling as the original. No one will miss the meat.
Use ground turkey or chicken for a lighter version
Lean ground turkey or chicken needs more seasoning than beef. Be generous with salt, cumin, chili powder, and garlic before adding it to the pan. The texture stays close to the original, but the final dish tastes cleaner and less heavy. It is a good option if you want something rich but not greasy after a day of hiking.
Make them gluten free with the right chips
Most tortilla chips are naturally gluten free, but double check the label if allergies are a concern. All the other ingredients in this recipe, from the cheese to the beans to the meat, fit a gluten free diet without changing the cooking method at all.
Add more heat without changing the method
For extra spice, layer pickled jalapeños into the pan before cooking or sprinkle fresh slices on top after the cheese melts. A few dashes of hot sauce in the meat layer work well too. Pepper jack cheese melted into the blend adds steady heat throughout. Just keep the salsa off until serving. That is where sogginess hides.
Storage and Reheating
Leftovers can be refrigerated in a sealed container for up to 2 days. The chips will soften, but the flavor holds. Do not freeze assembled nachos. The chips turn stale and the toppings separate during thawing. To reheat, spread the leftovers on a sheet pan and warm them in a 375°F oven until the cheese melts again. Skip the microwave. It makes the chips limp and rubbery.
Answers to the questions worth asking
Even with a solid method, a few questions come up every time someone makes campfire nachos. Here are the quick answers to the most common ones.
Can you prep camping nachos ahead of time? Yes, and you should. Cook and season the meat, drain the beans, and shred the cheese at home. Store each ingredient in a separate container or zip top bag. Assemble the pan right before you cook. If you build it too early, the chips start absorbing moisture from the toppings.
Why do some recipes use foil packets instead of a pan? Foil packets are portable and easy to toss, but they have limits. A foil packet works best for individual servings. For a group, a large disposable aluminum pan is sturdier and distributes heat more evenly. A thin foil tray buckles under the weight of toppings and concentrates heat in one spot.

How do you keep the cheese from burning? Keep the pan over medium heat on a grill grate. If the edges of the cheese darken too fast, move the pan to a cooler section of the fire. The cheese will continue melting gently without scorching.
What is the best way to reheat leftover nachos? Oven is best. Spread the leftovers on a sheet pan and warm them at 375°F until the cheese bubbles. The microwave turns everything soft, including whatever crunch the chips have left. If you are still at the campsite, reheat in a foil packet over low heat for a few minutes.
For more one pan ideas that work well over a fire, check out these foil packet meals for camping. And if you are feeding a big crew, these camping meals for large groups will keep everyone happy without extra cleanup.
FAQs
What are camping grilled nachos?
How do you keep nachos from getting soggy on a campfire?
What is the best cheese for camping nachos?
How long do you cook nachos over a campfire?
Can you make camping nachos in a foil packet?
What are good toppings for campfire nachos?

Camping Grilled Nachos
🔥 Crispy, never-soggy nachos made over the campfire using a two-layer stacking method that keeps every chip crunchy from first bite to last.
🧀 Loaded with seasoned beef, black beans, melted Mexican cheese blend, and fresh toppings finished with a bright squeeze of lime.
- Total Time: 25 minutes
- Yield: 6 servings 1x
Ingredients
1 bag (12-14 oz) thick tortilla chips
2 cups shredded Mexican cheese blend (Monterey Jack and cheddar)
1 can (15 oz) black beans, drained and rinsed
1 lb ground beef
1 teaspoon salt
1 teaspoon cumin
1 teaspoon chili powder
½ teaspoon garlic powder
½ cup salsa
½ cup sour cream
1 jalapeño, sliced
¼ cup chopped fresh cilantro
1 lime, cut into wedges
Instructions
1-Season and cook the beef: Brown ground beef with salt, cumin, chili powder, and garlic powder; drain excess fat.
2-Drain and rinse the beans: Drain and rinse black beans thoroughly to remove excess liquid that can sog the chips.
3-Shred the cheese: Shred Monterey Jack and cheddar blend, or use pre-shredded.
4-Build the first chip layer: Spread half the tortilla chips in a loose single layer across a large disposable aluminum pan.
5-Add first topping layer: Sprinkle half the cheese, half the beans, and half the seasoned beef evenly over the chips.
6-Build the second chip layer: Spread remaining chips in another loose layer, then top with remaining cheese, beans, and beef.
7-Place pan over campfire: Set the pan on a grill grate over medium campfire coals, away from direct flames.
8-Cook until cheese melts: Cook for 8–10 minutes, until cheese is fully melted and bubbling through the center.
9-Remove from heat and top: Pull pan off the grate and immediately top with salsa, sour cream, sliced jalapeño, chopped cilantro, and a squeeze of lime.
Last Step:
Please leave a rating and comment letting us know how you liked this recipe! This helps our business to thrive and continue providing free, high-quality recipes for you.Notes
🌮 Add all fresh toppings like salsa, sour cream, and cilantro only after removing the pan from the heat to prevent soggy chips.
🧀 Shredding cheese from a block gives a creamier melt than pre-shredded bags coated with anti-caking agents.
🔥 Keep the pan on a grill grate over medium coals, not direct flames, and listen for a gentle sizzle rather than a furious crackle.
- Prep Time: 15 minutes
- Cook Time: 10 minutes
- Category: Appetizer
- Method: Campfire Grilling
- Cuisine: Tex-Mex
- Diet: Gluten-Free
Nutrition
- Serving Size: 1 heaping cup
- Calories: 445
- Sugar: 3g
- Sodium: 680mg
- Fat: 24g
- Saturated Fat: 10g
- Unsaturated Fat: 12g
- Trans Fat: 0g
- Carbohydrates: 36g
- Fiber: 5g
- Protein: 22g
- Cholesterol: 55mg