What Are Slice and Bake Heart Cookies?
Every year my family throws a little Valentine’s Day party, and I am always on the hunt for a treat that feels special without requiring a pastry degree. That is exactly why I fell for these slice and bake heart cookies.
They are a simple sugar cookie dough with a sweet surprise: a bright pink heart baked right through the center of each slice. When you cut into the chilled log, every round reveals a neat little heart, almost too cute to eat.
Kids absolutely love spotting that hidden heart, and the whole process, from mixing the pink dough to stacking the hearts, turns into a fun holiday activity.
I first saw this clever technique on Artful Homemaking and have since made it a Valentine’s tradition in our kitchen.
The concept is genius in its simplicity. You make a batch of vanilla dough, color a portion pink, cut out small hearts, stack them, and wrap them in the plain dough.

When you slice the log, the cross section shows the pink heart nestled inside the pale cookie. It looks much harder than it really is, which makes it a perfect project for busy parents who still want to wow their loved ones.
The dough is forgiving, the colors are customizable, and because you can do the prep work a day ahead, you are not scrambling at the last minute while the kids are already decked out in red and pink.
These cookies are basically a homemade version of those store bought slice and bake rolls, but with real butter, no artificial flavors, and that adorable heart in every bite. They hold their shape well in the oven, so the heart stays distinct.
Whether you are filling a classroom treat box or setting out a dessert platter for a romantic dinner, they bring a handmade charm that nobody can resist.
And honestly, watching a first grader’s face light up when they see the heart inside is worth every minute of chilling time.
Jump to:
- What Are Slice and Bake Heart Cookies?
- Why You’ll Love This Recipe
- Supplies
- Slice and Bake Heart Cookies Ingredients
- How to Make Slice and Bake Heart Cookies
- How to Store
- Make Ahead Instructions
- FAQs
- Can you make slice and bake heart cookie dough ahead of time and freeze it?
- How do you keep the heart shape from spreading while slicing slice and bake heart cookies?
- What is the best food coloring for pink heart cookies?
- How should you store leftover slice and bake heart cookies?
- Slice and Bake Heart Cookies
- Ingredients
- Instructions
- Last Step:
- Nutrition
- Did you make this recipe?
Why You’ll Love This Recipe
There are plenty of sugar cookie recipes out there, but these have a few things going for them that make them a favorite in our house:
- Cookie within a cookie: That tiny pink heart makes them look like something you would find in a fancy bakery, yet the method is doable for regular home bakers.
- Make ahead friendly: The dough can be prepared one day and sliced and baked the next, which splits the work into two easy sessions. This is a lifesaver when you are baking with younger children who have limited attention spans.
- Customizable: You can roll the edges in red sprinkles for a festive sparkle or leave them plain for a cleaner look. I did half and half, and both disappeared fast.
- Buttery, tender texture: The dough bakes up with lightly golden edges and a soft center that is not too sweet, letting the vanilla and butter flavor come through.
- Minimal decorating stress: Unlike cutout cookies that require flooding and piping, these get their visual punch from the heart itself. A quick roll in sprinkles is the only extra step, and even that is optional.
Another reason this recipe is a keeper is its flexibility around timing. You can let the pink dough chill while you run errands, then assemble the log after dinner and bake the next afternoon.
If you are hosting a Valentine’s party, you can bake the cookies in the morning and have them ready to serve. Because the dough freezes beautifully, you can even make a double batch, bake one now, and save the other log for a future celebration. That kind of convenience is rare with decorative cookies.
I also love that the ingredient list is short and full of pantry staples. You probably have everything except maybe the food coloring, and even that you can swap for a natural dye if you prefer.
The dough comes together in one bowl with an electric mixer, so cleanup is easy. And because the cookies are sliced from a log, they are all roughly the same size, which means even baking and a uniform look that makes gift giving a breeze.
Supplies
Gathering the right tools ahead of time makes the process smooth, especially when little helpers are involved. Here is what you will need:
- Electric mixer or stand mixer
- 2 inch heart shaped cookie cutter
- Rolling pin
- Baking sheet
- Parchment paper
- Glass measuring cup and measuring spoons
- Wire cooling rack
- Plastic wrap
- Rubber spatula
A stand mixer speeds things up, but a hand mixer works just as well. The heart shaped cutter is key because it creates the cute center; a 2 inch size fits perfectly inside the log.
A ruler can help if you want to check that your dough is rolled to 1/4 inch thick, though after a few tries you will get a feel for it.
I always keep a couple of extra sheets of parchment paper on hand so I can slide the unbaked cookies onto the sheet without them sticking.
And a sturdy rolling pin, even a simple wooden one, gives you even thickness across the pink dough, which matters when you are stacking the hearts.
Slice and Bake Heart Cookies Ingredients
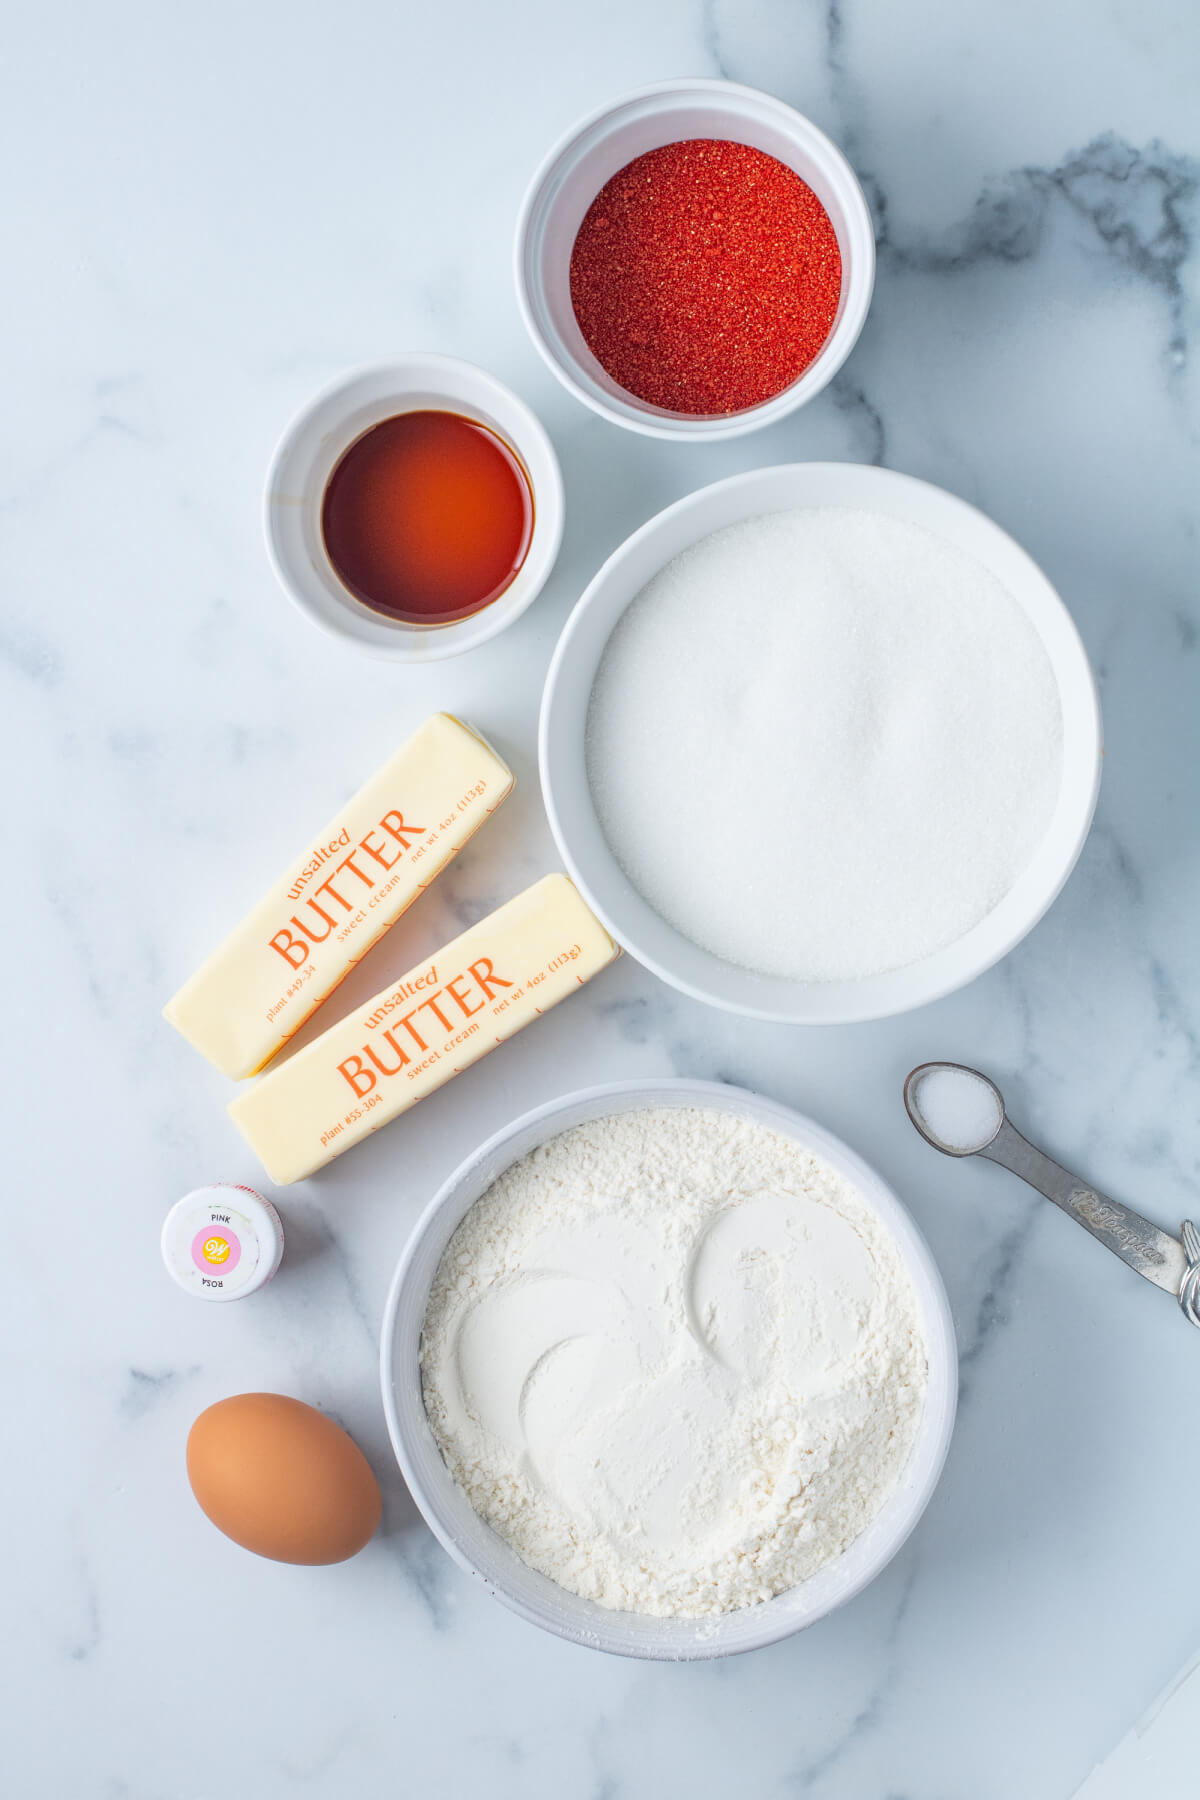
The ingredients are classic sugar cookie staples. For the best texture, use room temperature butter and egg. Here is the full list:
- 1 cup unsalted butter, room temperature
- 1 1/2 cups granulated white sugar
- 1 egg
- 2 teaspoons vanilla extract
- 2 1/4 cups all purpose flour
- 1/2 teaspoon salt
- Pink or red food dye (a natural dye works too)
- Red sugar sprinkles, optional
If you only have salted butter, you can use it but leave out the extra 1/2 teaspoon of salt to avoid overdoing it. The vanilla can be store bought or homemade; both taste lovely.
The egg should ideally be at room temperature so it blends smoothly into the creamed butter and sugar. As for the food coloring, start with a few drops and add more until you reach the shade you like.
My daughter always votes for a bright magenta, but a soft pastel pink is equally pretty. The sprinkles are a fun finishing touch; I like to set out a shallow bowl of them and let the kids roll the cookie edges before baking.
How to Make Slice and Bake Heart Cookies
These cookies have a few steps, but none of them are hard. Think of it as a fun weekend project. I will walk you through it just the way we do it at home.
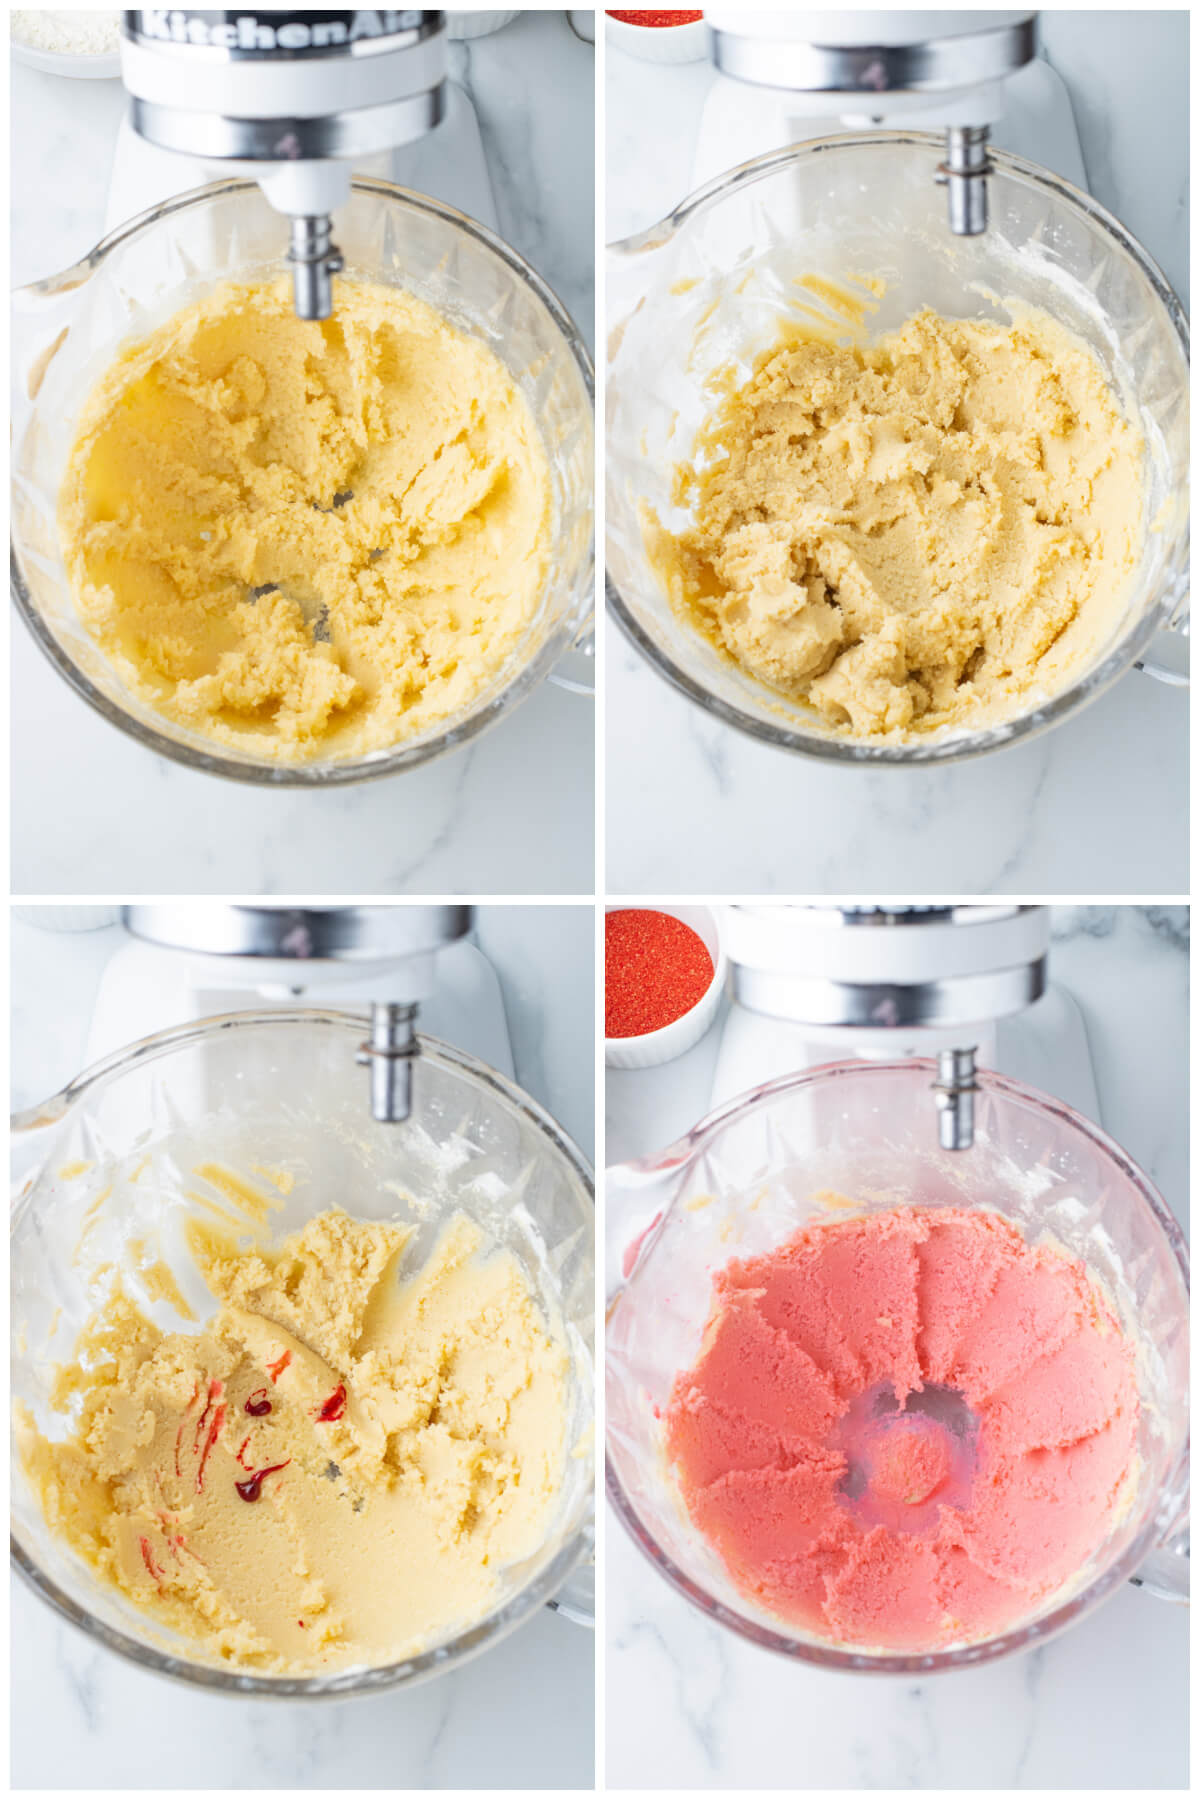
- Add the butter, sugar, egg, and vanilla extract to a large mixing bowl and beat with an electric mixer until creamy and light.
- Scrape the sides of the bowl with a rubber spatula, then add the flour and salt. Mix slowly until the cookie dough comes together. Do not overmix, or the cookies will be tough.
- Separate about 1 3/4 cups of the dough into a separate bowl and set it aside. This will be the outer plain dough. Do not refrigerate this portion yet; it needs to stay soft.
- Add a few drops of pink or red food coloring to the remaining dough and mix until the color is fully incorporated.
- Form the dyed dough into a disk shape, wrap it tightly in plastic wrap, and refrigerate for at least one hour. Chilling makes it easier to roll and cut clean heart shapes.
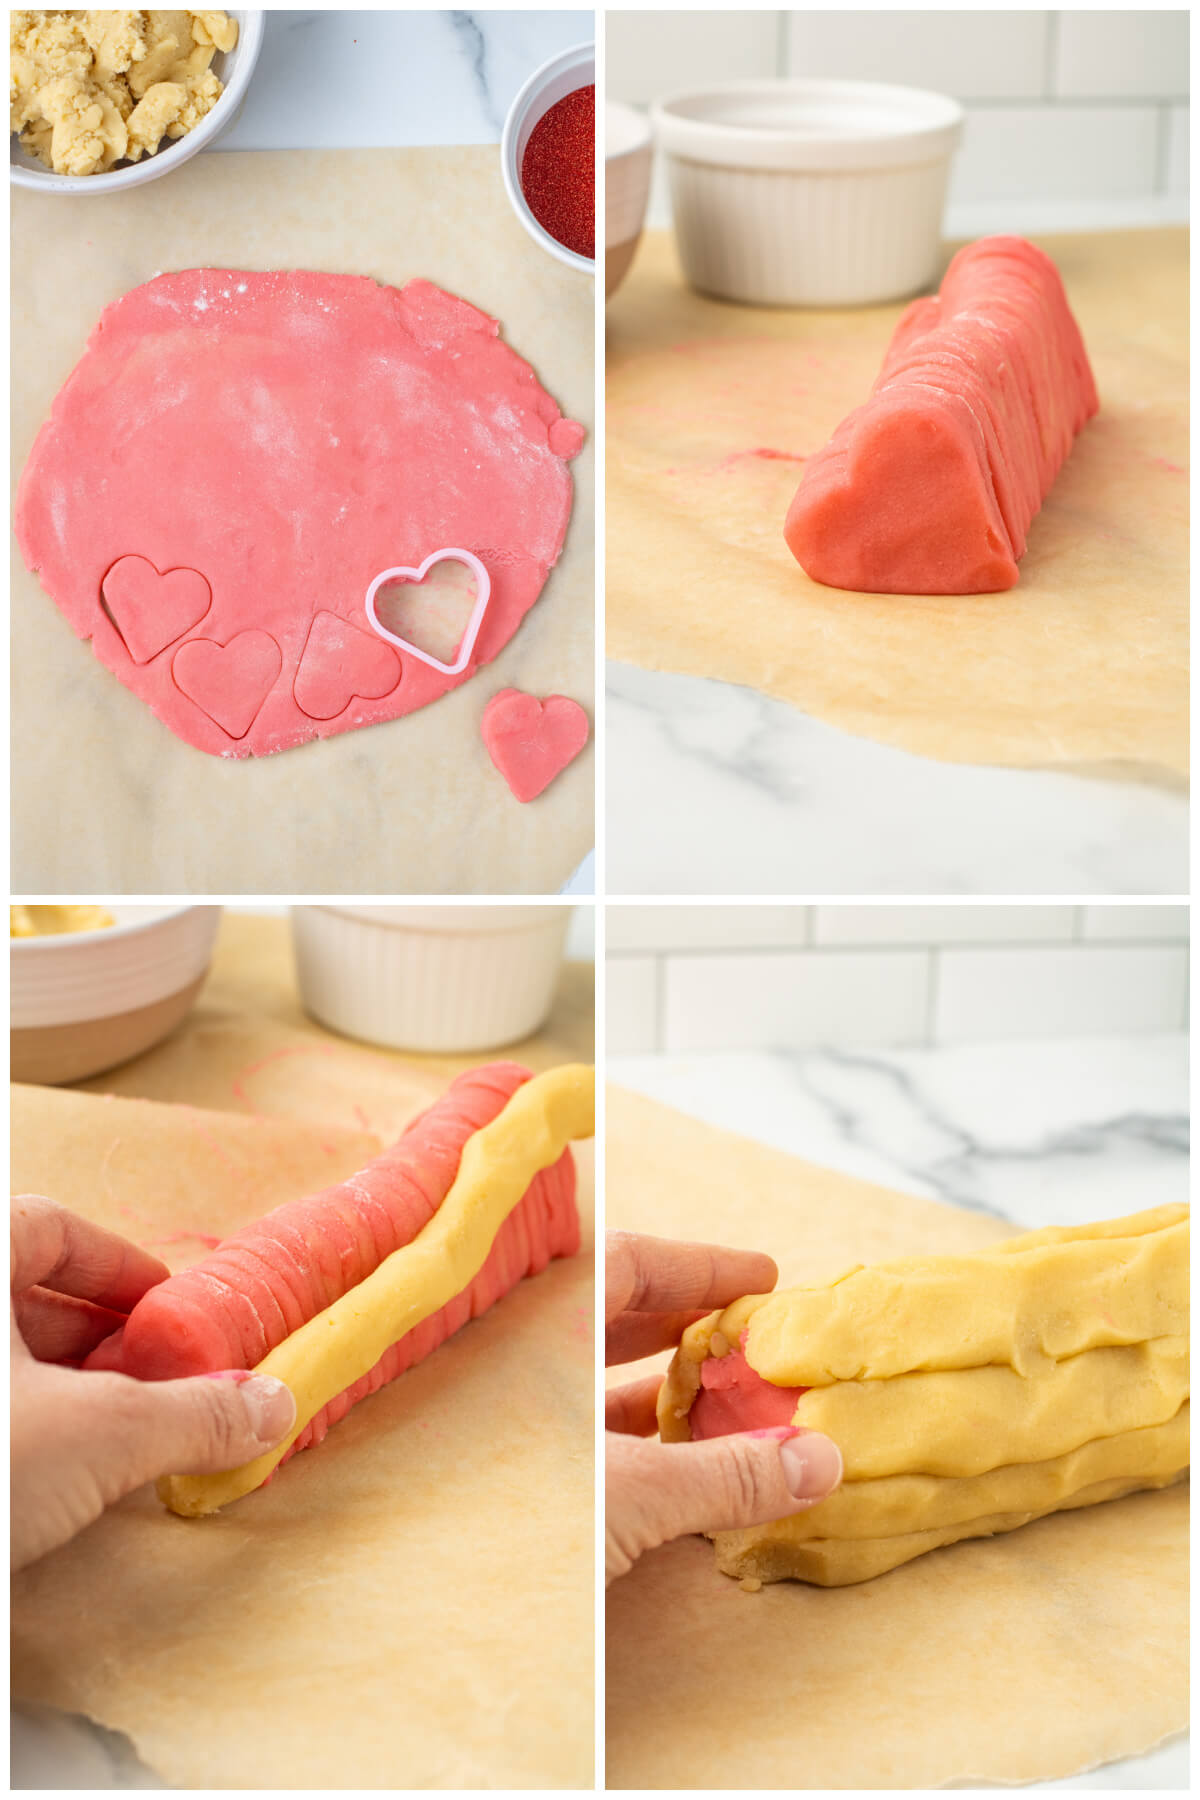
- Once chilled, remove the pink dough and place it on a lightly floured surface. Roll it out to 1/4 inch thick.
- Cut out cookies with your 2 inch heart shaped cutter until all the pink dough is used up. You can gather the scraps and reroll them once if needed.
- Stack the heart cookies on top of one another and press them gently so they stick together. This stack will form the heart column inside each slice.
- Take small sections of the reserved plain dough, roll them between your hands into strips, and press them all around the stacked hearts, covering every bit of pink completely.
- Gently roll the assembled log back and forth on the counter to smooth its surface. Wrap it in plastic wrap and refrigerate for at least four hours, or overnight. This long chill ensures the log slices cleanly and the heart holds its shape.
- When ready to bake, preheat the oven to 350 degrees Fahrenheit. Line your baking sheet with parchment paper.
- Remove the chilled log from the fridge and slice it into rounds about 1/3 inch thick. A sharp serrated knife works well here.
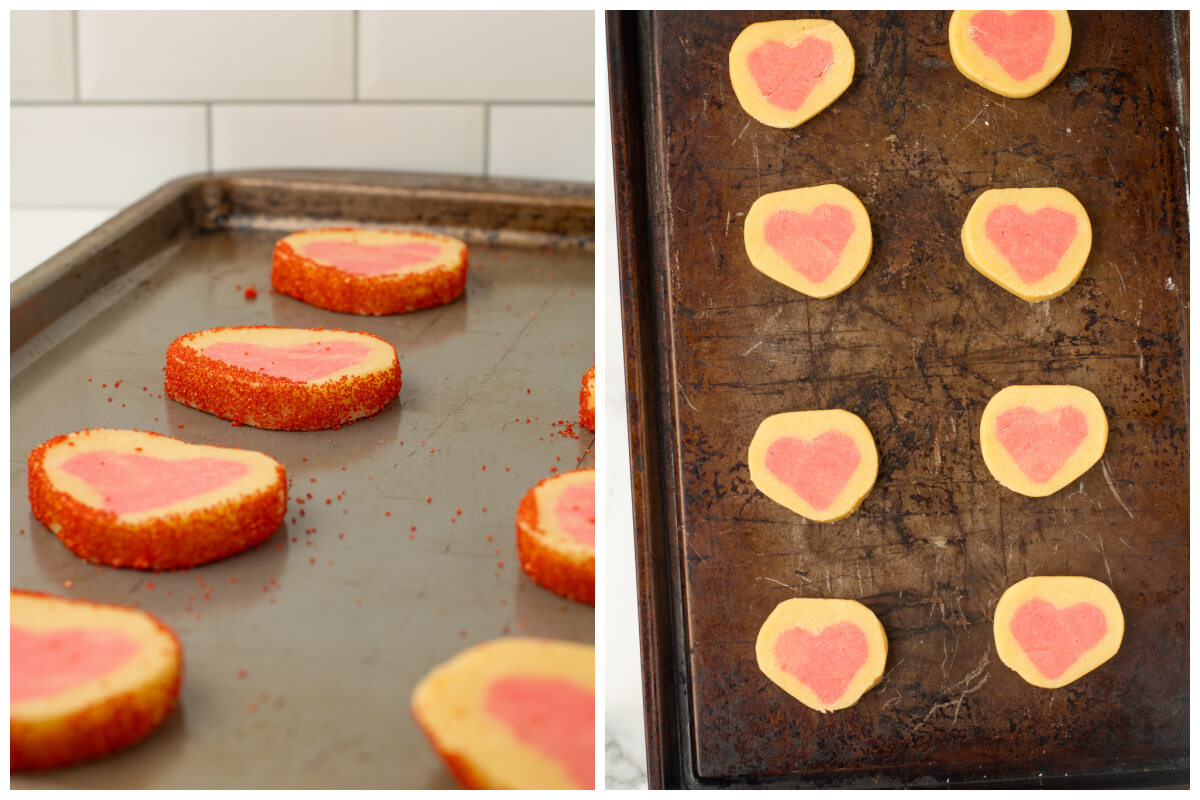
- If you are using sprinkles, roll the edges of each cookie in the red sugar sprinkles. I did half with and half without, and both looked lovely.
- Place up to 8 cookies on the prepared baking sheet, spacing them evenly. Bake for 10 to 11 minutes, or until the edges are lightly golden brown. Watch them closely; they go from perfect to overdone quickly.
- Let the cookies rest on the baking sheet for a couple of minutes, then transfer them to a wire cooling rack to cool completely.
- Repeat with the remaining dough slices until all cookies are baked. Store any leftovers in an airtight container for up to three days.
My tip: the undyed dough must not go into the fridge until the log is formed, or it will be too stiff to wrap around the hearts. Also, when rolling the pink dough, use a light hand and flip it occasionally to prevent sticking.
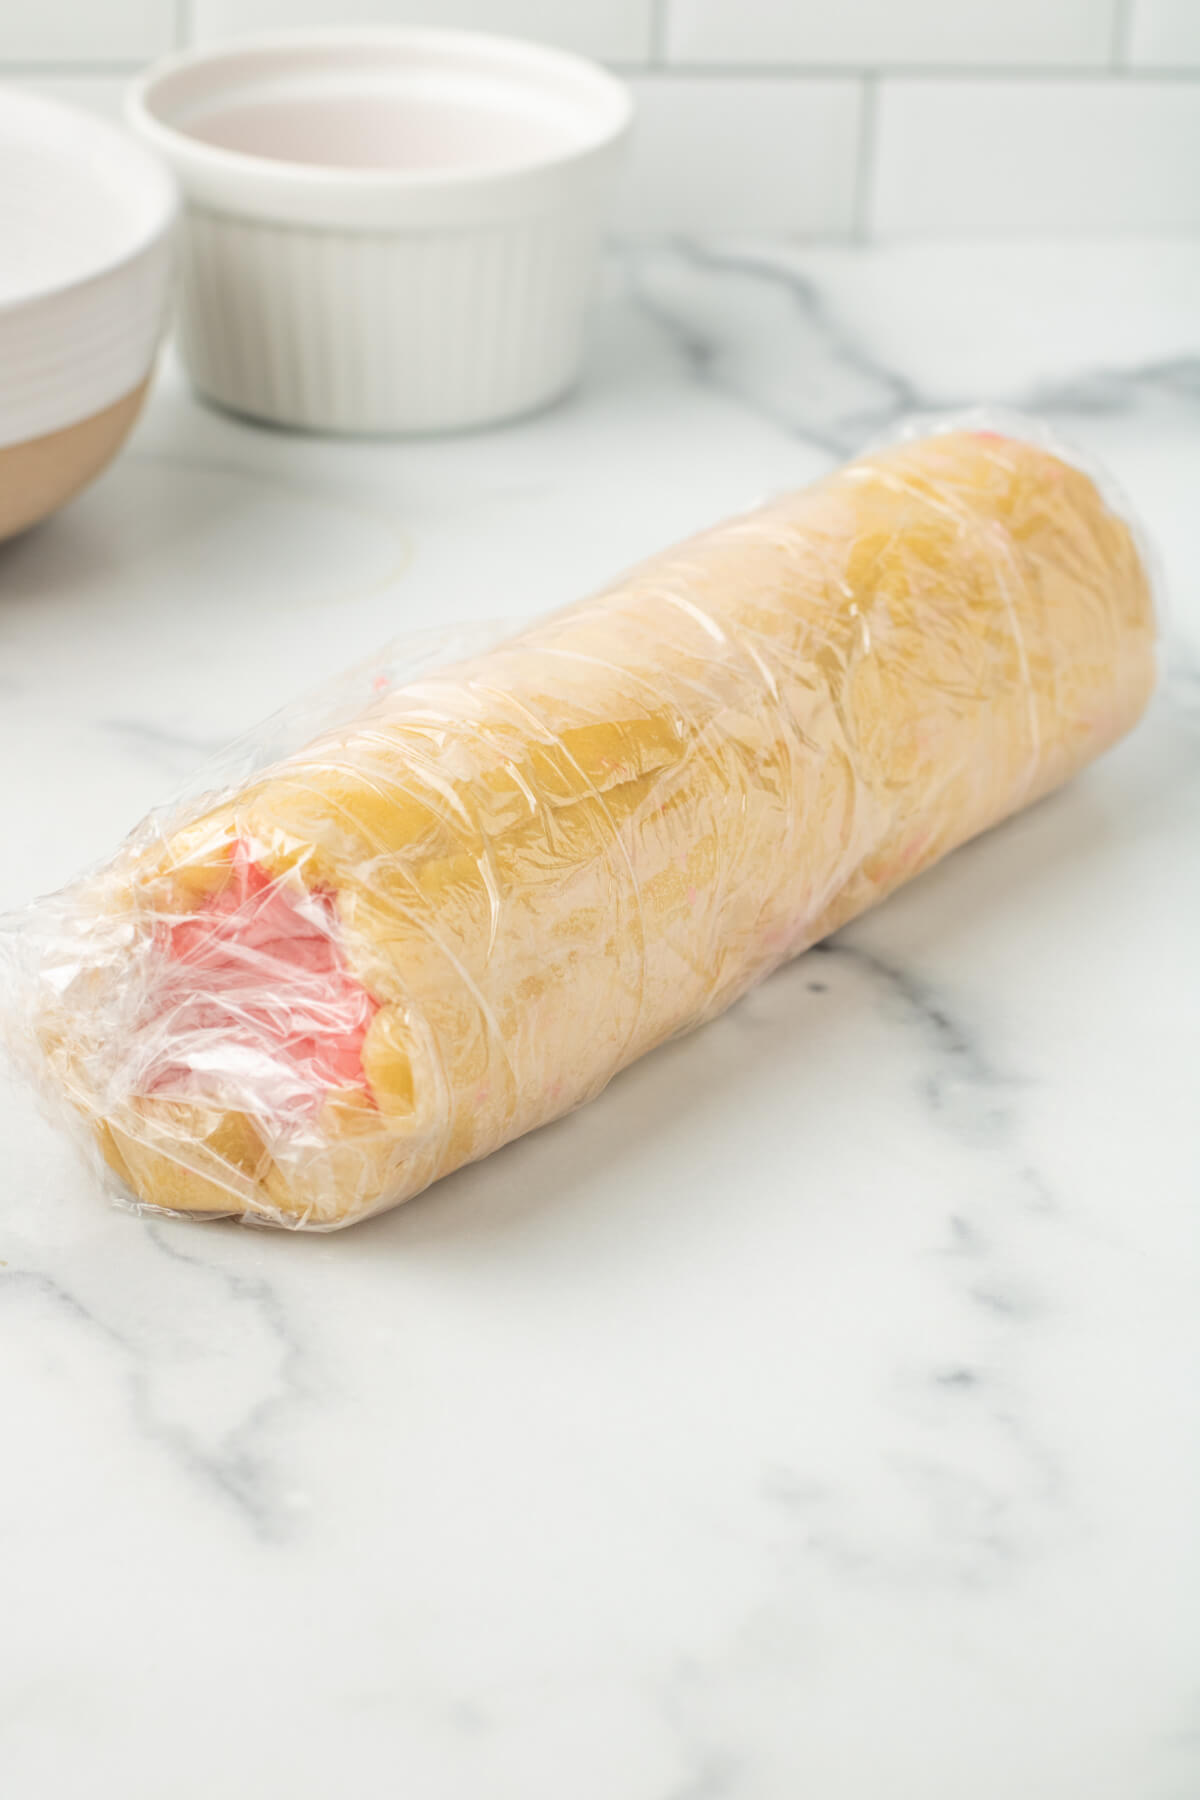
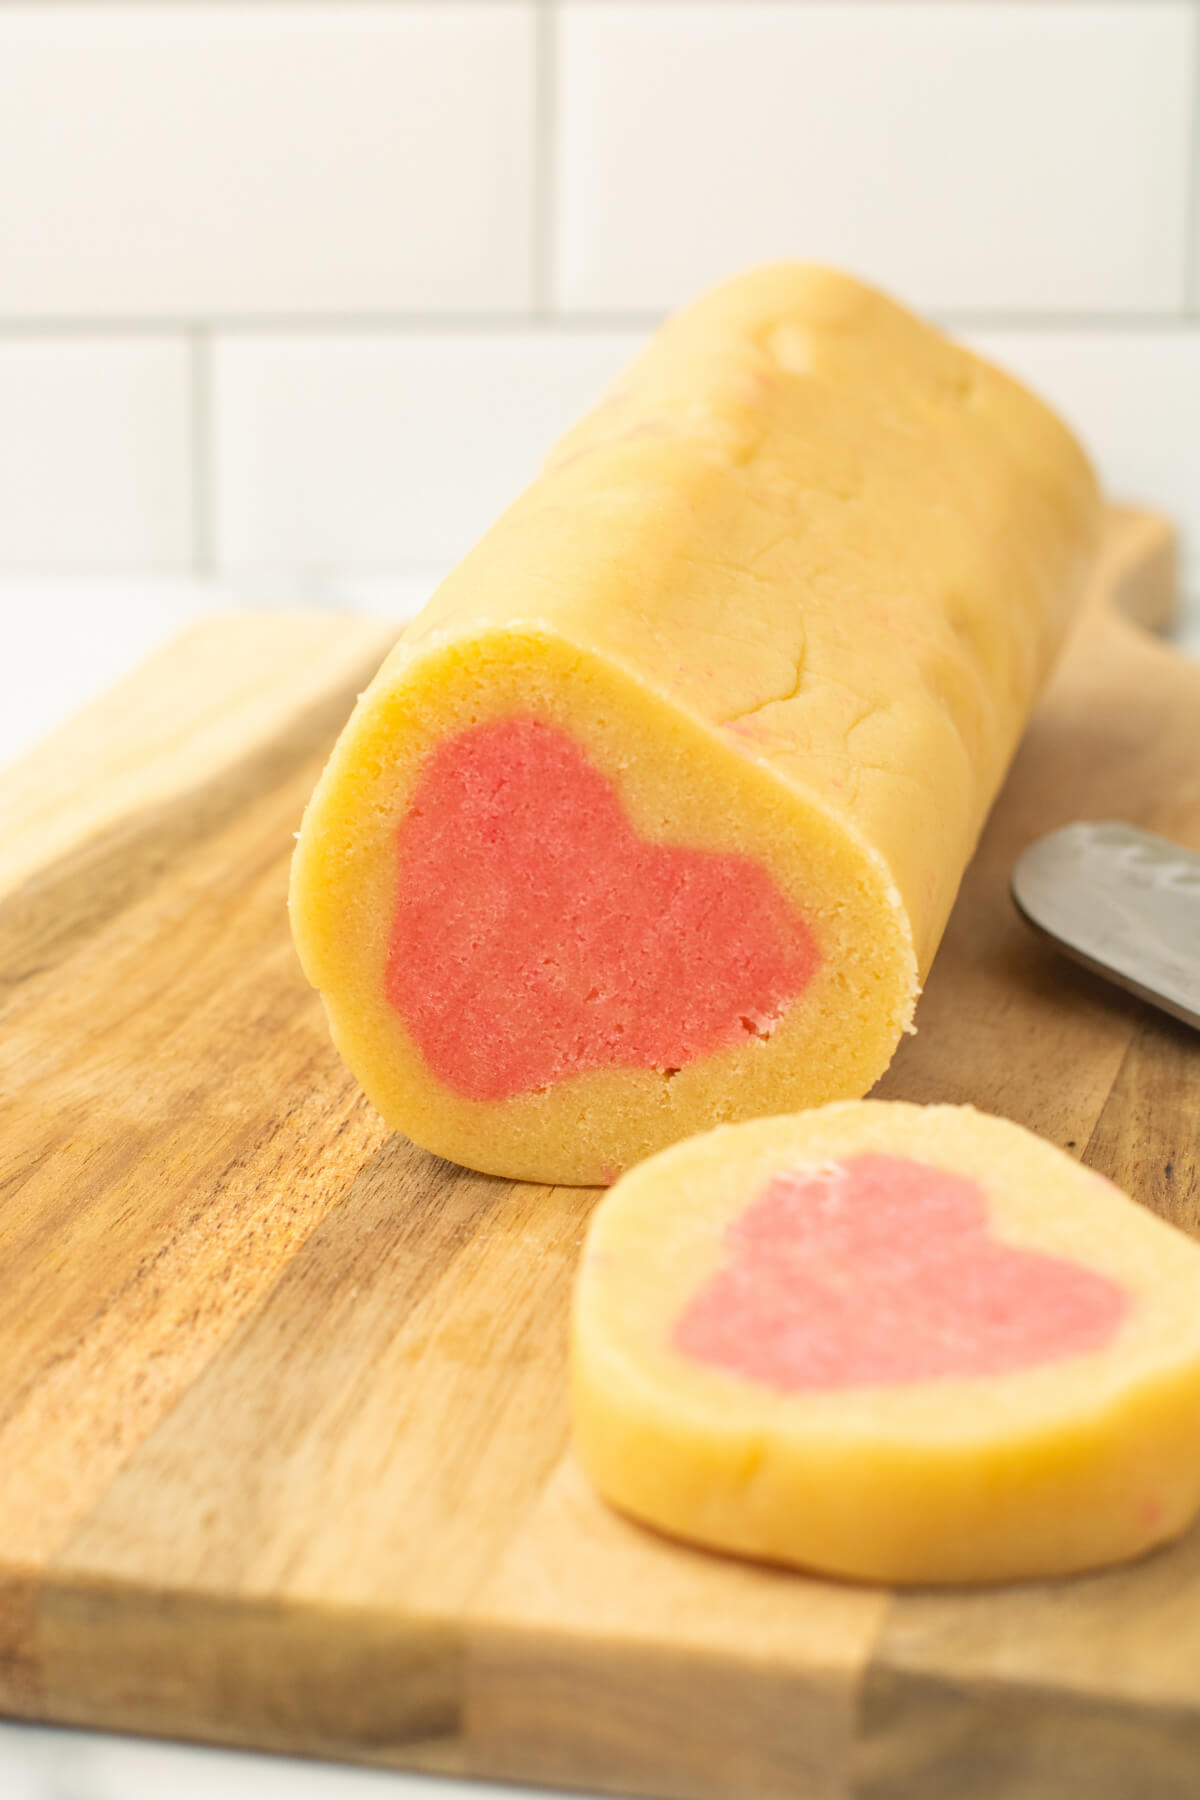
The cookie heart stack does not need to be perfectly aligned because any unevenness disappears inside the final log. And do not skip the second long chill; it is the secret to cookies that keep their round shape and show a crisp heart outline.
How to Store
These cookies stay fresh for up to three days when stored in an airtight container at room temperature. Make sure they are completely cool before you close the lid, otherwise condensation will soften the surface.
I like to layer them between sheets of wax paper if I am stacking them in a tin for gifting. The heart pattern stays visible, and the texture remains nicely crisp on the outside and tender inside.

If your kitchen is warm, you can pop the container in a cool spot, but do not refrigerate the baked cookies as that can dry them out.
Make Ahead Instructions
This recipe practically begs to be made ahead. The assembled dough log can be wrapped well and refrigerated overnight, which is my favorite way to break up the work.
I mix and assemble on a Friday evening, then slice and bake with the kids on Saturday morning. The cold log slices like a dream and goes straight onto the baking sheet.
For even longer storage, wrap the log very tightly in plastic wrap and then place it in a freezer bag. It will keep in the freezer for up to three months.
When you want to bake, move the log from the freezer to the refrigerator the night before, letting it thaw gradually.
Slice and bake as usual, but be aware the baking time may need an extra minute or two if the dough is still quite cold.
Do not try to slice a rock hard frozen log; you will crack the dough and risk losing the heart shape.
With a little planning, you can have homemade Valentine’s cookies ready to go at a moment’s notice, which makes you feel like a superhero on a busy weeknight.
For a quick summary, here is the timing at a glance: the pink dough needs at least one hour of chill, the assembled log needs at least four hours (or overnight), and each batch bakes in about 10 minutes.
Total time from start to finish is around 5 hours 30 minutes, most of it hands off. That leaves plenty of time to help the kids cut out paper hearts or set the party table.
FAQs
Can you make slice and bake heart cookie dough ahead of time and freeze it?
How do you keep the heart shape from spreading while slicing slice and bake heart cookies?
What is the best food coloring for pink heart cookies?
How should you store leftover slice and bake heart cookies?

Slice and Bake Heart Cookies
What Are Slice and Bake Heart Cookies? Every year my family throws a little Valentine’s Day party, and I am always on the hunt for a treat that feels special without requiring a pastry degree.
- Total Time: 330 min
- Yield: 20 cookies 1x
Ingredients
1 cup unsalted butter, room temperature
1 ½ cups granulated white sugar
1 egg
2 teaspoons vanilla extract
2 ¼ cups all-purpose flour
½ teaspoon salt
pink or red food dye
red sugar sprinkles
Instructions
1-Add the butter, sugar, egg, and vanilla: Add the butter, sugar, egg, and vanilla extract to a large mixing bowl and beat with an electric mixer until creamy.
2-Scrape the sides of the bowl with: Scrape the sides of the bowl with a rubber spatula and add the flour and salt to the mixing bowl. Mix slowly until the cookie dough comes together.
3-Separate about 1 ¾ cups of cookie: Separate about 1 ¾ cups of cookie dough into a separate bowl and set aside for later.
4-Add a few drops of pink or: Add a few drops of pink or red food coloring to the remaining cookie dough and mix until the color is fully incorporated.
5-Form the dyed dough into a disk: Form the dyed dough into a disk shape, wrap it with plastic wrap, and place it in the refrigerator for at least one hour.
6-Remove the dough from the refrigerator and: Remove the dough from the refrigerator and place it on a lightly floured surface. Roll the dough out until it is ¼ inch thick.
7-Cut out cookies with a 2-inch, heart-shaped: Cut out cookies with a 2-inch, heart-shaped cookie cutter until all the pink dough is used up.
8-Stack the cookies on top of one: Stack the cookies on top of one another and compress them gently so they all stick together.
9-Roll small sections of the undyed dough: Roll small sections of the undyed dough between your hands and press the strips around all sides of the stacked hearts until no pink is showing.
10-Roll the dough log gently back and: Roll the dough log gently back and forth to smooth it out, wrap it in plastic wrap, and place it in the refrigerator for a minimum of four hours or overnight.
11-Preheat the oven to 350 degrees Fahrenheit: Preheat the oven to 350 degrees Fahrenheit when ready to bake the cookies.
12-Remove the chilled cookie dough from the: Remove the chilled cookie dough from the refrigerator and slice it into cookies that are about ⅓ inch thick.
13-Roll the edges of the cookies in: Roll the edges of the cookies in the sugar sprinkles if desired. I did half of mine with sprinkles and half without.
14-Place 8 of them, evenly spaced, on: Place 8 of them, evenly spaced, on a baking sheet and bake for 10-11 minutes, or until the edges are LIGHTLY golden brown.
15-Allow the cookies to rest on the: Allow the cookies to rest on the baking sheet for a few minutes before transferring them to a wire cooling rack to cool completely.
16-Repeat until all the cookies are baked: Repeat until all the cookies are baked. Store any leftover cookies in an airtight container for up to three days.
Last Step:
Please leave a rating and comment letting us know how you liked this recipe! This helps our business to thrive and continue providing free, high-quality recipes for you.- Prep Time: 20 min
- Cook Time: 10 min
- Method: bake
Nutrition
- Serving Size: 1 cookie
- Calories: 195
- Sugar: 15
- Sodium: 14
- Fat: 10
- Saturated Fat: 6
- Carbohydrates: 26
- Fiber: 0.4
- Protein: 2
- Cholesterol: 33