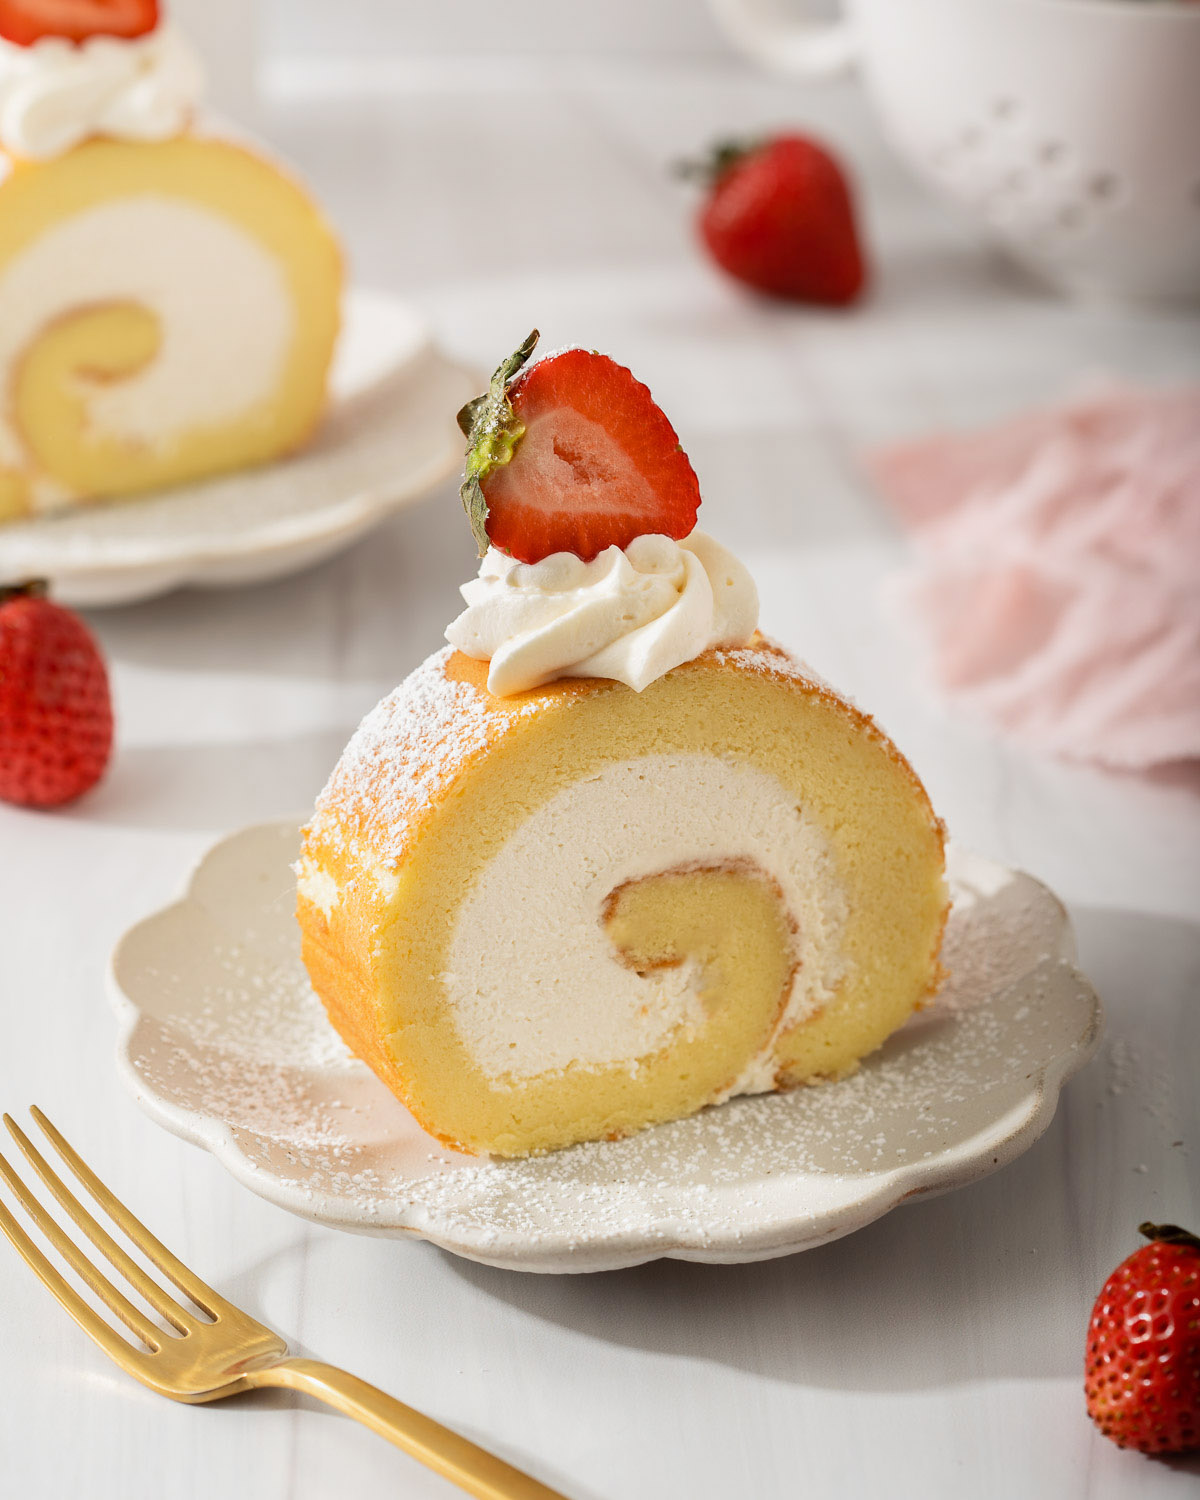
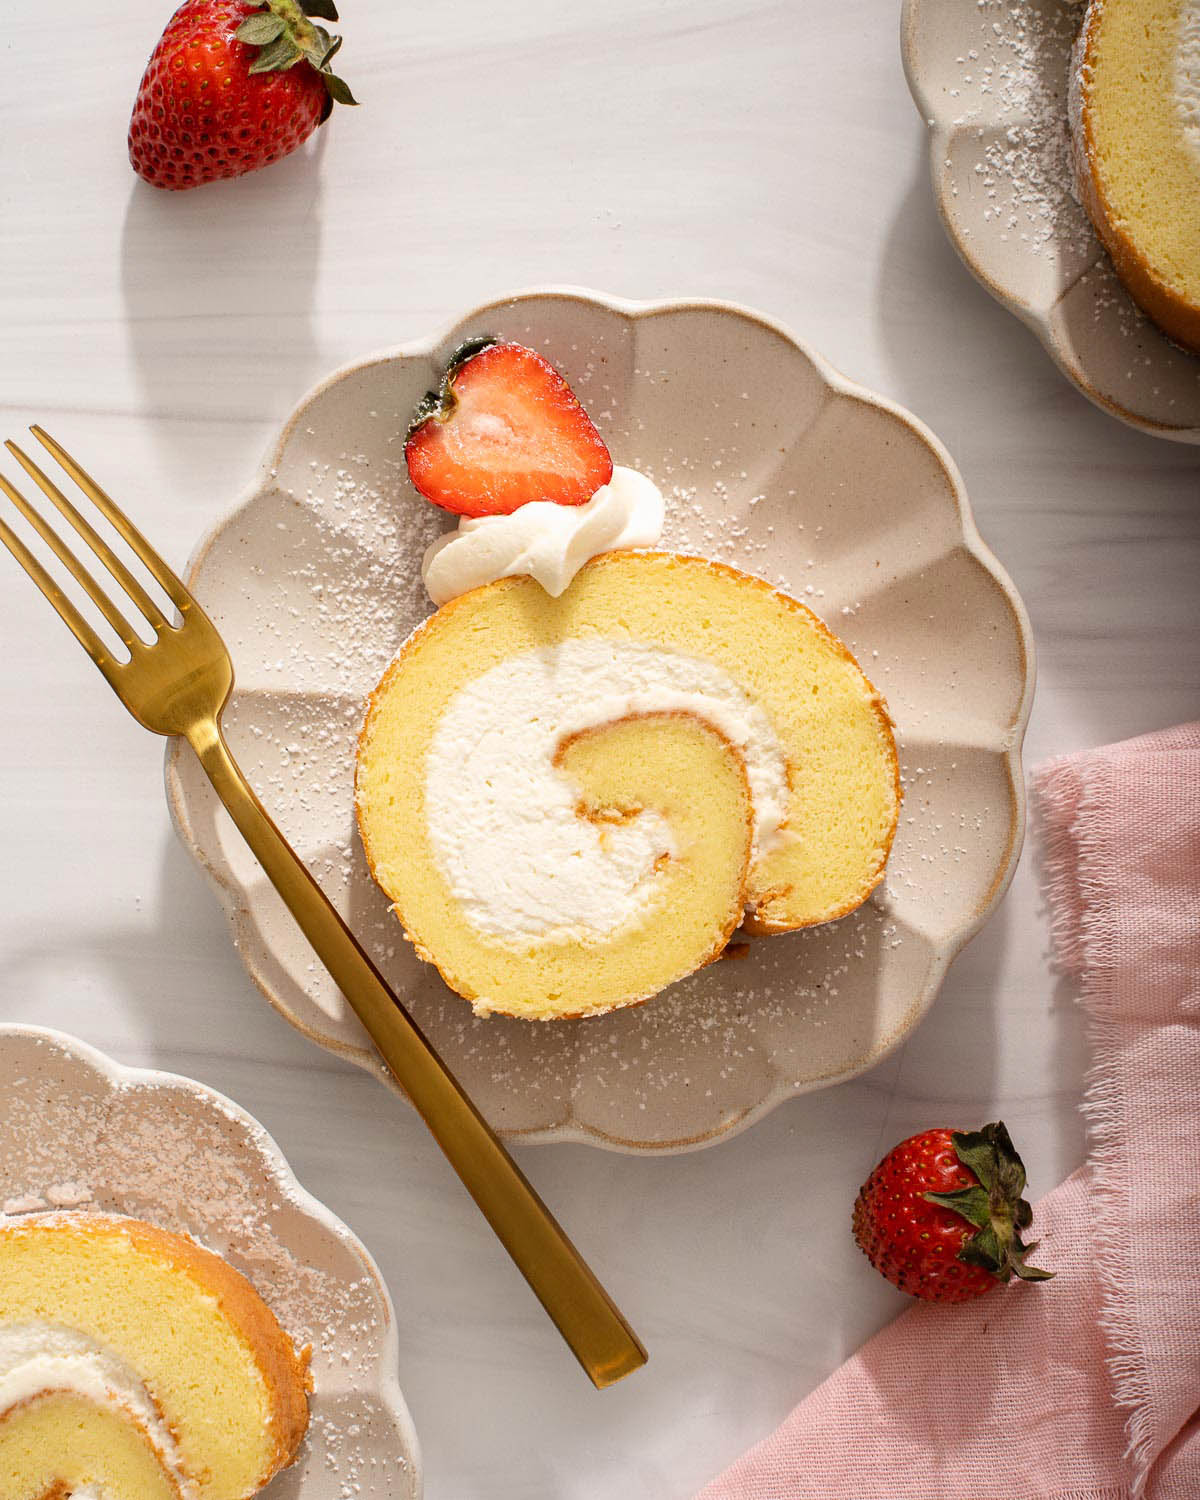
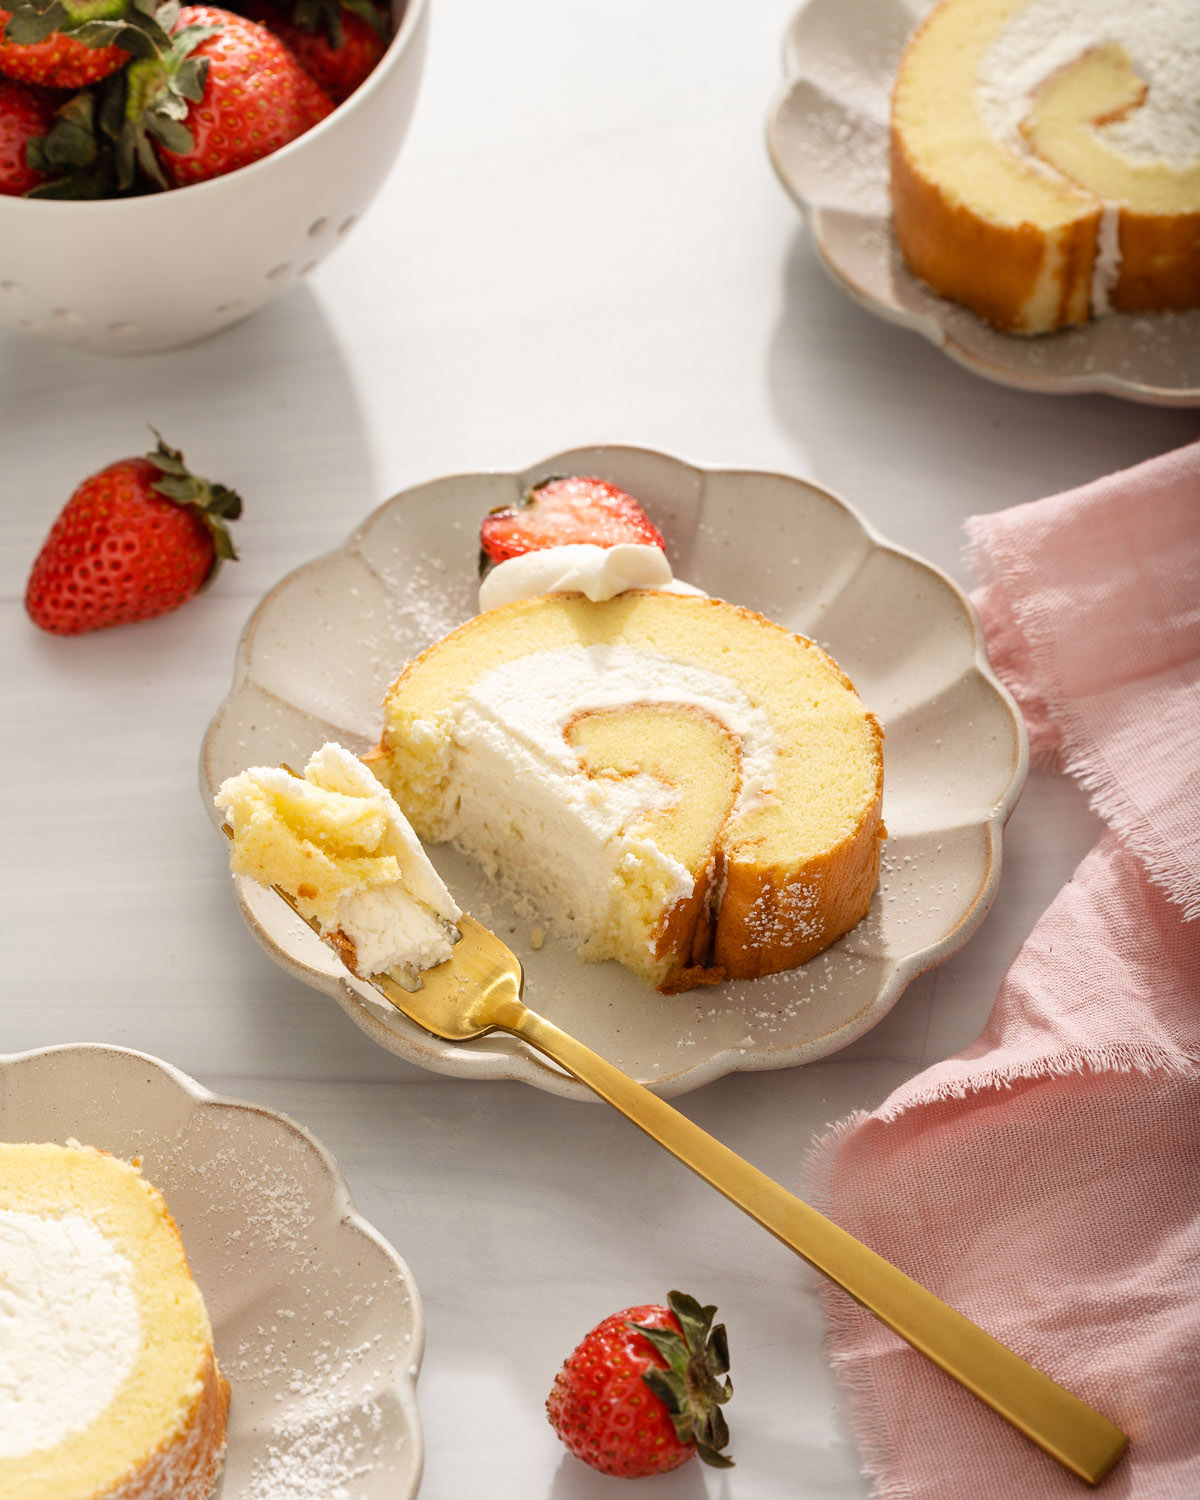
A Japanese cake roll is a rolled chiffon cake filled with light and airy whipped cream. The sponge is soft, tender, and fluffy rather than dense or dry. It has a delicate spiral and a melt in the mouth texture. The sweetness is restrained, so the cream and cake feel balanced instead of heavy.
This style of roll cake is popular in Japan because it is elegant enough for a special occasion but simple enough for an afternoon treat. I still remember the first time I tried one. The slice looked so neat, but the sponge practically disappeared on my fork. Trust me, the texture is the real star here.
This roll cake may seem intimidating, but it is really straightforward with all the tips and tricks I have laid out for you to follow. You will want to read through the folding and rolling sections before you start.
Megan from Takes Two Eggs has a detailed guide for this Japanese cake roll that helped me understand the key steps.
Both are rolled cakes, but the Japanese version is different in a few clear ways. A traditional European Swiss roll often uses a genoise sponge, which can be drier and thinner. It tends to rely more on jams, icings, or stronger fillings for flavor.
A Japanese cake roll is built around a chiffon style sponge, which contains oil and whipped egg whites. That combination creates a more tender, moist, and pillowy crumb. The filling is usually a lightly sweetened whipped cream, which keeps the whole dessert airy.
Traditional Swiss roll: drier texture, thinner sponge, bolder jam or icing fillings, more sugar, genoise style base.
If you like desserts that are not too sweet, this Japanese version is a wonderful choice.
Kitchen Equipment
Having the right tools makes this recipe much easier. You do not need anything fancy, but a few pieces will help the cake release cleanly and roll without cracking.
Kitchen scale: recommended for accuracy, especially when measuring flour and sugar.
Mixing bowls: use separate bowls for the yolk mixture and meringue.
Electric mixer: a stand mixer or hand mixer works for whipping eggs and cream.
Fine mesh sieve: for sifting the cake flour and baking powder.
Rubber spatula: for gentle folding and spreading the filling.
9 by 13 inch baking pan: the right size for a thin, even sponge.
Parchment paper: lines the pan and helps release the cake.
Clean kitchen towel: slightly damp, used to roll the warm cake.
Plastic wrap: wraps the filled roll before chilling.
Before you begin, have the pan prepared and the oven preheated. This cake moves quickly once the sponge comes out of the oven.
Ingredients
The sponge gets its rise from properly beaten eggs and a small amount of baking powder. Cake flour keeps the crumb soft, while oil and milk add moisture. The filling is a simple whipped cream that stays light and not too sweet.
Cake
4 large egg yolks, room temperature
1/4 cup (50 g) granulated sugar, for the egg yolk mixture
1/4 teaspoon (1 g) salt
1/2 teaspoon vanilla extract
1/4 cup (50 ml) vegetable oil
3 tablespoons (50 ml) whole milk
1/2 cup (67 g) cake flour
1/2 teaspoon (2 g) baking powder
4 large egg whites, room temperature
1/4 teaspoon (1 g) cream of tartar
1/3 cup (67 g) granulated sugar, for the egg white meringue
Whipped cream
1 cup (250 ml) heavy whipping cream
3 tablespoons (38 g) powdered sugar
1 teaspoon vanilla extract
If you are out of cream of tartar, lemon juice can help stabilize the egg whites. Avocado oil can replace vegetable oil in the same amount. Keep the heavy whipping cream cold until you are ready to whip it.
Nutrition per serving
Calories
Carbohydrates
Protein
Fat
Saturated Fat
Fiber
Sugar
Sodium
Cholesterol
317
26 g
6 g
21 g
9 g
1 g
20 g
168 mg
118 mg
How to Make Japanese Cake Roll
Plan for about 1 hour and 10 minutes from start to finish. That includes 25 minutes of prep, about 15 minutes in the oven, and at least 30 minutes of chilling. Your oven may need 15 to 17 minutes, so check with a toothpick.
Prepare the oven and pan. Line a 9 by 13 inch baking tray with parchment paper. Preheat the oven to 350°F or 176°C.
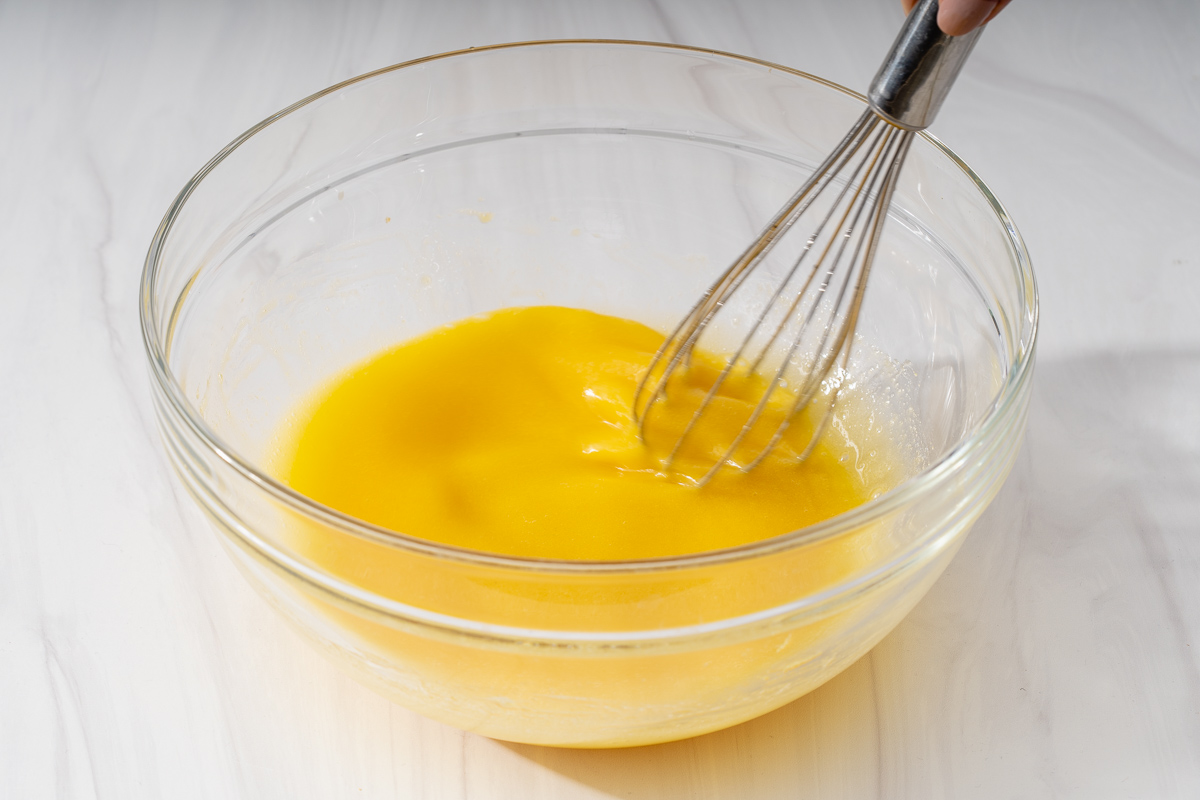
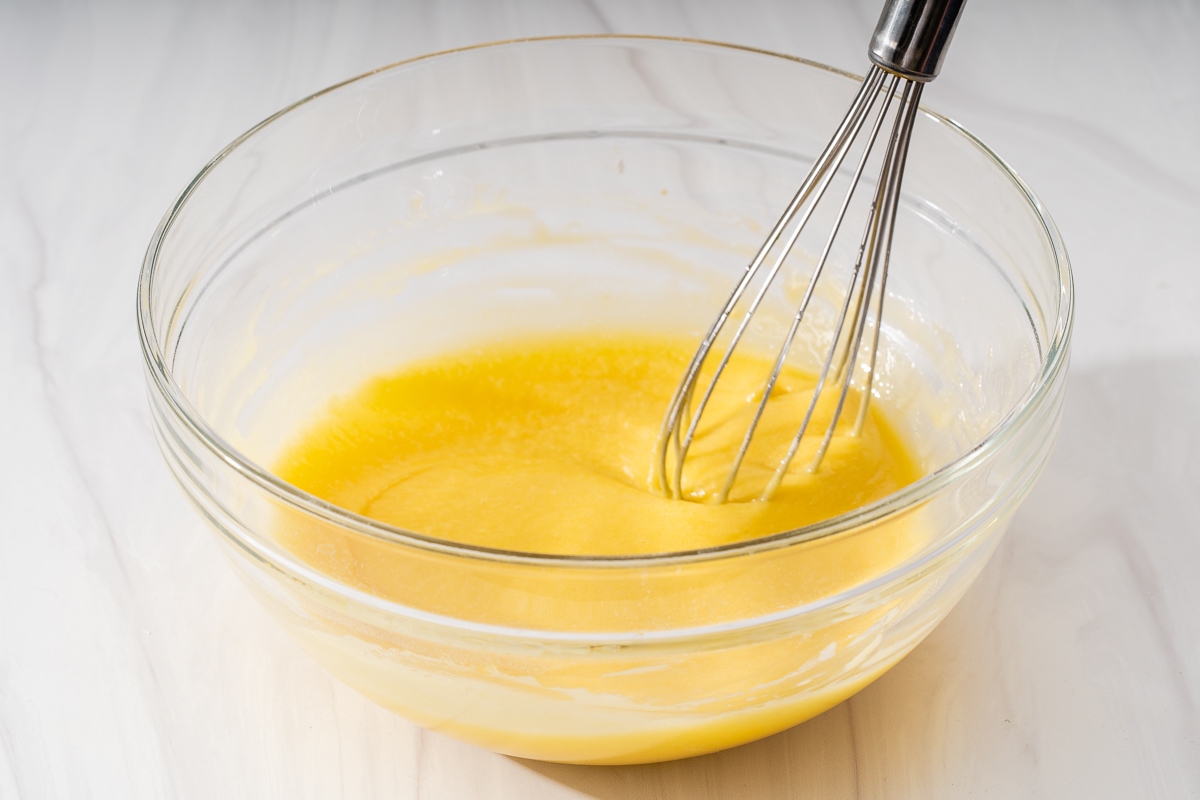
Mix the egg yolk mixture. In a medium mixing bowl, whisk together the egg yolks, 1/4 cup of granulated sugar, salt, vanilla extract, vegetable oil, and whole milk until combined.
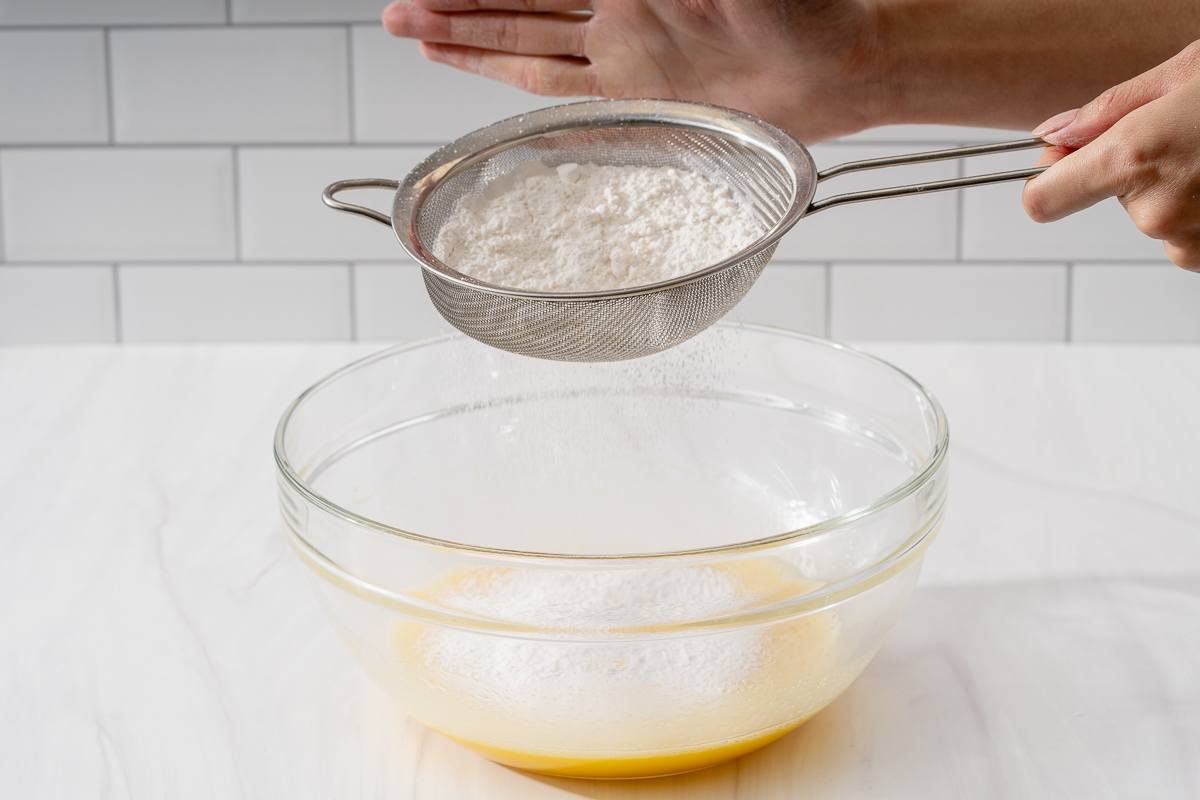
Sift in the dry ingredients. Using a fine mesh sieve, sift the cake flour and baking powder into the egg yolk mixture. Whisk until there are no lumps or traces of flour.
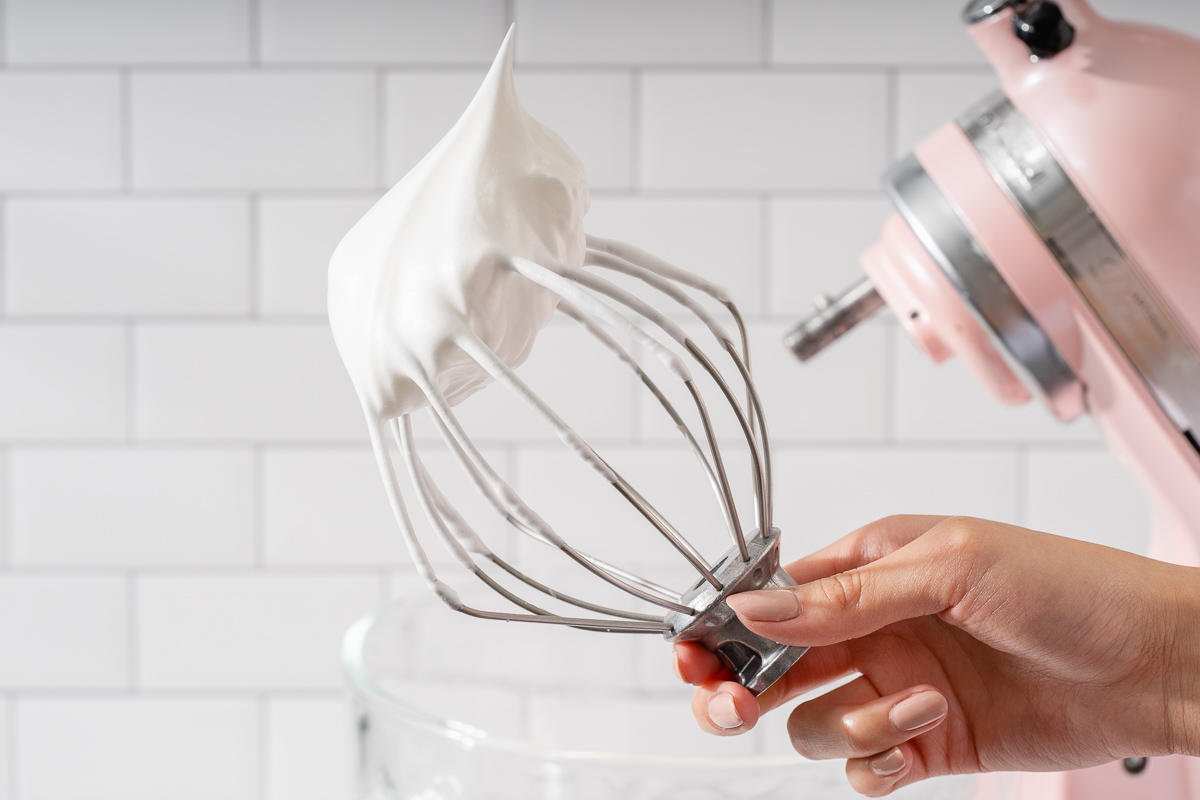
Make the egg white meringue. In a large mixing bowl, wipe the bowl with a paper towel and a little lemon juice or vinegar. Add the egg whites and beat on high until bubbly and frothy. Add the cream of tartar and beat until the whites are opaque and the bubbles have tightened up. Slowly pour the 1/3 cup of sugar in three increments while the mixer runs. Continue beating until stiff peaks form. The meringue should be fluffy, shiny, and hold a pointed tip.
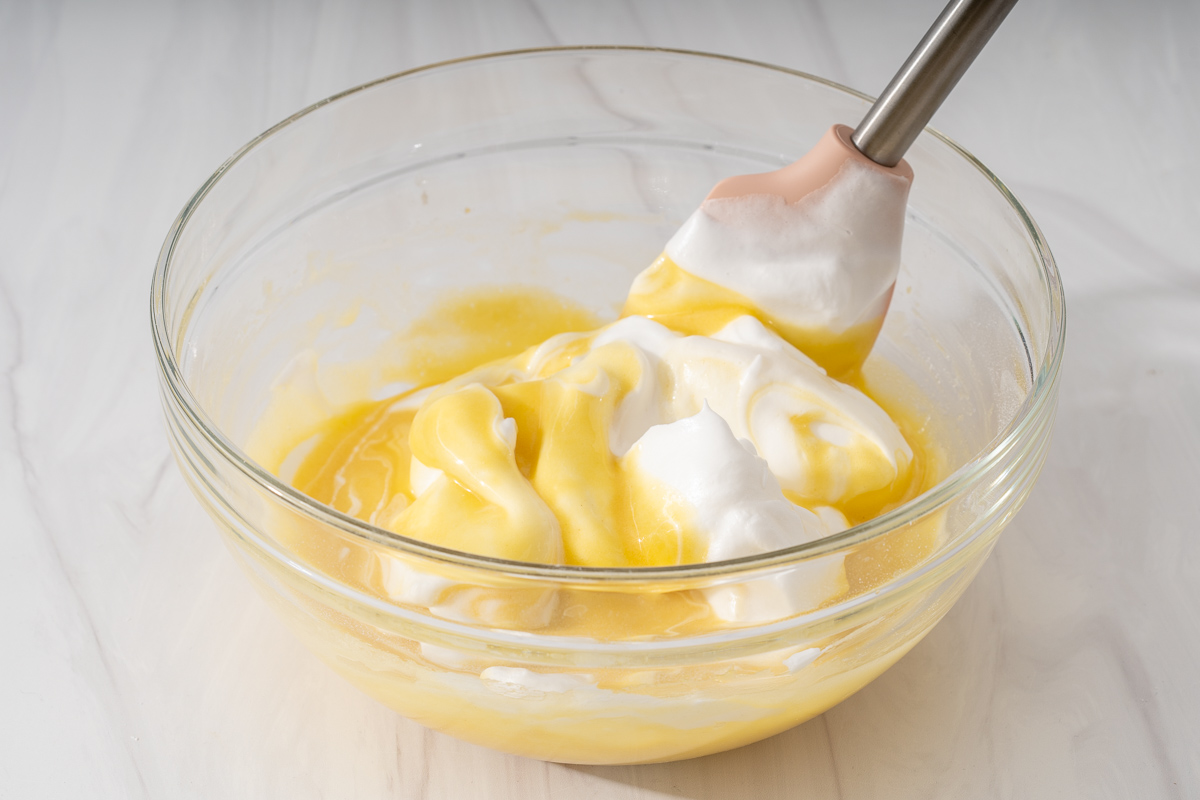
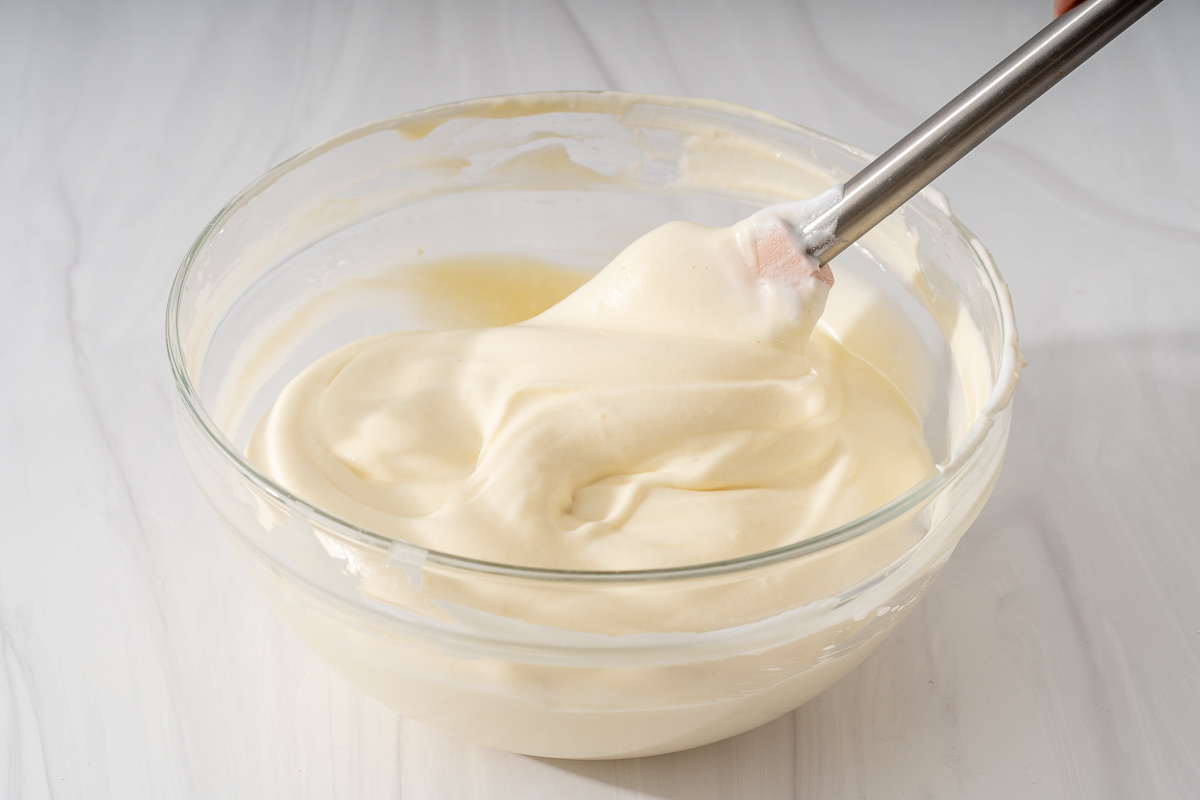
Combine the egg mixtures. Use a rubber spatula to add about one third of the meringue to the yolk mixture and gently fold until mostly mixed. Add the next third and fold, then repeat with the remaining meringue. Be careful not to deflate the air. Folding is not stirring. Gently take the spatula around the edges to the bottom of the bowl and scoop upward.
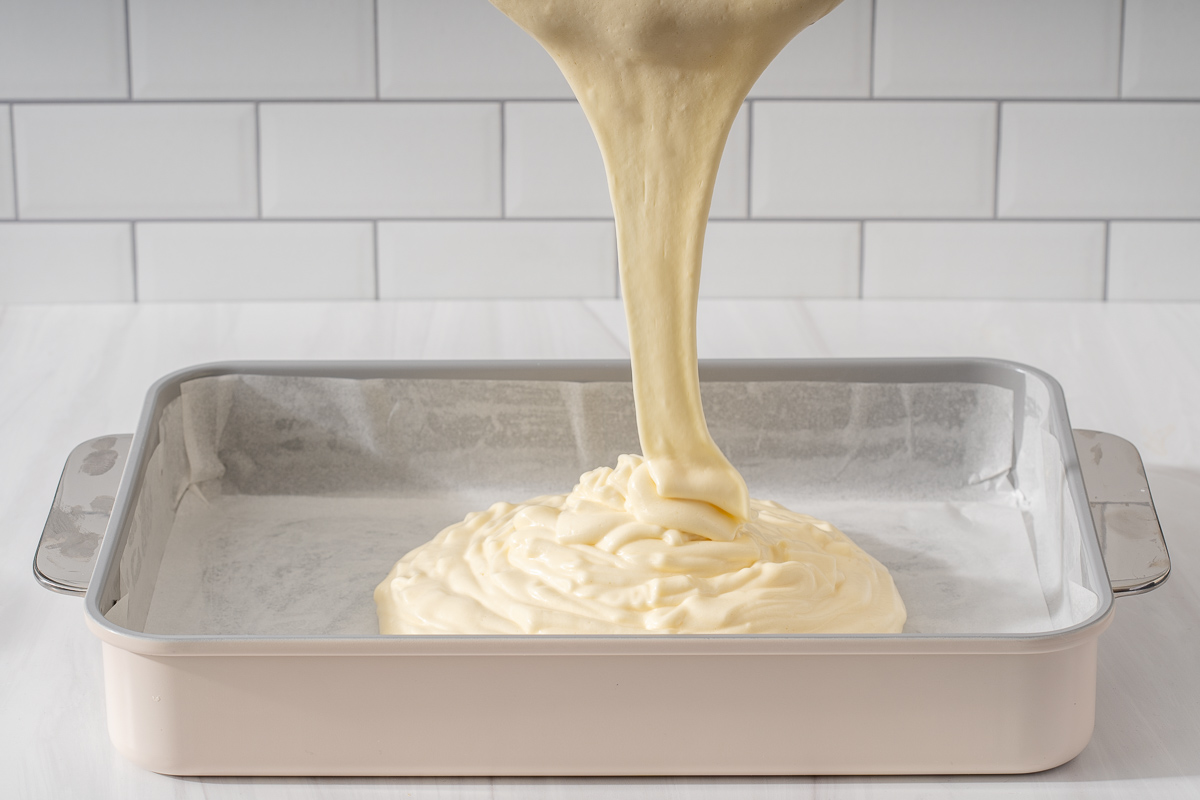
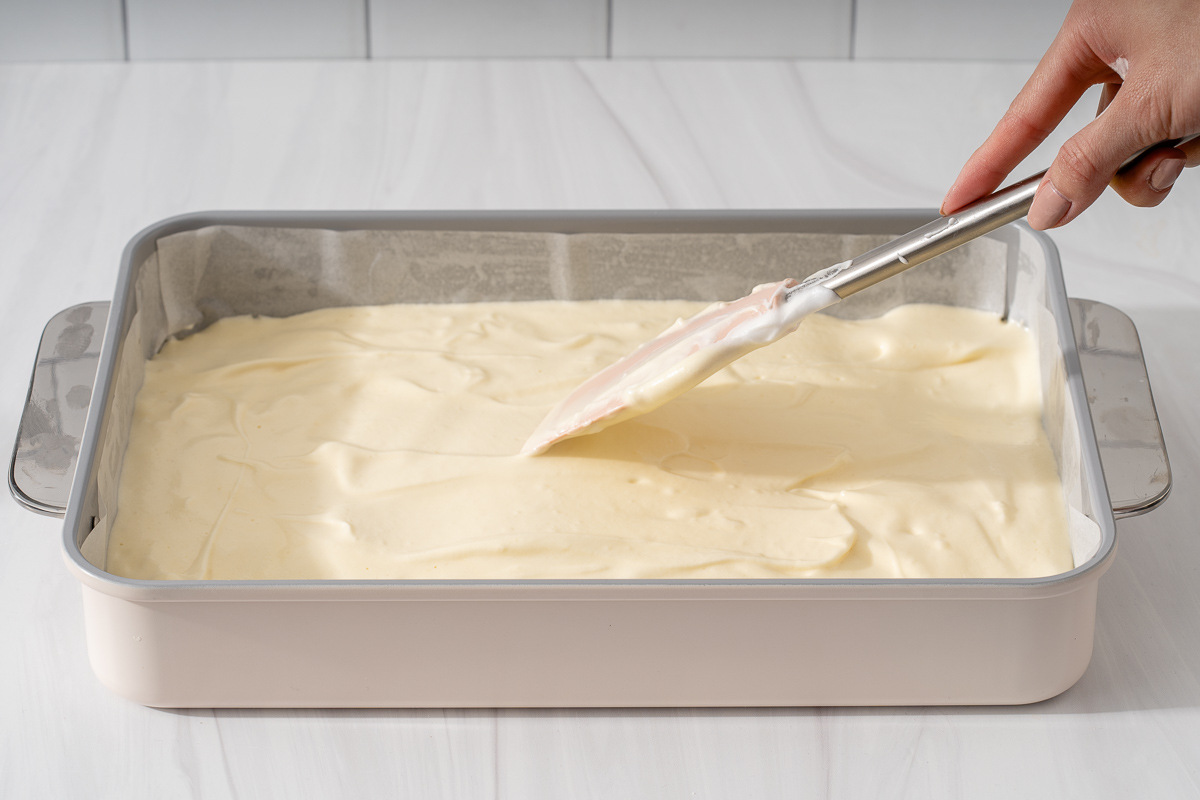
Bake. Pour the batter into the prepared pan and even it out with a spatula. Tap the tray a few times on the work surface to release large air bubbles. Bake at 350°F or 176°C for 15 to 17 minutes, or until a toothpick inserted in the center comes out clean.
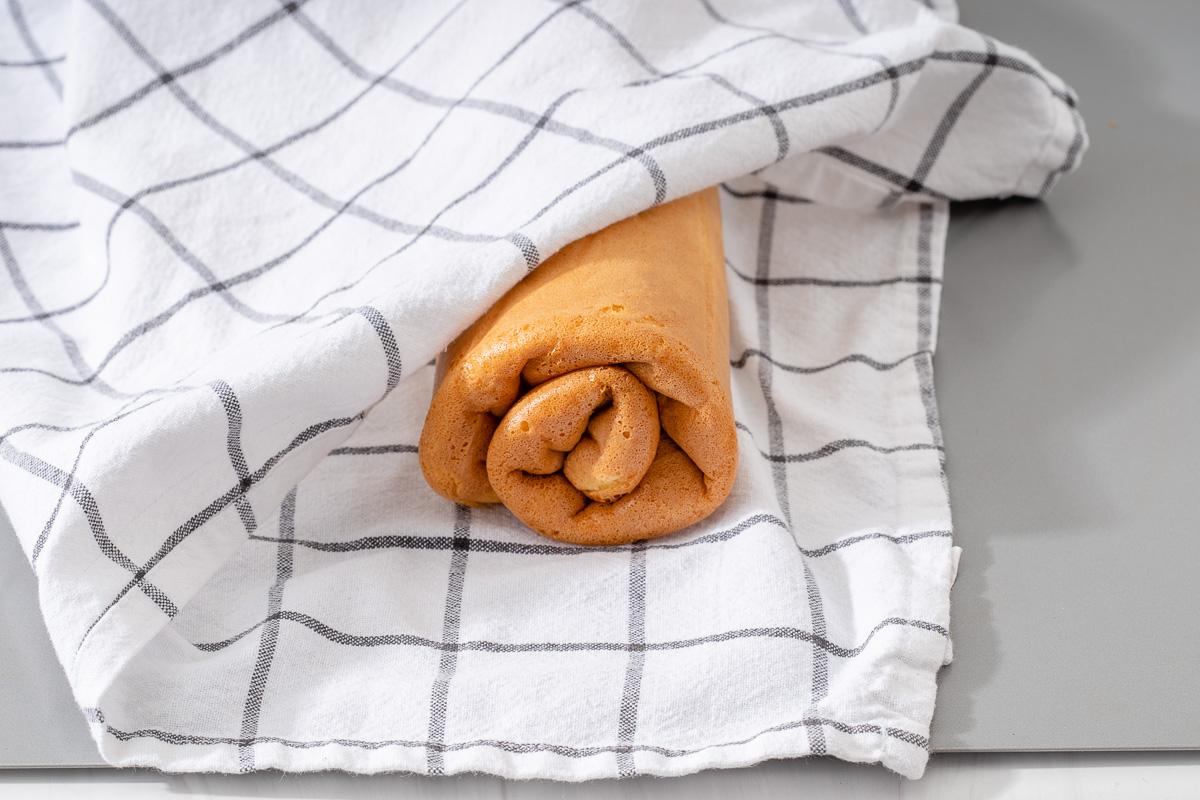
Remove and roll. Immediately flip the hot cake onto a slightly damp kitchen towel that is larger than the cake. Peel off the parchment paper. Starting from the short side, roll the cake with the towel very slowly and gently. Be careful not to squeeze the cake too tightly, or it may crack. Let it cool completely rolled in the towel.
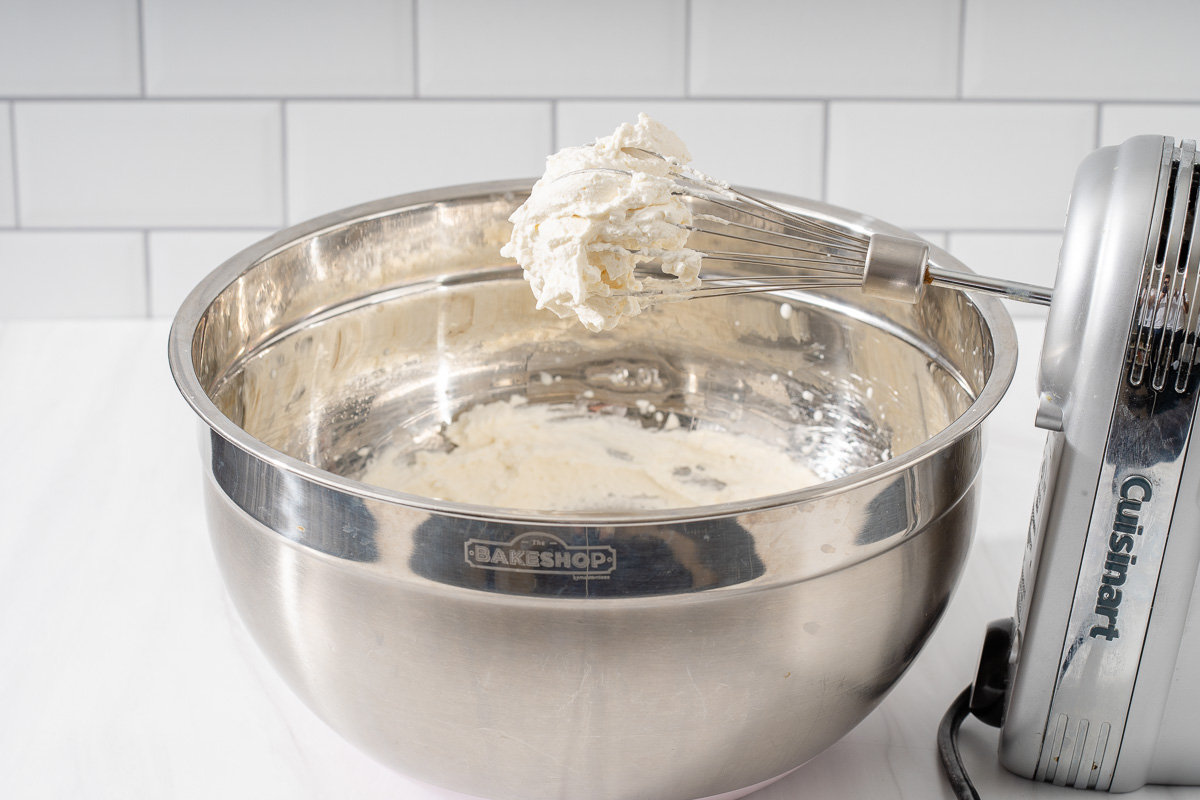
Make the whipped cream. Using an electric mixer or stand mixer with a whisk attachment, whip the heavy cream, powdered sugar, and vanilla extract until medium to stiff peaks form.
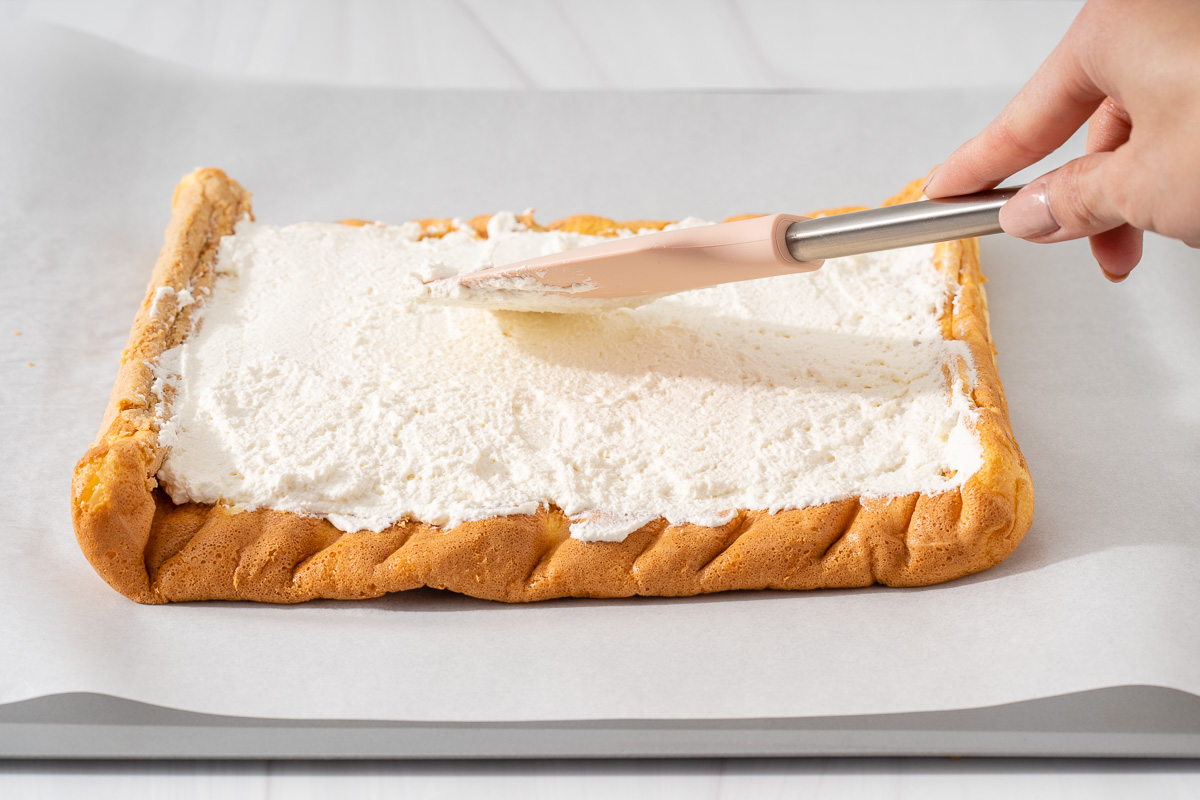
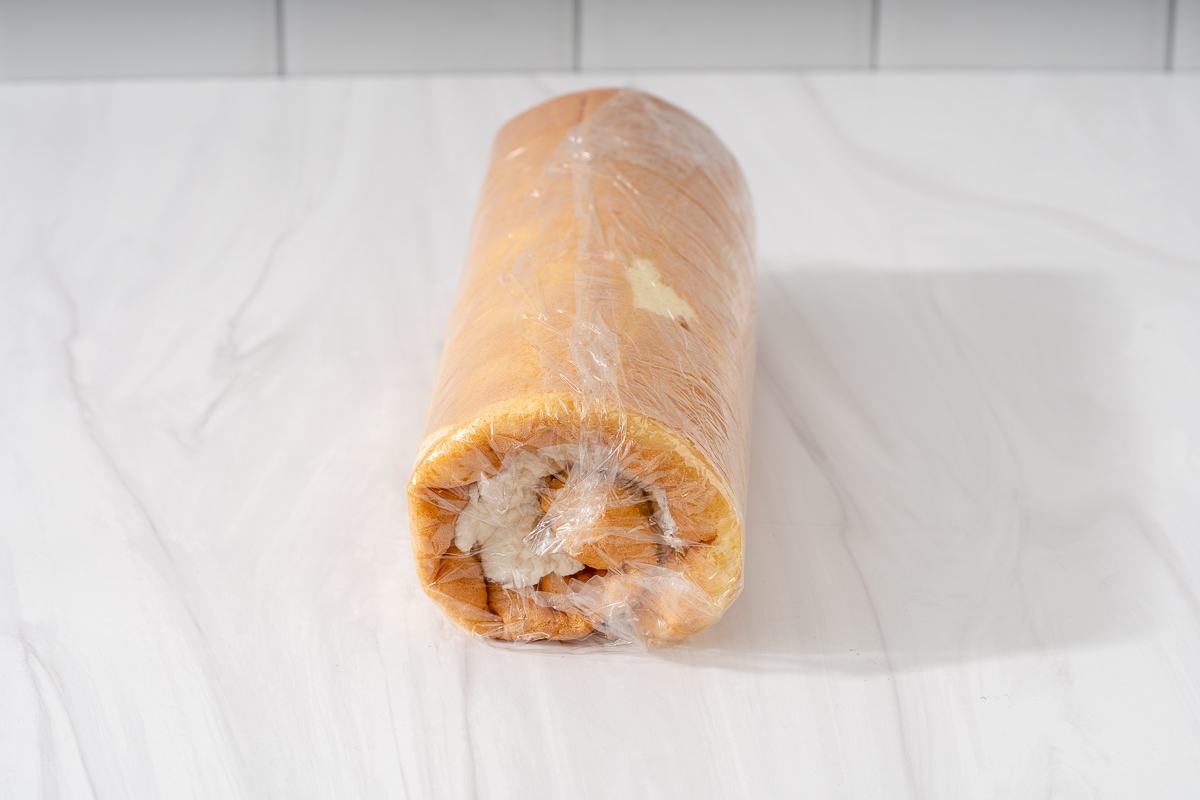
Assemble. When the cake has cooled completely, gently unroll it and trim the edges. Spread the whipped cream evenly on top, leaving about a 1/2 inch border around the edges. Gently roll the cake back up without the towel. Wrap the roll tightly in plastic wrap and chill for at least 30 minutes. For the cleanest slices, I let it chill for a full hour before slicing.
Tips for the Best Japanese Cake Roll
The meringue is the heart of this recipe. Treat it gently, and the cake will stay light. These are the small details that make a big difference.
Keep the equipment clean and fat free. Any trace of grease can stop the egg whites from whipping properly. A glass or stainless steel bowl works best. Wipe the bowl and whisk with a paper towel and a little lemon juice or vinegar.
Add the sugar slowly. Wait until the egg whites are frothy and opaque, then add the sugar in three increments. This gives the meringue structure without deflating it.
Fold with a gentle scooping motion. Do not stir. Scoop from the sides of the bowl to the bottom and lift up. Stop once the batter is combined, even if a few small streaks remain.
Watch the bake time. Overbaking can dry out the sponge and make it more likely to crack. A toothpick should come out clean at the center.
Trust me: the gentle fold is the most important step. All the air you whip into the meringue is what gives this cake its cloudlike texture.
Tips on How to Roll the Perfect Cake Roll
Rolling is the step that worries most home bakers, but the process is very forgiving when you work while the cake is still warm. The warm sponge is flexible and less likely to crack.
Roll right away. As soon as the cake comes out of the oven, flip it onto the towel and peel the parchment. Rolling it warm sets the shape and helps prevent cracks.
Use a slightly damp towel. The towel keeps the sponge from sticking and adds a little moisture while it cools.
Keep the first fold clean. Start slowly and guide the sponge with the towel. The first turn creates the center of the spiral, so make it even.
Leave a cream border. When filling, leave about a 1/2 inch border around the edges so the whipped cream does not squeeze out.
Do not squeeze too hard. You want a snug roll, not a pressed one. Squeezing too tightly can crack the sponge or push out the filling.
If your cake does crack, do not panic. Roll it carefully, wrap it well, and chill it. The spiral will still look lovely once sliced.
Storage Instructions
This cake is best after a good chill, but it also keeps well. Store it in an airtight container in the refrigerator for up to 3 days. The whipped cream filling should stay cold.
If you want to make it ahead, wrap the finished roll tightly before refrigerating. You can also freeze the roll for up to 3 months. Wrap it well to protect the sponge and cream from freezer odor.
Before serving, slice with a serrated knife and wipe the blade clean between cuts. This gives you neat edges and a pretty spiral. If the roll was refrigerated, you can let it sit at room temperature for a few minutes before serving, but do not leave the whipped cream filling out for long.
One serving from this recipe is about 317 calories based on the source nutrition. It is a lighter style dessert, but the whipped cream makes it feel special enough for company.
FAQs
What is a Japanese cake roll?
A Japanese cake roll is a rolled chiffon cake filled with light, airy whipped cream. It is popular in Japan for its fluffy, melt-in-the-mouth texture and subtly sweet flavor. Compared with a European Swiss roll, it has a softer crumb, less sugar, smaller portions, and a lighter whipped cream filling rather than jam or icing.
Why does my Japanese cake roll crack?
Cracking usually happens when the cake is overbaked or rolled too tightly after it has cooled. Flip the hot cake onto a slightly damp kitchen towel, peel off the parchment, and roll it gently from the short side while it is still warm. Let it cool completely rolled in the towel before unrolling and filling.
What flour is best for a Japanese cake roll?
Cake flour is best because its lower protein content limits gluten formation and gives the roll a softer, more delicate crumb. Sift the cake flour with the baking powder before adding it to the egg yolk mixture. All-purpose flour will still work, but the result will be slightly springier and less tender.
How should I store a Japanese cake roll?
Keep the filled cake roll in an airtight container in the refrigerator for up to 3 days. You can freeze it for up to 3 months, but wrap it tightly to protect the texture of the whipped cream filling. For the cleanest slices, use a serrated knife and wipe the blade between cuts.
What Is Japanese Cake Roll? A Japanese cake roll is a rolled chiffon cake filled with light and airy whipped cream.
Total Time:70 min
Yield:81x
Ingredients
Scale
Cake 4 large egg yolks, room temperature ¼ cup (50 g) granulated sugar, for egg yolk mixture ¼ teaspoon (1 g) salt ½ teaspoon vanilla extract ¼ cup (50 ml) vegetable oil 3 tablespoon (50 ml) whole milk ½ cup (67 g) cake flour ½ teaspoon (2 g) baking powder 4 large egg whites, room temperature ¼ teaspoon (1 g) cream of tartar ⅓ cup (67 g) granulated sugar, for egg white meringue
Whipped Cream 1 cup (250 ml) heavy whipping cream 3 tablespoon (38 g) powdered sugar 1 teaspoon vanilla extract
Instructions
1-Prepare the oven and pan: Prepare the oven and pan. Prepare a 9×13 baking tray with parchment paper. Preheat the oven to 350°F or 176°C. 2-Mix the egg yolk mixture: Mix the egg yolk mixture. In a medium mixing bowl, add the egg yolks, 1/4 cup of sugar, salt, vanilla, oil and milk. Mix with a whisk until combined. 3-Sift in the cake flour and baking: Sift in the cake flour and baking powder. Using a fine mesh sieve, sift the cake flour and baking powder into the egg yolk mixture. Whisk to combine. Stop when there are no more lumps or traces of flour. 4-Make the egg white meringue: Make the egg white meringue. In a large mixing bowl, quickly wipe the bowl with a paper towel and some lemon juice or vinegar. Add the egg whites and beat with an electric mixer on high until bubbly and frothy, then add the cream of tartar and beat until the whites are opaque and the bubbles have tightened up. Next, slowly pour the 1/3 cup of sugar in three increments while the mixer is running. Continue beating the egg whites until stiff peaks form or when the egg whites are fluffy, shiny and the egg whites holds its pointed tip when you lift the mixer from the bowl. 5-Combine the egg mixtures: Combine the egg mixtures. Using a rubber spatula, add about 1/3 of the egg white meringue into the egg yolk mixture and very gently fold until mostly mixed. Then add the next 1/3 of the mixture and gently fold and repeat with the remaining third. Be careful to not deflate the air in the mixture by over folding. (Folding is not stirring. You want to gently take the spatula around the edges of the bowl to the bottom of the mixture and scoop upward. Continue until the mixture is combined.) 6-Bake: Bake. Pour the batter into the parchment lined 9×13 inch pan and even out the batter with a spatula. Give the tray a few taps on your work surface to release any large air bubbles. Bake at 350°F or 176°C for 15-17 minutes or until a toothpick inserted in the center comes out clean. 7-Remove and roll: Remove and roll. Once you take the cake out of the oven, quickly flip the cake onto a slightly damp kitchen towel that is larger than the cake on your work surface. Peel off the parchment paper. Begin to roll the cake tightly with the kitchen towel starting with the short side of the cake. Do this very slowly and very gently. Be sure not to squeeze the cake too tightly because this may create cracks. Allow the cake to cool completely rolled up in the towel. 8-Make the whipped cream: Make the whipped cream. Using an electric mixer or your stand mixer with a whisk attachment, whip the heavy cream, sugar and vanilla extract until medium to stiff peaks form. 9-Assemble: Assemble. When the cake has cooled completely, gently unroll the cake and trim the edges. Spread the whipped cream evenly on top using a rubber spatula leaving about 1/2 inch border around the edges. Gently roll the cake back up without the towel. Tightly wrap the cake with plastic wrap and chill the cake in the refrigerator for 1 hour. Then garnish, slice and serve!
Last Step:
Please leave a rating and comment letting us know how you liked this recipe! This helps our business to thrive and continue providing free, high-quality recipes for you.