Qu'est ce que le cake courgette feta ?
Amish refrigerator pickles are a cold, crisp style of homemade pickle that skips the canning process entirely. The vegetables sit in a sweet and tangy vinegar brine, and the jars stay in the refrigerator while the flavor develops.
This version uses cucumbers, green pepper, and onion with cider vinegar, granulated sugar, celery seed, and kosher salt. The result is a jar of pickles that stays bright, lightly sweet, and very crunchy.

Because the method is a no cook process, it is one of the easiest ways to make pickles at home. You do not need a boiling water bath or canning equipment beyond clean jars. The recipe makes 6 pint size jars and takes about 20 minutes of prep. After that, the refrigerator does most of the work.
I keep coming back to this refrigerator pickle method when the cucumbers pile up on the counter or when I want a quick side for sandwiches and burgers. The brine is simple, but the balance of vinegar, sugar, and celery seed gives the pickles a distinctive sweet and tangy character.
Jump to:
- Qu'est ce que le cake courgette feta ?
- Story and Character of the Recipe
- Ingredients for the Recipe
- Preparing the Ingredients
- Cooking Instructions
- Tips for Perfect Results
- Serving and Storage
- FAQs
- How long do Amish refrigerator pickles last in the fridge?
- Can I reduce the sugar in Amish refrigerator pickles?
- What kind of cucumbers are best for Amish refrigerator pickles?
- Do I need to can refrigerator pickles?
- Conclusion
- AMISH REFRIGERATOR PICKLES
- Ingredients
- Instructions
- Last Step:
- Did you make this recipe?
Story and Character of the Recipe
This recipe feels like a little piece of family history in my kitchen. My grandmother made a version of these pickles long before I started cooking, and she stored the finished jars in an old ice box.
Today the only real change is that the jars go into a modern refrigerator. The cold temperature still does the same job, keeping the vegetables crisp while the brine seeps into every slice.
What I love most about these pickles is the contrast. The cider vinegar gives a clean, sharp note, the sugar rounds it out, and the celery seed brings an earthy, almost grassy flavor that makes them taste more interesting than plain cucumber pickles.
The green pepper and onion add their own layers, so every forkful has a little sweetness and bite.
Nothing beats the crunch of these sweet and tangy pickles. My grandma always said the secret is letting them sit a full two days before tasting.
For a busy week, that waiting time is actually a gift. You can slice everything, shake the jars, and tuck them into the fridge. The pickles are then ready when you need them, and the flavor only improves as they sit cold.
Ingredients for the Recipe
This recipe keeps the ingredient list short, but each item matters. The cucumbers provide the crunch, the onion gives a mellow sharpness, and the green pepper adds a fresh garden note. Cider vinegar supplies the tang, while sugar, celery seed, and salt build the brine.
For 6 pint size jars, you need:
- 3 medium cucumbers, sliced about 1/4 inch thick
- 1 green pepper, sliced into short strips
- 1 onion, sliced into rings
- 2 cups cider vinegar
- 2 cups (400 g) granulated sugar
- 2 teaspoons celery seed
- 4 tablespoons kosher salt
You will also need 6 pint size mason jars with lids. Clean and sanitize the jars before filling them. You can run them through a dishwasher or boil them in a large pot of water. Even though these are refrigerator pickles and not canned pickles, the jars need to be clean and able to seal tightly.
Preparing the Ingredients
Preparation is quick, but a little attention to slicing helps the final texture. Wash the cucumbers and cut them into slices about 1/4 inch thick. Keep the slices as even as you can so they all absorb the brine at the same rate. Cut the green pepper into short strips and slice the onion into rings.
After the vegetables are ready, divide the cucumbers, pepper, and onion evenly among the 6 clean pint jars. The jars do not need to be packed painfully tight, but the vegetables should fill them well enough that the brine has plenty of surface to season.
This is one of the reasons the recipe works so well for busy parents, students, and working cooks. There is no stove time, no complicated knife work, and very little cleanup before the jars go into the fridge.
Cooking Instructions
There is no actual cooking in this recipe, just assembly and a little shaking. The cold refrigerator does the work of turning the vegetables into pickles while keeping them crisp.
- Clean and sanitize 6 pint size mason jars with lids. Divide the sliced cucumbers, pepper, and onion amongst the jars.
- Create the pickling liquid by mixing together the vinegar, sugar, celery seed, and salt. Fill the jars halfway with the liquid. Fill each jar the rest of the way with cold water.
- Fit the lid on tightly and shake to mix. Store in the refrigerator for at least 24 hours.
After the first 24 hours, the pickles are ready to taste. The brine may look slightly separated or cloudy right after shaking, but the sugar and salt will dissolve and the flavors will settle as the jars sit cold. For even better crunch and balance, wait a full two days before opening the first jar.
Tips for Perfect Results
Once you have the base recipe, it is easy to make small changes without losing the sweet and tangy character. These are optional variations, so you can stick with the classic jars or try a different style.
- For a dill flavor, add up to 6 sprigs of fresh dill or 1 teaspoon of dill seeds to each jar.
- For a mellow garlic note, include a few cloves of garlic still in their skins.
- For a different shape, cut the cucumbers into spears instead of slices. Baby cucumbers work especially well for spears.
The most important step is keeping everything cold. These pickles do not go through a canning process, so the refrigerator is essential for safety, texture, and flavor. Also, do not rush the resting time. A solid 24 hours is the minimum, and a full 48 hours gives the brine more time to reach the center of the cucumber slices.
Slice the vegetables just before you fill the jars. This keeps the cucumber from becoming limp, and it preserves that fresh crunch from edge to edge.
Serving and Storage
These pickles are a natural side dish for burgers, sandwiches, hot dogs, grilled chicken, or a simple lunch plate. I also like them chopped into potato salad or served alongside cheese and crackers when guests come over. The sweet and tangy brine adds brightness without being too sharp.
Store the jars in the refrigerator at all times. Because this is a refrigerator pickle recipe and not a shelf stable canning recipe, the jars should not be kept at room temperature after the initial assembly. The vegetables stay crisper when they remain cold, and the brine continues to develop flavor over the first several days.
Make a batch on the weekend, and the jars will be ready for quick sides, snacks, and easy lunches throughout the week. If you are giving them as a small gift, keep them cold and let the recipient know they are refrigerator pickles.
FAQs
How long do Amish refrigerator pickles last in the fridge?
Can I reduce the sugar in Amish refrigerator pickles?
What kind of cucumbers are best for Amish refrigerator pickles?
Do I need to can refrigerator pickles?
Conclusion
Amish refrigerator pickles prove that a simple no cook recipe can still deliver big flavor and serious crunch. With a short list of ordinary ingredients, 6 clean jars, and about 20 minutes of prep, you can turn fresh cucumbers into a sweet and tangy side that works all week long.
The recipe is forgiving enough for first time pickle makers and flexible enough for anyone who wants to add dill, garlic, or spear cut cucumbers. Keep the jars cold, be patient for at least a day or two, and you will have a crunchy homemade pickle that tastes far better than the effort suggests.
Print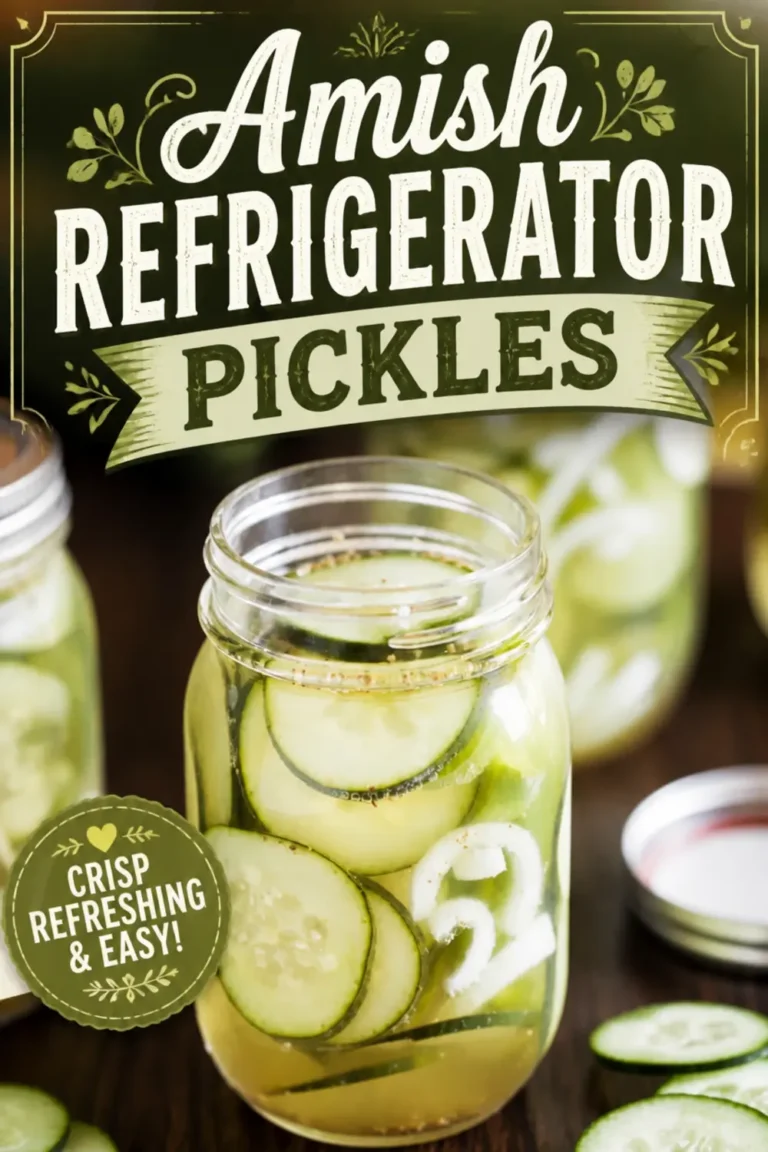
AMISH REFRIGERATOR PICKLES
Qu’est ce que le cake courgette feta ? Amish refrigerator pickles are a cold, crisp style of homemade pickle that skips the canning process entirely.
- Total Time: 20 min
- Yield: 6 jars 1x
Ingredients
Ingredients
3 medium cucumbers, sliced about ¼-inch thick
1 green pepper, sliced into short strips
1 onion, sliced into rings
2 cups cider vinegar
2 cups (400 g) granulated sugar
2 teaspoons celery seed
4 tablespoons kosher salt
Instructions
Instructions
1-Clean and sanitize 6 pint size mason: Clean and sanitize 6 pint size mason jars with lids. Divide the sliced cucumbers, pepper, and onion amongst the jars.
2-Create the pickling liquid by mixing together: Create the pickling liquid by mixing together the vinegar, sugar, celery seed, and salt. Fill the jars halfway with the liquid. Fill each jar the rest of the way with cold water.
3-Fit the lid on tightly and shake: Fit the lid on tightly and shake to mix. Store in the refrigerator for at least 24 hours
Last Step:
Please leave a rating and comment letting us know how you liked this recipe! This helps our business to thrive and continue providing free, high-quality recipes for you.- Prep Time: 20 min
- Cook Time: 0 min
- Method: no_cook