Yellow Squash Chips
There is nothing quite like the first wave of summer squash. It shows up at the farmers market, it shows up in your CSA box, and if you have a garden, it shows up in piles on your kitchen counter.
You start giving them to neighbors, you sneak them into stir fries, and still the yellow beauties keep coming. Enter these crispy yellow squash chips. They are the snack that turns your squash avalanche into the highlight of snack o’clock.
Thin rounds get slicked with olive oil, dusted with garlic salt, blanketed in a sharp Parmesan and smoked paprika crust, then roasted until the edges turn golden and the cheese crackles.
Dip them into a tangy, herby sour cream sauce and you will wonder why you ever bothered with potato chips.

I learned the hard way that squash chips are a delicate operation. The first time I tried, I ended up with sad, floppy circles that steamed in their own juices. Nobody wants a steamed chip.
I went back to the drawing board, dried the slices like my oven’s reputation depended on it, and everything changed. Now I make a batch almost weekly, and the bowl is empty within minutes. This is not a “healthy alternative” that tastes like compromise. These are shockingly good, legitimately crunchy, and absolutely repeatable.
This recipe is adapted from Jess Loves Cooking and it nails the technique every time.
Jump to:
- Yellow Squash Chips
- How to Get Crispy Squash Chips
- Why Patting Dry Is Non Negotiable
- Can You Make These Ahead?
- Dip Swaps If You Hate Cilantro
- Ingredients
- Step 1: Slice and Preheat
- Step 2: Toss in Seasoned Oil
- Step 3: Layer and Sprinkle Cheese
- Step 4: Bake Until Golden
- Step 5: Whisk the Cool Sauce
- Step 6: Assemble and Serve Warm
- FAQs
- How do you make yellow squash chips crispy?
- How long do you bake yellow squash chips?
- Can you make yellow squash chips in an air fryer?
- What dip goes with yellow squash chips?
- Best Yellow Squash Chips
- Ingredients
- Instructions
- Last Step:
- Nutrition
- Did you make this recipe?
How to Get Crispy Squash Chips
Great crunch comes from a few non negotiable moves. First, you need a hot oven, 425°F with the rack in the upper third so the heat hits the cheese directly. Second, slice the squash into even 1/8 inch rounds.
A mandoline makes this stupidly easy, but a sharp knife and a steady hand work too. Third, and this is where most people mess up, you must pat the slices bone dry. Fourth, toss them with oil and garlic salt until every piece is glistening.
Fifth, arrange them in one layer and shower them with a Parmesan paprika mix. Sixth, bake them just long enough that the cheese bubbles and browns, then let them rest on the sheet so the edges set. That is it.
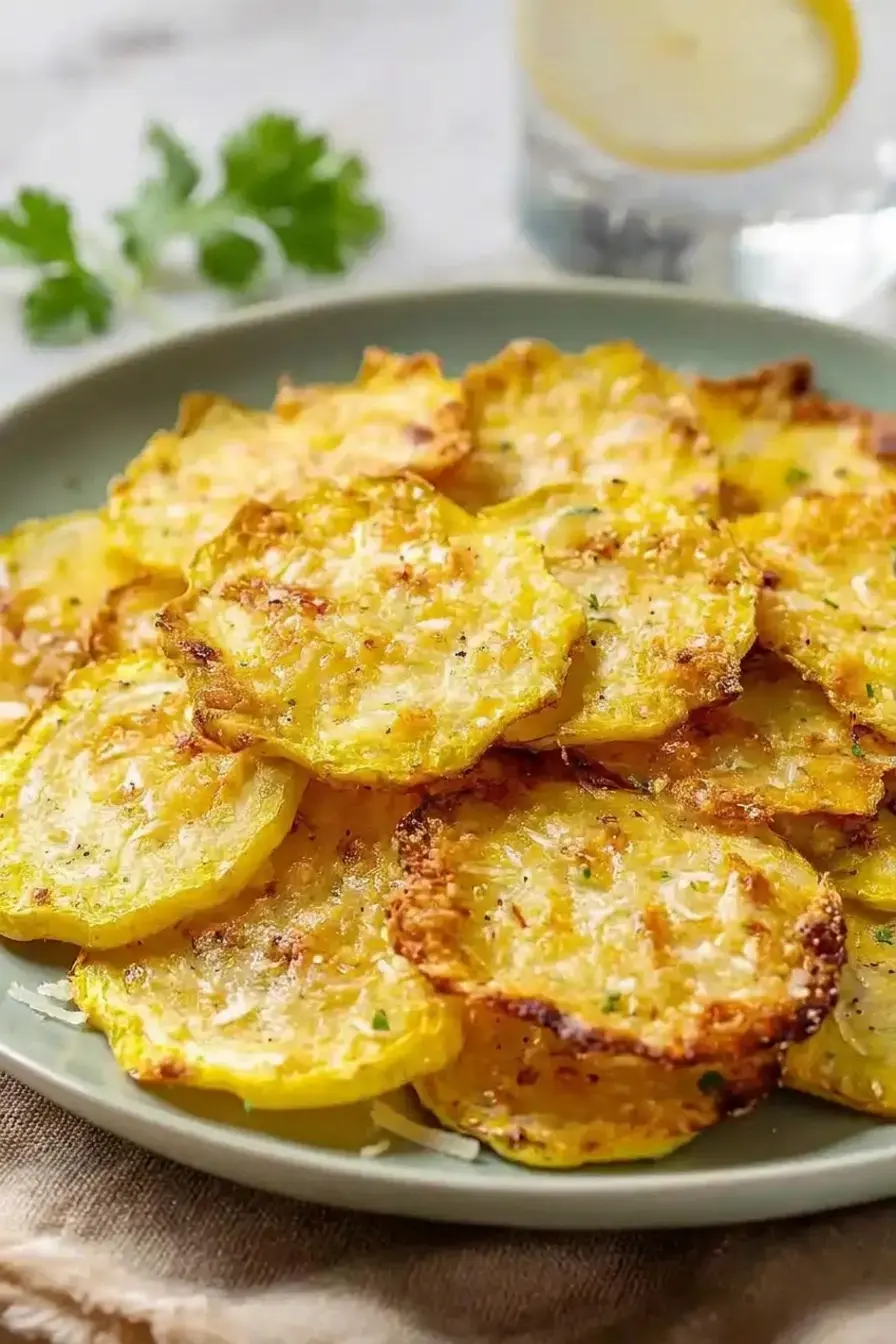
Six little steps. No dehydrator, no deep fryer, just a sheet pan and some attention.
The quick method means you can go from zero to snack in about 25 minutes. I timed it while my kids were doing their “I’m hungry” dance and had a platter on the table before the whining escalated. True story. The smell alone will make you a hero.
Why Patting Dry Is Non Negotiable
Yellow squash is basically a sponge with a pretty skin. It holds a ton of water, close to 95 percent moisture. If you skip the drying step, those wet slices will steam instead of roast.
You will end up with limp, rubbery coins that refuse to crisp, and the cheese will slide off in a greasy mess. Wet squash also repels oil, so the seasoning will not stick.
You need dry surfaces so the oil can cling and help the cheese fuse into a crust.
Here is what I do. Lay the rounds on a double layer of paper towels and press firmly with another layer on top. I mean press, not dab.
You want to see water spots on the paper. For extra insurance, I sometimes sprinkle the slices with a tiny pinch of salt, wait five minutes, and blot again. That little trick draws out even more internal moisture.
It is an extra step, but it pays off when you hear that first CRUNCH. Do not be timid. Dry those slices like your oven’s reputation depends on it. Because honestly, it does.
Can You Make These Ahead?
Here is the honest truth. Yellow squash chips are at their very best right out of the oven. That is when the cheese is still crackly and the squash is tender but firm.
If you try to hold them for an hour, they will soften. I have tested this, terribly. So bake them immediately before you plan to serve them.
Put the sheet in the oven when your guests are walking through the door, and by the time drinks are poured, the chips are done.
But you can absolutely get ahead on prep. The herby dip can be whisked together up to two days in advance. Store it in the fridge and give it a quick stir before serving.
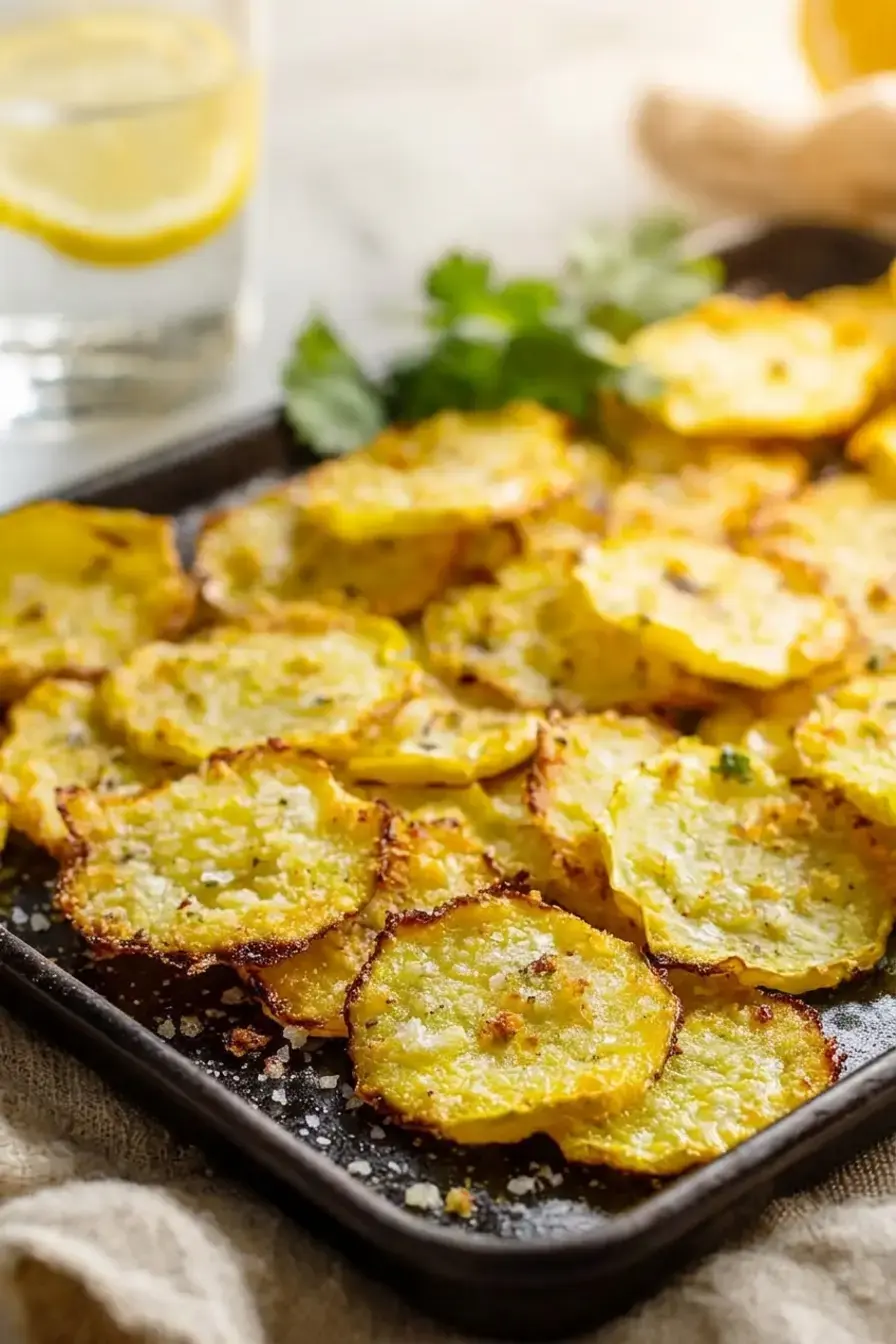
The squash can be sliced a few hours ahead, too. Just keep the rounds in an airtight container in the fridge, then pat them dry again right before you toss them with oil.
One critical warning: do not sprinkle the cheese on raw squash and then let it sit. The salt in the cheese will pull out water and turn everything into a puddle. Layer and bake immediately.
If you have leftovers, which rarely happens in my house, you can reheat them on a baking sheet at 375°F for three to four minutes. They will not fully re crisp, but they will be warm and tasty enough to salvage. I usually just eat the last few cold, standing at the counter, no shame.
Dip Swaps If You Hate Cilantro
I love cilantro, but I know a good chunk of the world thinks it tastes like soap. I am not here to judge. The base dip is sour cream, lemon juice, and black pepper, which is already fantastic on its own, so the herb is just a bonus layer. You can easily swap in something that makes you happy.
Fresh dill gives a bright, almost grassy note that reminds me of ranch without the packet. Chives are mild and oniony and play really well with the Parmesan. Flat leaf parsley is classic and always available; it adds a clean freshness without competing.
If you have basil, tear in a few leaves for a sweet, peppery lift. Green onion, just the green parts, gives a similar allium punch to chives but a bit more bite.
And if you want to get fancy, a little minced tarragon, just a teaspoon, brings a subtle licorice note that feels surprisingly elegant with the smoky paprika. Use whatever green you have. The chips do not care.
Ingredients
This is not one of those recipes that requires a special trip. You probably have most of this in your kitchen right now. Here is what you need for the chips and the cool herb dip.
For the chips:
- 4 yellow squash, sliced into 1/8 inch rounds
- 3 tablespoons olive oil (I reach for a good extra virgin, it handles the heat fine here)
- 1 teaspoon garlic salt
- 1 1/4 cups finely grated Parmesan (grate it yourself from a block; the pre shredded stuff will not melt the same way)
- 1/2 teaspoon smoked paprika (the kind that smells like a campfire in the best way)
For the dip:
- 1/2 cup sour cream (full fat, please, we are not dieting here)
- 2 teaspoons fresh lemon juice
- 2 teaspoons freshly minced cilantro (or your chosen swap from the section above)
- 1/4 teaspoon freshly cracked black pepper
That is nine ingredients total. Count them. Nine. And the result tastes like you spent an hour. I love recipes that punch above their weight.
Step 1: Slice and Preheat
Position your oven rack in the upper third and crank it to 425°F. While the oven climbs, grab your squash and a mandoline or a sharp knife. Slice them into 1/8 inch rounds. Consistent thickness is not optional if you want every chip to finish at the same time. Thin ones burn; thick ones stay soggy. So take your time.
Once they are sliced, spread the rounds on paper towels and press firmly on both sides. You should feel the paper dampen. If you can, do the optional salt, and blot trick I mentioned earlier. It makes a difference. Now they are ready for the bowl.
Step 2: Toss in Seasoned Oil
Dump the dry squash slices into a large bowl. Drizzle the olive oil over them and sprinkle on the garlic salt. Get your hands in there and toss gently but thoroughly.
You want every single round coated with oil so it can brown and crisp evenly. A spoon works but hands are faster and more effective. This takes maybe 30 seconds.
The oil also acts as a glue for the Parmesan crust later, so do not skimp.
Step 3: Layer and Sprinkle Cheese
Arrange the oiled slices on a baking sheet in a single layer. It is okay if they touch slightly, but do not pile them. In a small bowl, mix the finely grated Parmesan with the smoked paprika until the red flecks disappear into the cheese.
Now here comes the fun part: generously top each squash round with the cheese mixture. And by generously I mean do not be shy. Pile it on.
The edges should have little mounds that will spread and crisp into golden, cheesy lace. This is what makes the chip, so go for it.
Step 4: Bake Until Golden
Slide the sheet into that hot upper rack and set a timer for 10 minutes. At 10 minutes, peek. Ovens vary wildly, and you want to catch the moment when the squash is tender and the cheese is golden brown and bubbling at the edges.
It usually takes between 10 and 15 minutes. If you see deep brown spots, pull them immediately. Do not let them shrivel.
Once they come out, let the chips cool on the baking sheet for two to three minutes. This is another non negotiable. The cheese needs that time to set and harden slightly.
If you try to lift them too early, the cheese will stretch and slide off. Patience. You can use those two minutes to splash lemon juice on your face and feel like a kitchen winner.
Step 5: Whisk the Cool Sauce
While the squash is roasting, whisk together the sour cream, lemon juice, minced cilantro, and black pepper in a small bowl. Keep whisking until it is smooth and the herbs are speckled throughout. Taste it.
Does it need more lemon? More pepper? Adjust it.
You want a bright, tangy punch that cuts through the rich cheese. The dip is not an afterthought; it is the co star. A spoonful of this sauce on a hot chip is a perfect bite.
Step 6: Assemble and Serve Warm
Transfer the warm chips to a platter, set the bowl of dip right in the middle, and serve. This is not a dish that waits for anyone. The chips lose their crispness as they cool, so encourage everyone to grab them fast.
I have seen polite conversation stop the moment this platter hits the table. Forks are optional. Hands are mandatory.
Make these once and you will start looking at summer squash with greedy eyes instead of dread. They are that good. And if you are lucky enough to have leftovers, remember the 375°F reheat trick, but do not expect miracles. Better to just eat them all in one glorious, crunchy sitting.
FAQs
How do you make yellow squash chips crispy?
How long do you bake yellow squash chips?
Can you make yellow squash chips in an air fryer?
What dip goes with yellow squash chips?

Best Yellow Squash Chips
Yellow Squash Chips There is nothing quite like the first wave of summer squash. It shows up at the farmers market, it shows up in your CSA box, and if you have a garden, it shows up in piles on your kitchen counter.
- Total Time: 25 min
- Yield: 3.5 servings 1x
Ingredients
For the chips
4 yellow squash, sliced into 1/8-inch rounds
3 tablespoons olive oil
1 tsp garlic salt
1 1/4 cups parmesan, finely grated
1/2 tsp smoked paprika
For the dip
1/2 cup sour cream
2 tsp lemon juice
2 tsp cilantro, freshly minced
1/4 tsp freshly cracked black pepper
Instructions
1-Preheat your oven to 425°F and position: Preheat your oven to 425°F and position a rack in the upper third of the oven-this placement ensures the squash chips crisp up nicely on top from the direct heat. While the oven heats, slice your yellow squash into 1/8-inch rounds using a mandoline or sharp knife; consistent thickness is key for even cooking and crisping. Pat the squash slices dry with paper towels to remove excess moisture, which will help them achieve a crispier texture rather than steaming.
2-In a large bowl, toss the squash: In a large bowl, toss the squash slices with the olive oil and garlic salt until every piece is evenly coated. This step is crucial because the oil helps the squash brown and crisp while the garlic salt adds a foundational savory flavor. I recommend using your hands to gently toss-it ensures better coverage than a spoon and takes just 30 seconds.
3-Arrange the oiled squash slices in a: Arrange the oiled squash slices in a single layer on a baking sheet, slightly overlapping them if needed. In a small bowl, combine the finely grated parmesan with the smoked paprika, mixing thoroughly so the paprika distributes evenly and adds subtle color and depth. Generously top each squash slice with the cheese mixture-don’t be shy here, as the cheese will crisp up beautifully and create those addictive golden edges.
4-Bake for 10-15 minutes, until the squash: Bake for 10-15 minutes, until the squash is tender and the cheese is golden brown and crispy at the edges. Check around the 10-minute mark-oven temperatures vary, and you want to catch them at peak crispiness before they begin to shrivel. Remove from the oven and let cool for 2-3 minutes on the baking sheet so the cheese sets and hardens slightly.
5-While the squash roasts, whisk together the: While the squash roasts, whisk together the sour cream, lemon juice, freshly minced cilantro, and cracked black pepper in a small bowl until smooth and well combined. The fresh cilantro adds a bright herbal note that complements the savory, crispy squash beautifully. Taste and adjust seasoning if needed-you want the dip to be tangy and herbaceous.
6-Transfer the warm squash chips to a: Transfer the warm squash chips to a serving platter and arrange the herb dip in a small bowl alongside them. Serve immediately while the chips are still warm and crispy for the best texture and flavor.
Last Step:
Please leave a rating and comment letting us know how you liked this recipe! This helps our business to thrive and continue providing free, high-quality recipes for you.- Prep Time: 10 min
- Cook Time: 15 min
- Method: bake
Nutrition
- Calories: 550-700
- Fat: 46-58 g
- Carbohydrates: 22-30 g
- Protein: 17-27 g