Crunchy Dill Pickle Recipe — With Canning Directions
Every August when the garden starts throwing cucumbers at me faster than I can make salads, I turn to this exact crunchy dill pickle recipe.
It started as a way to avoid wasting produce, but now it is a yearly ritual my kids actually look forward to.
The sound of lids popping on the cooling rack is one of the most satisfying noises a home cook can hear, and it means we will have tangy, crisp pickles stacked in the pantry well into winter.
What makes this recipe special is that it gives you both a no fail pickle formula and complete water bath canning directions all in one place. You can slice them into hamburger chips, cut sturdy spears, or leave tiny cucumbers whole.

The brine hits that perfect balance of vinegar tang, garlic warmth, and dill freshness without any commercial aftertaste. The recipe makes 7 quarts or 14 pints, which sounds like a lot, but honestly once you open the first jar they disappear quickly.
Key takeaway: Trimming the blossom end off every cucumber matters more than you think. That small step removes enzymes that would otherwise soften the pickles over time, and it is the number one reason these stay crunchy for months.
Below I walk through why homemade pickles are worth the effort, the exact ingredients and tools you need, step by step canning instructions, storage, variations, and the expert tips I have learned after many batches.
Whether you are new to water bath canning or have been doing it for years, this guide will help you fill your pantry with the best dill pickles you have ever made.
Jump to:
- Crunchy Dill Pickle Recipe — With Canning Directions
- Why I Love Making Homemade Pickles
- Ingredients Needed
- Essential Canning Tools I Use
- How to Make
- Step 1: Sterilize the jars
- Step 2: Prep the cucumbers
- Step 3: Load the jars
- Step 4: Make the brine
- Step 5: Fill and seal
- Step 6: Process in the water bath
- Step 7: Cool and check seals
- Step 8: Wait for best flavor
- How to Sterilize Canning Jars
- Storage
- Variations To Recipe
- Expert Tips
- FAQs
- What is the best vinegar for canning crunchy dill pickles?
- How do you keep homemade canned pickles crunchy?
- How long should you let canned dill pickles sit before eating?
- Do you need to sterilize jars before canning dill pickles?
- Crunchy Dill Pickle Recipe
- Ingredients
- Instructions
- Last Step:
- Nutrition
- Did you make this recipe?
Why I Love Making Homemade Pickles
I will be honest: the first time I tried canning pickles I was intimidated. Boiling jars, measuring headspace, worrying about seals. It sounded like a science experiment I was destined to fail.
But once I actually went through the motions, I realized it is far easier than it looks, and the reward is real.
There is something deeply satisfying about pulling a jar of your own pickles off the shelf in December when the garden is frozen solid.
Summer produce is the main driver here. If you grow cucumbers or have access to a good farmers market, you know how quickly they pile up.
Pickling cucumbers are smaller, firmer, and have thinner skins than the big slicing types, which means they absorb brine beautifully and keep that signature snap. Persian and Kirby varieties are my favorites for this.
Instead of letting them go soft in the fridge, you can turn an entire basket into shelf stable jars in one afternoon.
Another reason I keep coming back to this recipe is the flavor flexibility. You can stick with the classic dill and garlic profile, or toss in a pinch of red pepper flakes for heat, a few coriander seeds for warmth, or even a little fresh dill frond if you have it growing.
Homemade means you control the salt level, the vinegar sharpness, and every spice note. Compare that to store bought jars that often taste flat or overly sweet, and there is no contest.
Finally, the shelf life is a game changer. A properly sealed jar stored in a cool pantry lasts up to one year. That means you are not rushing to eat everything within a week like refrigerator pickles.
You can open jars as needed for burgers, chopped into potato salad, or just as a crunchy side next to a sandwich.
It is one of the most practical preserving projects a home cook can learn, and once you taste your own, you will wonder why you waited so long.
Ingredients Needed
Here is what goes into the brine and jars for this crunchy dill pickle recipe. Every ingredient has a job, and small swaps can change the final result, so I stick close to this list when I am canning for the pantry.
- Pickling cucumbers: 8 to 10 small, firm cucumbers. Look for ones around 4 to 6 inches long with bumpy skin. Persian and Kirby types hold their texture best. Avoid large waxed slicing cucumbers.
- Water: 5 cups. Regular tap water works fine as long as it tastes good. If your water is very hard, filtered water can help keep the brine clear.
- White distilled vinegar: 3 1/2 cups. The 5% acidity level is important for safe canning. Do not swap in homemade vinegar or lower acidity types unless you are making refrigerator pickles only.
- Dill seed: 5 teaspoons. Dill seed gives a more concentrated herb flavor than fresh fronds alone. You can supplement with a small sprig of fresh dill per jar, but the seeds are the backbone.
- Mustard seeds: 4 teaspoons. These add a subtle warmth and slight bitterness that rounds out the vinegar tang.
- Garlic: 7 to 14 cloves, one per jar. Fresh peeled cloves deliver a punch that jarred minced garlic cannot match. Slice them in half if they are extra large.
- Black peppercorns: 32 whole peppercorns. They infuse slowly and add a gentle bite without overpowering the dill.
- Pickling salt: 4 tablespoons. This is pure fine salt without iodine or anti caking agents, which can cloud the brine and affect flavor. You can find it near canning supplies at grocery stores or online.
- Sugar: 2 tablespoons. Just enough granulated sugar to soften the vinegar edge without making the pickles sweet. It helps balance the brine rather than dominate it.
Note: Using fresh garlic and pickling salt matters more than you might think. I tried regular table salt once and the brine turned cloudy and slightly metallic. Sticking to pickling salt keeps everything bright and clean tasting.
Essential Canning Tools I Use
If you are new to water bath canning, a few basic tools make the process safer and much less stressful. You do not need a professional kitchen; a basic canning kit covers most of what you need.
- Water bath canner with rack: A large deep pot with a fitted rack that keeps jars off the direct bottom heat. The rack also lets you lift multiple jars in and out at once. Many stock pots come with a rack included, or you can buy one separately.
- Jar lifter: Tongs with rubberized grips designed to grab hot jars securely. Trying to lift boiling jars with regular tongs is asking for trouble, so this tool is worth every penny.
- Magnetic lid wand: A small plastic wand with a magnet on the end. You dip it into hot water, pick up a seal, and place it on the jar without touching the sterile surface with your fingers.
- Wide mouth funnel: Helps pour hot brine into jars without spilling down the sides, which is crucial for getting a clean seal.
- Headspace measuring tool: Often built into the funnel or jar lifter. It lets you check the 1/2 inch gap at the top of each jar before sealing.
- Mason jars, lids, and bands: Use pint or quart size depending on your preference. Always use new lids for canning; the sealing compound on reused lids may not hold reliably. Bands can be reused if they are rust free.
All of these come in inexpensive canning starter kits, and once you have them, you are set for years of pickles, jams, and tomato sauces. I keep mine in a box under the counter and pull it out every August without having to think about what is missing.
How to Make
This process looks long on paper because I want you to have every detail, but once you get moving it flows naturally. The prep takes about 40 minutes, the boiling about 30 minutes, and then the jars do the rest of the work while you sleep. Plan to start mid morning so you are not rushing at the end.
Step 1: Sterilize the jars
Detailed sterilization steps are in the next section, but in short: wash jars, lids, and bands in hot soapy water, rinse well, then submerge them in your canning pot with the rack in place.
Bring the water to a boil for 5 to 10 minutes, then reduce the heat so the jars stay hot while you prep the cucumbers. Hot jars are essential for preventing thermal shock when you pour in boiling brine.
Step 2: Prep the cucumbers
Wash every cucumber under cold running water and gently scrub off any dirt or tiny spines. Pat them dry, then trim off both ends. The blossom end in particular contains enzymes that soften pickles, so do not skip this cut. Slice them into your preferred shape: rounds for burgers, spears for snacking, or leave small ones whole.
Step 3: Load the jars
Place one peeled garlic clove in each warm jar. Divide the dill seed, mustard seeds, and peppercorns evenly among all the jars. Then pack the cucumber pieces in tightly, standing spears upright or layering rounds. Tight packing prevents floating and helps the pickles stay submerged in brine, which keeps texture even.
Step 4: Make the brine
Combine the 5 cups of water, 3 1/2 cups vinegar, 4 tablespoons pickling salt, and 2 tablespoons sugar in a saucepan over medium high heat. Stir continuously while it comes to a boil so the salt and sugar dissolve completely.
Once it reaches a full rolling boil, remove it from the heat. A few undissolved grains of salt can throw off the brine balance, so stir thoroughly.
Step 5: Fill and seal
Set the wide mouth funnel on a jar and ladle hot brine in, leaving exactly 1/2 inch of headspace at the top. Wipe the rim clean with a damp paper towel. Anything on the rim can prevent a proper seal.
Place a warm lid on top and screw the band down hand tight only. Do not crank it down hard; the jar needs to vent air during processing.
Step 6: Process in the water bath
With your canning pot at a full boil and the rack lifted out, set the filled jars onto the rack and lower it into the water. Make sure every jar is fully submerged by at least an inch of water.
Process pint jars for 10 minutes and quart jars for 20 minutes, counting from when the water returns to a full boil. If you live above 1,000 feet elevation, add extra time according to standard altitude adjustments.
Step 7: Cool and check seals
Lift the rack out and use the jar lifter to transfer each jar to a towel lined surface. Leave space between jars so air can circulate.
You will hear the lids pop as they seal, usually within the first hour but sometimes taking up to 12 to 24 hours. When cool, press the center of each lid.
If it flexes or pops back, that jar did not seal and goes in the fridge for eating within a week.
Step 8: Wait for best flavor
Label the jars with the date and store them in a cool dark pantry. Try to wait at least 3 weeks before opening the first jar.
The flavors deepen significantly over time, and pickles at the two month mark are noticeably better than ones opened right away. Once opened, keep the jar in the fridge and eat the pickles within one week.
How to Sterilize Canning Jars
Sterilizing jars properly is the foundation of safe canning. I learned the hard way that skipping this step or letting jars cool down before filling leads to cracking and seal failures, so I follow these steps every single time without shortcuts.
- Wash first: Even brand new jars need a wash in hot soapy water to remove manufacturing dust. Rinse thoroughly. Check rims for nicks or cracks and discard any damaged jars.
- Set up the canning pot: Place the rack in the bottom of the pot. Fill the pot with enough water to cover the jars by at least an inch once they are submerged. Bring the water to a boil over high heat.
- Boil the jars: Using the jar lifter, lower clean jars, lids, and bands into the boiling water. Process them for 5 to 10 minutes at a steady boil. This step kills any remaining bacteria and yeast that could spoil the pickles later.
- Keep them hot: After the boil time, reduce the heat so the water stays at a gentle simmer. Leave the jars in the hot water until you are ready to fill them. Removing them too early and letting them cool on the counter is the most common cause of breakage when hot brine hits cold glass.
- Lift with care: When you are ready to fill a jar, lift it out with the jar lifter, pour out any water inside, and set it on a clean towel. Work one jar at a time so the others stay hot.
Safety reminder: Never place jars directly on the bottom of a canning pot without a rack. Direct contact with the burner heat can cause the glass to shatter even before you add brine.
Storage
Once your jars have cooled and the seals are confirmed solid, proper storage is straightforward but a few details matter for long term quality.
Keep sealed jars in a cool, dry, dark place such as a basement pantry, a kitchen cabinet away from the stove, or a closet that does not get direct sunlight.
Temperature swings and light can degrade the pickles over time, so avoid shelves above the refrigerator or near a window. Properly stored, these canned dill pickles hold their crunch and flavor for up to one year.
Check the seals before storing. Press down on the center of each lid. If it does not flex, the seal is good.
If a lid makes a popping sound when pressed, the jar is not sealed. Unsealed jars are still safe to eat, but they must go into the refrigerator and be consumed within 7 days. Do not try to store unsealed jars at room temperature.
If you catch an unsealed jar within 12 hours of processing, you have the option to re process it. Remove the lid and band, wipe the jar rim with a clean dry towel, place a new warm lid on, and process again in the water bath for the full time.
After 12 hours, re processing is less reliable and refrigerator storage is the safer choice.
Label each jar with the date you canned it. I write directly on the lid with a permanent marker. This small habit helps you rotate stock and open the oldest jars first.
The ideal window for peak flavor starts around the 3 week mark and lasts through the entire storage year, with deeper dill and garlic notes developing as time goes on.
Variations To Recipe
One of the joys of making your own pickles is tweaking the spice blend to match your taste. Once you have the basic brine and canning method down, you can play with these variations without affecting safety as long as you keep the vinegar to water ratio unchanged.
Spicy dill pickles: Add a half teaspoon of red pepper flakes per jar, or drop in one small dried chili. The heat builds slowly over the weeks and pairs beautifully with the garlic and dill. Start conservative and adjust the next batch.
Herb swaps: While dill seed is the foundation, you can layer in a small sprig of fresh dill per jar for a brighter green note. Fresh dill alone does not give as much depth as the seeds, so I use both when I have it.
You can also try a teaspoon of coriander seeds for a citrusy undertone, or a bay leaf per jar for a subtle earthy layer.
Different cuts: The recipe works with any shape. Hamburger slices are great for sandwiches. Spears are classic for snacking. Whole baby cucumbers make an elegant presentation and are fun to pull out for a cheese board. Just keep the pieces similar in size within each jar so brine penetration is even.
Fresh versus dried dill: Dried dill seed provides concentrated flavor that holds up well to the heat of canning. Fresh dill fronds are more delicate and can lose some punch during processing, but they add a lovely visual element.
You can safely use either, but if you rely only on fresh dill, increase the amount and expect a milder final flavor.
Extra brining liquid: If you have leftover brine after filling all the jars, do not throw it away. Store it in a sealed container in the refrigerator for up to a week. You can pour it over fresh cucumber slices for a quick refrigerator pickle batch, or use it as a tangy addition to salad dressings.
Expert Tips
After several seasons of canning pickles, these are the details that made the biggest difference between a batch that was just okay and one that earned permanent shelf space.
- Keep jars hot until the moment you fill them: Cold jars crack when boiling brine hits them. Leaving jars in the simmering canner and pulling them out one at a time is the simplest way to avoid breakage and wasted ingredients.
- Trim both ends of every cucumber: The blossom end contains enzymes that soften pickle texture. Cutting it off, even just a thin slice, is one of the most reliable ways to guarantee crunch for months. I learned this from a failed batch that turned disappointingly soft, and I have not skipped it since.
- Pack jars tightly: Cucumbers shrink slightly as they absorb brine. If you leave gaps, the pickles will float and the tops may soften. Wedge them in firmly without crushing, and the brine will hold them in place.
- Hand tight bands only: If you screw the bands on too tightly, air cannot escape during processing and the seal may fail. You want resistance but not a death grip. Think snug, not strained.
- Respect processing times: Pint jars need 10 minutes at a full boil; quart jars need 20 minutes. If you are at an altitude above 1,000 feet, add 5 minutes for pints and 10 minutes for quarts to ensure safe preservation. Undercooking can lead to spoilage, so set a timer and do not guess.
- Patience equals flavor: Opening a jar the next day is tempting, but the pickles will taste mostly of vinegar and salt. Let them rest at least 3 weeks, and ideally 2 months, for the garlic, dill, and spices to fully meld. The wait transforms a good pickle into a great one.
- Watch for seal failures: After 24 hours, press every lid. If one springs back, refrigerate that jar immediately. Sealed jars have a concave lid that does not move. Re processing is an option within the first 12 hours, but after that, refrigeration is the safest path.
FAQs
What is the best vinegar for canning crunchy dill pickles?
How do you keep homemade canned pickles crunchy?
How long should you let canned dill pickles sit before eating?
Do you need to sterilize jars before canning dill pickles?
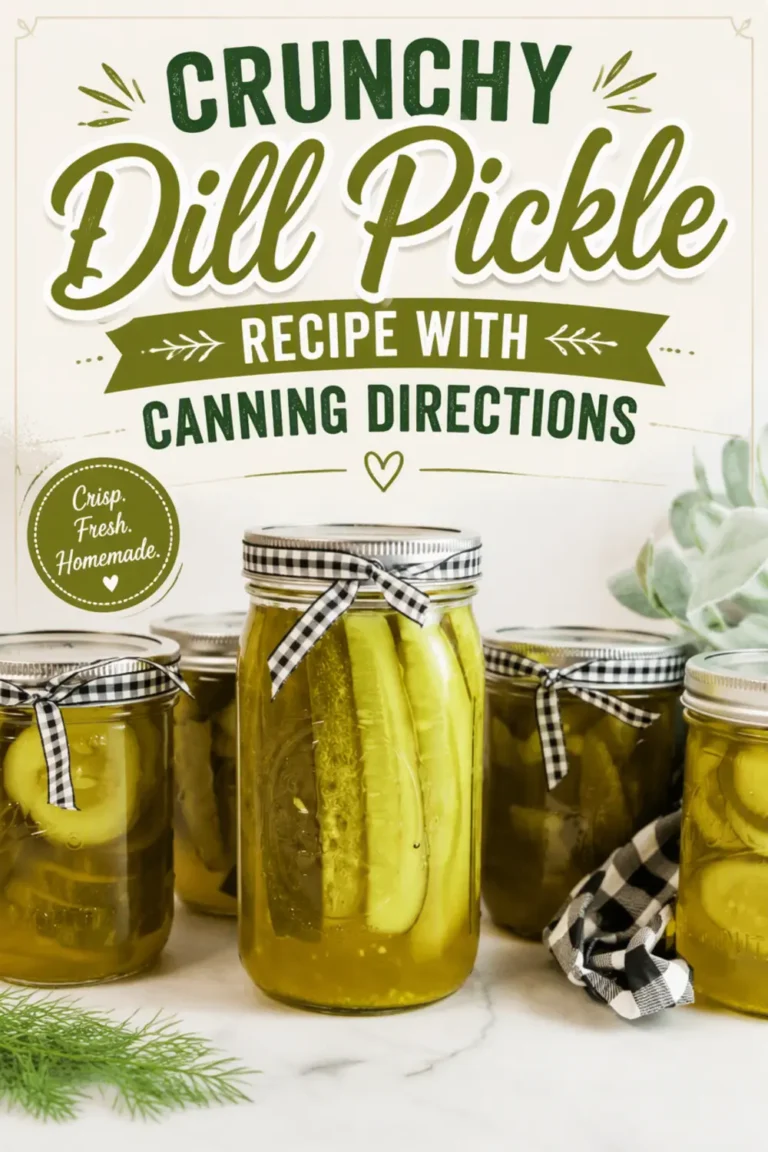
Crunchy Dill Pickle Recipe
Crunchy Dill Pickle Recipe — With Canning Directions Every August when the garden starts throwing cucumbers at me faster than I can make salads, I turn to this exact crunchy dill pickle recipe. It started as a way to avoid wasting produce, but now it is a yearly ritual my kids actually look forward to.
- Total Time: 790 min
- Yield: 7 quarts or 14 pints 1x
Ingredients
Ingredients
8–10 cucumbers pickling cucumbers
5 cups water
3 1/2 cups white distilled vinegar
5 teaspoons dill seed
4 teaspoons mustard seeds
7–14 cloves garlic
32 whole black peppercorns
4 tablespoons pickling salt
2 tablespoons sugar
Instructions
Instructions
1-Start by sterilizing your mason jars and: Start by sterilizing your mason jars and lids. Clean well with soap and water, then place in a large pot with water, and let the water boil, then after 5-10 minutes, lower to let the jars simmer while you work on the pickles.
2-Wash and rinse all your cucumbers: Wash and rinse all your cucumbers. Trim off the ends, and then slice into spears, hamburger slices, or any style you want.
3-Add 1 clove of garlic into each: Add 1 clove of garlic into each jar, and then with the rest of the dill seed, mustard seed, and peppercorn, split between all the jars.
4-Add in the pickles, packing the jars: Add in the pickles, packing the jars as tight as you can.
5-Add your water, vinegar, pickling salt and: Add your water, vinegar, pickling salt and sugar in a pan over medium-high heat. bring mixture to a boil stirring, to make sure the salt and the sugar fully dissolve.
6-Pour the pickle brine into the prepared: Pour the pickle brine into the prepared jars. Leave 1/2″ of space at the top. Then place seals on and lightly seal hand tight. Don’t do too tight.
7-In your water canning pot, you will: In your water canning pot, you will place your fitted rack in. Fill with water and bring to a full boil. Lift the rack out and place jars on the rack and lower into the water.
8-Make sure all the jars are fully: Make sure all the jars are fully submerged and boil for 10 minutes if pint size, and 20 minutes if quart size jars.
9-Once done, remove the jars carefully and: Once done, remove the jars carefully and place on a towel lined cooling rack.
10-The seals will pop as they lock: The seals will pop as they lock tight. You should expect them to all seal within 12-24 hours of being canned.
11-Store your canned dill pickles in a: Store your canned dill pickles in a pantry or cool dry place for up to 1 year. Best to allow the pickles to sit at least 3 weeks, the longer they sit the more flavor.
Last Step:
Please leave a rating and comment letting us know how you liked this recipe! This helps our business to thrive and continue providing free, high-quality recipes for you.- Prep Time: 40 min
- Cook Time: 30 min
- Method: stovetop
Nutrition
- Serving Size: 1g
- Calories: 17
- Sugar: 1g
- Sodium: 14mg
- Carbohydrates: 3g
- Fiber: 1g