What Is a Chinese Swiss Roll?
A Chinese Swiss Roll is the kind of cake that stops you mid conversation the first time you try it. I still remember peering through the glass at a bakery in Chinatown, watching the baker dust a long, golden log with powdered sugar.
One bite and I was hooked: the crumb was impossibly soft and airy, only lightly sweet, and it practically melted on my tongue. That moment turned me into a home baker determined to recreate that same tender spiral in my own kitchen.
At its heart, this is a chiffon style sponge built on separated eggs. The yolks carry the fat and flour, while the whites are whipped into a stable meringue that lifts the whole cake.

The result is a thin sheet that rolls around itself without cracking, even without a filling. Many Chinese bakeries offer filled variations: whipped cream and sliced strawberries, a smear of sweet red bean paste, or savory pork floss for a salty sweet contrast.
But the plain version is where I think the true character of the sponge shines, because there is nothing to hide behind.
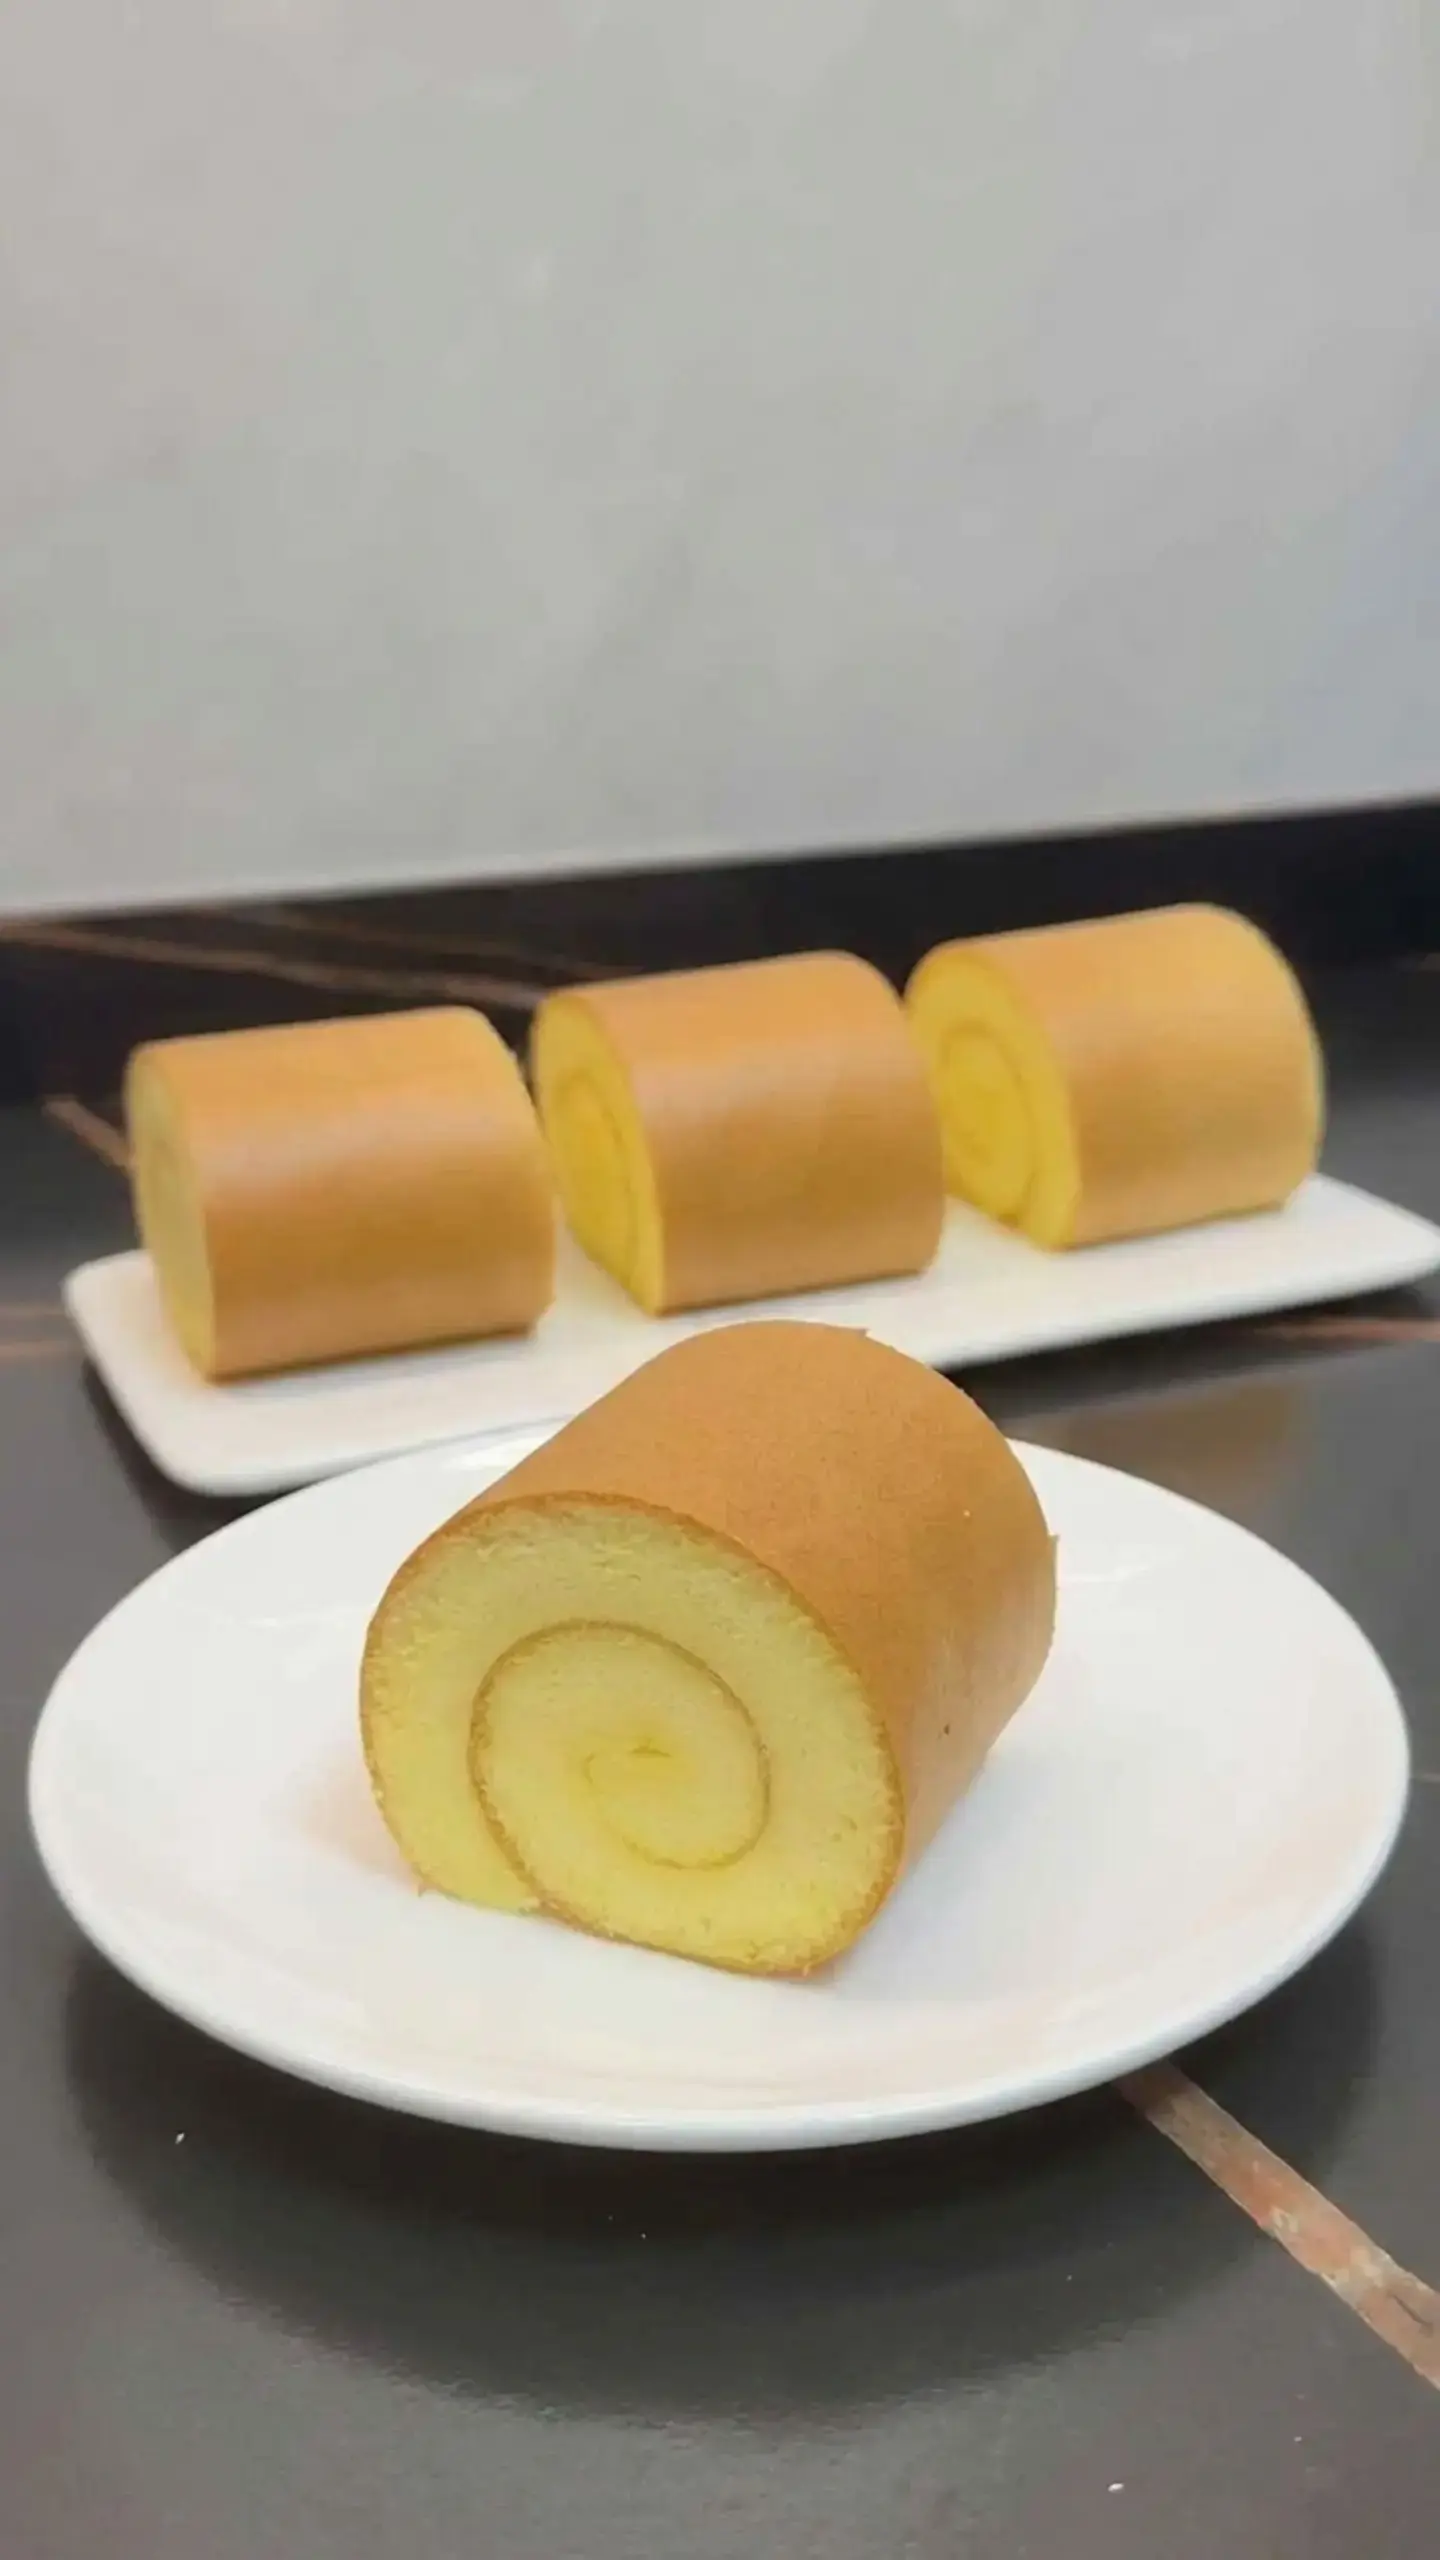
Compared to a classic Western Swiss roll, the Chinese version is noticeably less sweet and relies on oil instead of butter, so it stays moist and springy longer. It also uses low gluten cake flour, which keeps the crumb delicate enough to roll without tearing.
Once you master this base, you can start playing with flavors and fillings. If you love the pillowy texture of Asian bakery cakes, you will also enjoy my Ube Roll Cake, which shares the same soft sponge but adds a gorgeous purple yam twist.
And if you want to see another take on this classic treat, this fluffy Chinese Swiss roll guide offers plenty of extra inspiration.
Jump to:
- What Is a Chinese Swiss Roll?
- Ingredients
- How to Make a Chinese Swiss Roll
- Step 1: Prepare the Eggs and Oven
- Step 2: Make the Egg Yolk Batter
- Step 3: Whip the Egg Whites
- Step 4: Combine the Batters
- Step 5: Bake the Sponge
- Step 6: Roll the Warm Cake
- Step 7: Set, Slice, and Serve
- Tips for a Soft, Crack Free Roll
- Frequently Asked Questions
- What is a Chinese Swiss roll and how is it different from a classic Swiss roll cake?
- How can I prevent my Chinese Swiss roll from cracking when I roll it?
- Can I use all-purpose flour or a different oil for Chinese Swiss roll in the United States?
- How should I fill, store, and serve a homemade Chinese Swiss roll?
- Chinese Swiss Roll – Soft and Fluffy
- Ingredients
- Instructions
- Last Step:
- Nutrition
- Did you make this recipe?
Ingredients
The ingredient list is reassuringly short, and every item has a purpose. Here is everything you need to make a soft and fluffy Chinese Swiss Roll at home.
| Ingredient | Quantity | Notes |
|---|---|---|
| Large eggs | 5 (60, 65 g each) | Separated; whites chilled, yolks at room temperature |
| Corn oil | 40 g | Neutral oil; canola or soybean work too |
| Milk | 60 g | Whole or 2% is fine |
| Cake flour (low gluten) | 60 g | Sifted; see substitution below |
| White sugar | 50 g | Divided; all goes into the meringue |
| Lemon juice | 3 g | Stabilizes the egg whites |
Cake flour is the real star for that melt in the mouth tenderness. If you cannot find it in your local U.S.
grocery store, you can make a quick substitute: measure 1 cup of all purpose flour, remove 2 tablespoons, and replace them with 2 tablespoons of cornstarch. Whisk well before using. The texture will be very close, though the real cake flour still wins for lightness.
Everything else is pantry friendly. Corn oil keeps the cake moist without adding flavor, and the lemon juice helps the egg whites whip up into a glossy, stable foam that won’t deflate later.
How to Make a Chinese Swiss Roll
Making a Chinese Swiss Roll at home is a series of simple, deliberate steps. As long as you keep your bowls clean and your folding gentle, you will be rewarded with a tall, springy sponge that rolls beautifully.
Step 1: Prepare the Eggs and Oven
Start by preheating your oven to 150 °C with both top and bottom heat. Grab two mixing bowls and make sure they are completely clean, dry, and free of any oil or water.
Even a tiny speck of yolk in the whites will sabotage your meringue, so I always crack each egg into a small ramekin first before adding it to the big bowl.
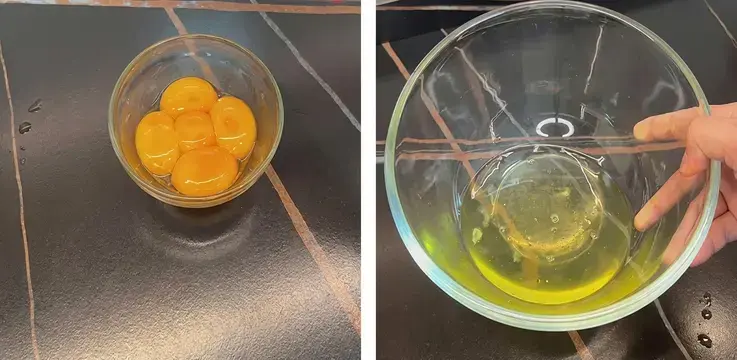
Separate all five eggs, then place the bowl of whites in the freezer for 10 minutes. This quick chill makes whipping easier and helps build a sturdier foam.
Step 2: Make the Egg Yolk Batter
In the yolk bowl, whisk the 40 g of corn oil and 60 g of milk together until they become one creamy, emulsified mixture. Sift the 60 g of cake flour on top, then stir gently until no lumps remain.
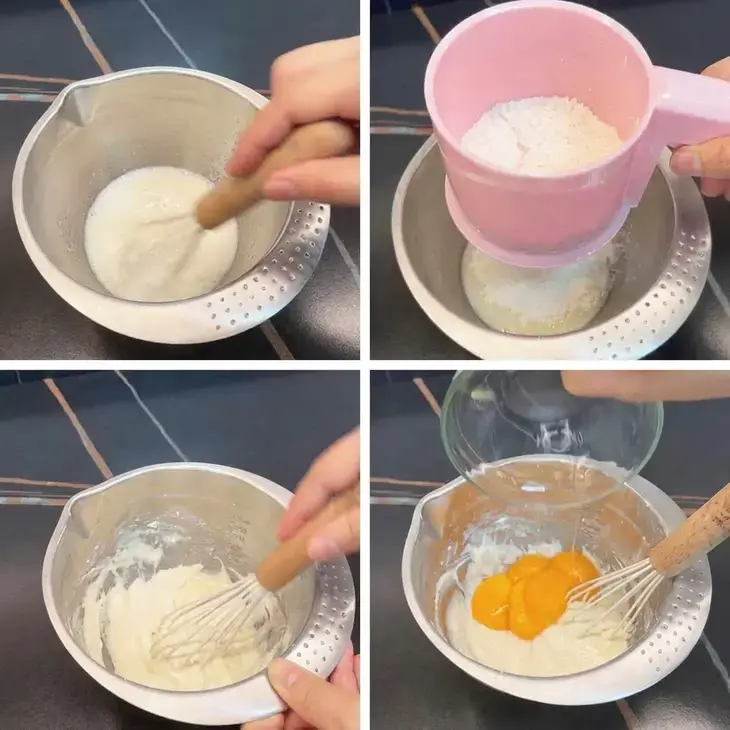
I like to use a flexible spatula and trace a “Z” shape through the batter; this motion cuts down on gluten development so the sponge stays tender.
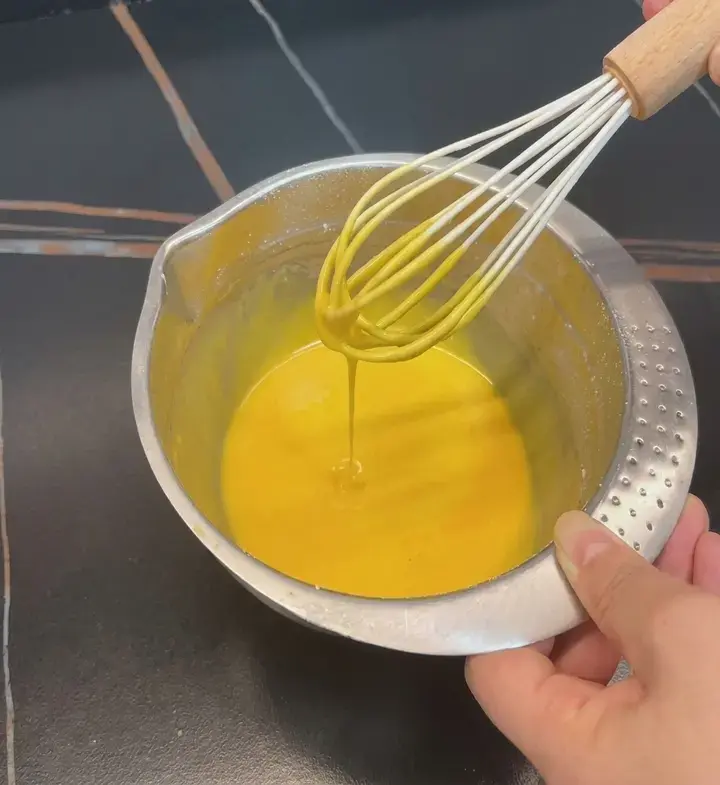
Once smooth, add the egg yolks and continue folding in that same Z pattern until you have a glossy, fluid batter. Set it aside while you work on the whites.
Step 3: Whip the Egg Whites
Retrieve the chilled whites and add the 3 g of lemon juice. With an electric mixer on high speed, beat for about 50 seconds until large bubbles cover the surface. Now start adding the 50 g of sugar in three portions.
Let the first addition whip until the bubbles turn fine and uniform, then add the second portion. When the foam looks thick and white, scatter in the last of the sugar. Keep beating just until soft peaks form.
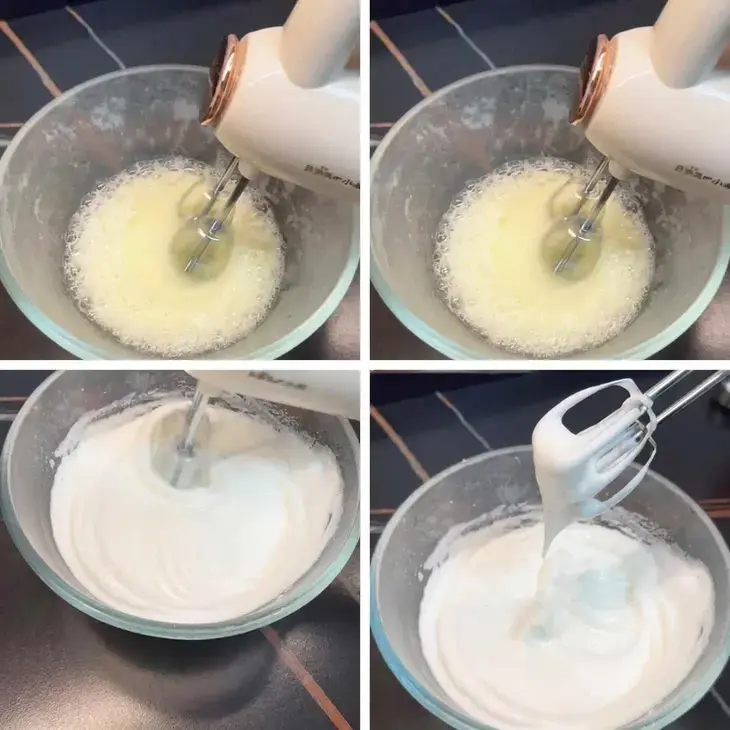
The meringue will look glossy and hold a curved, droopy tip when you lift the whisk; this is exactly where you should stop.
Step 4: Combine the Batters
This is the only delicate part of the whole process. Scoop about one third of the whipped egg whites into the yolk batter and fold them together with a light hand.
I cut down through the center with my spatula, scrape up one side of the bowl, and fold the mixture over itself, turning the bowl a quarter turn each time.
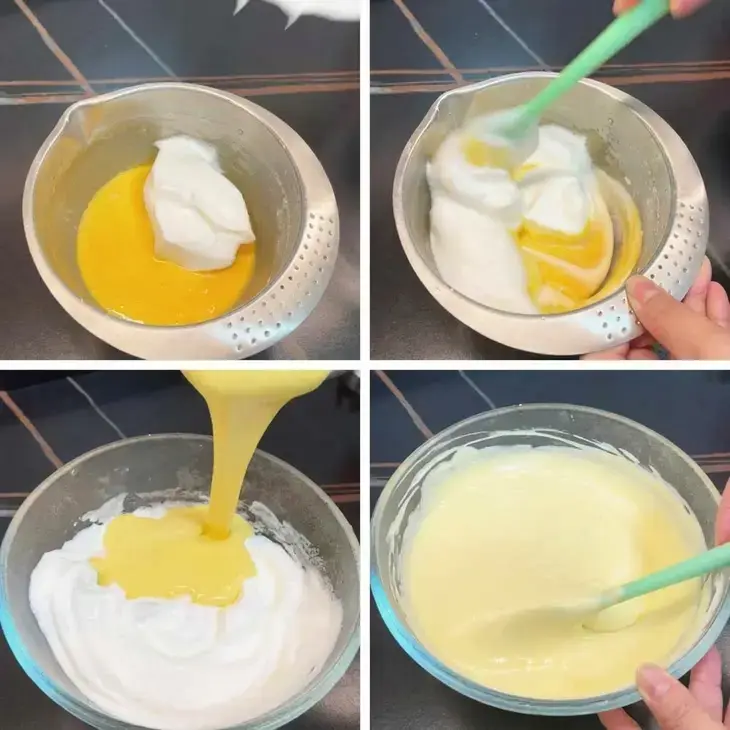
Once that portion is barely blended, pour the rest of the whites on top and continue folding until no streaks remain. The finished batter should be voluminous and almost cloud like, so resist the urge to stir.
Step 5: Bake the Sponge
Line a rectangular baking tray with parchment paper, leaving a slight overhang on the sides. Pour the batter into the centre and use an offset spatula to spread it evenly into the corners.
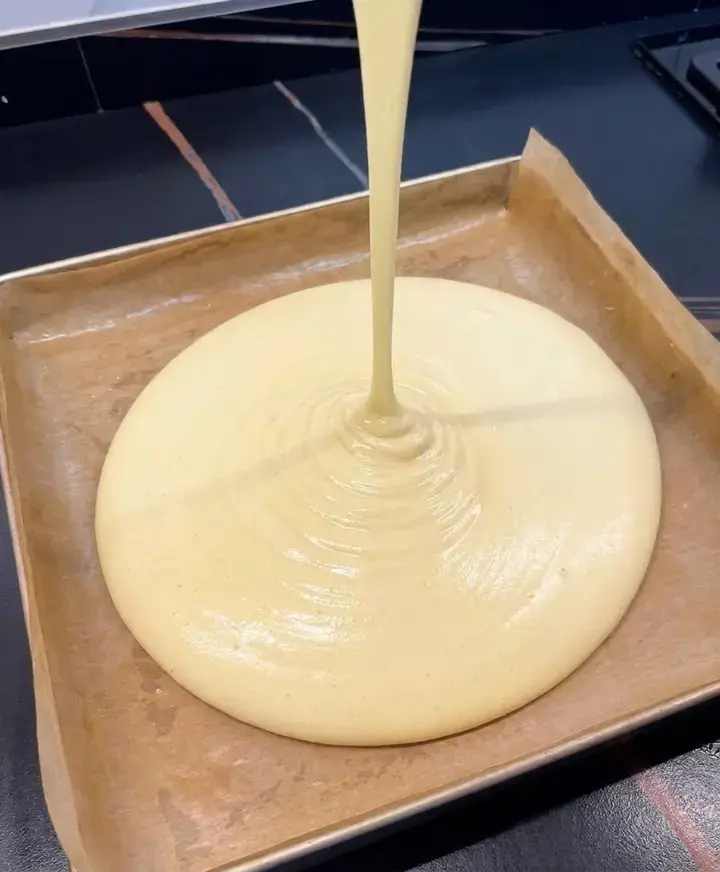
Give the tray a few gentle taps on the counter to pop any large air bubbles. Slide it into the preheated oven and bake at 150 °C for 20 minutes.
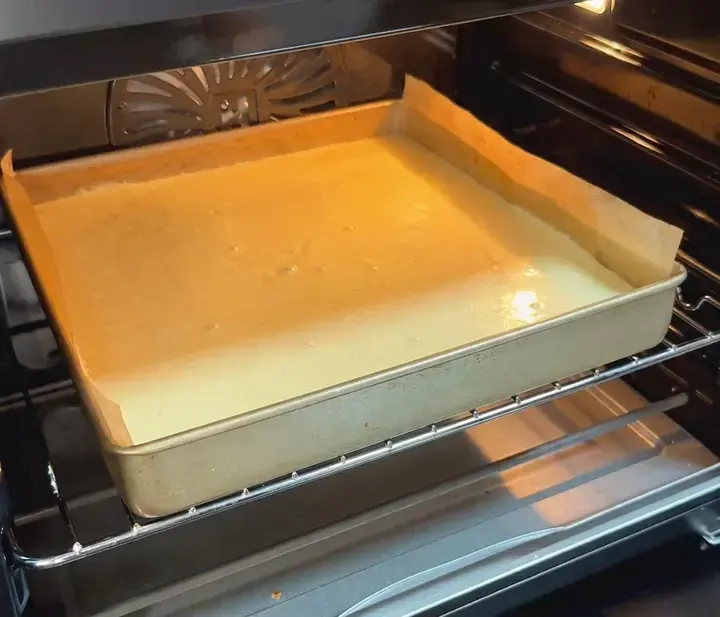
Then, increase the top heat to 160 °C while keeping the bottom at 150 °C, and bake for another 10 minutes. The cake is ready when the top is golden brown and the surface springs back lightly when you press it with your finger.
Step 6: Roll the Warm Cake
Take the tray out of the oven and let the cake rest on a cooling rack only until it is still warm but comfortable to handle. Place a fresh sheet of parchment paper directly on top of the sponge, then flip the whole thing over.
Carefully peel off the paper that the cake baked on. Now, while the sponge is warm and flexible, position a rolling pin at one short edge and use the bottom parchment to help you roll the cake forward, pulling the paper away as you go so it does not get trapped inside.
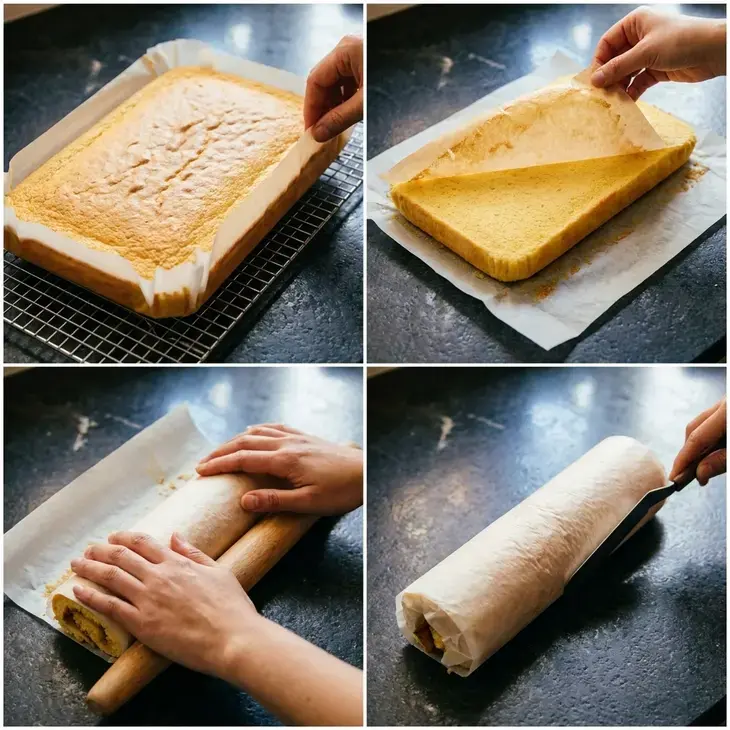
Once the log is formed, I run a spatula along the seam to tighten it and help it hold its spiral.
The first time I did this, I was convinced the cake would snap, but rolling while warm really is the secret. It bends willingly, almost like a soft kitchen towel, and sets into a neat, crack free roll.
Step 7: Set, Slice, and Serve
Leave the rolled cake to rest for at least 30 minutes. This short setting time fuses the layers together so that every slice reveals a clean spiral. Use a sharp serrated knife to cut even rounds, wiping the blade between slices for the tidiest presentation.
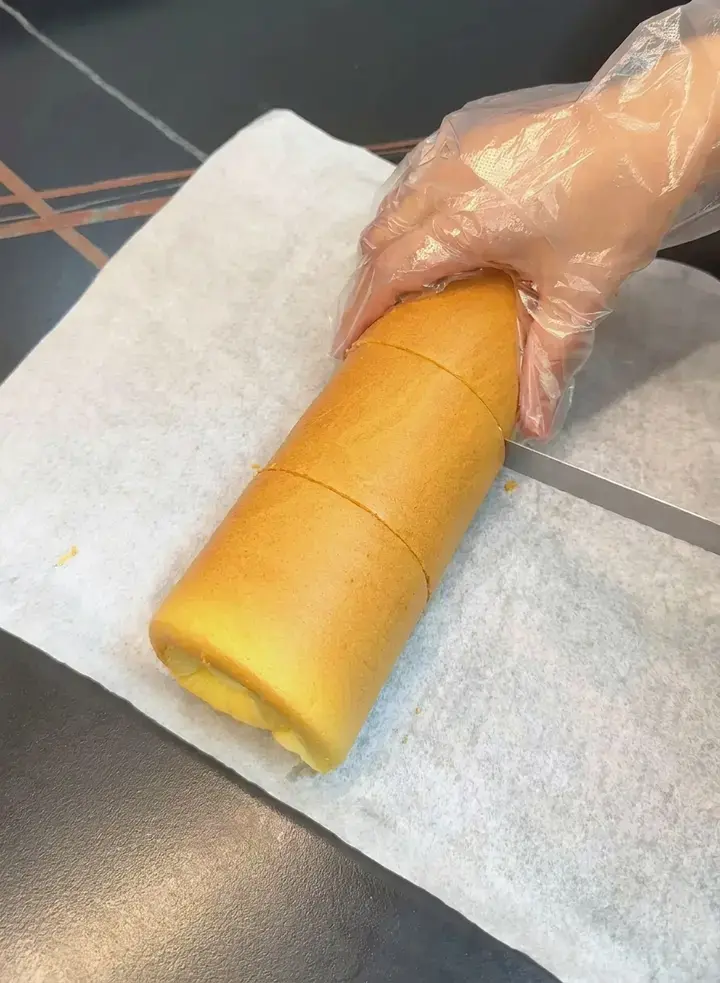
I often serve it as a light breakfast with tea or dust a little confectioners’ sugar on top for an afternoon pick me up.
Tips for a Soft, Crack Free Roll
Over the years, a handful of small habits have made the difference between a stressed out baker and a cake that practically rolls itself. Here are the ones that matter most.
Start with absolutely clean tools. Any trace of oil, water, or egg yolk in the bowl or beaters will keep the whites from whipping to their full volume. I wipe my bowl with a paper towel and a drop of vinegar before I even separate the eggs.
Fold, don’t stir. The meringue holds all the air that makes the sponge rise. Use a gentle cut, and fold motion, and stop as soon as the two mixtures are combined. A few faint white streaks are safer than an overworked, deflated batter.
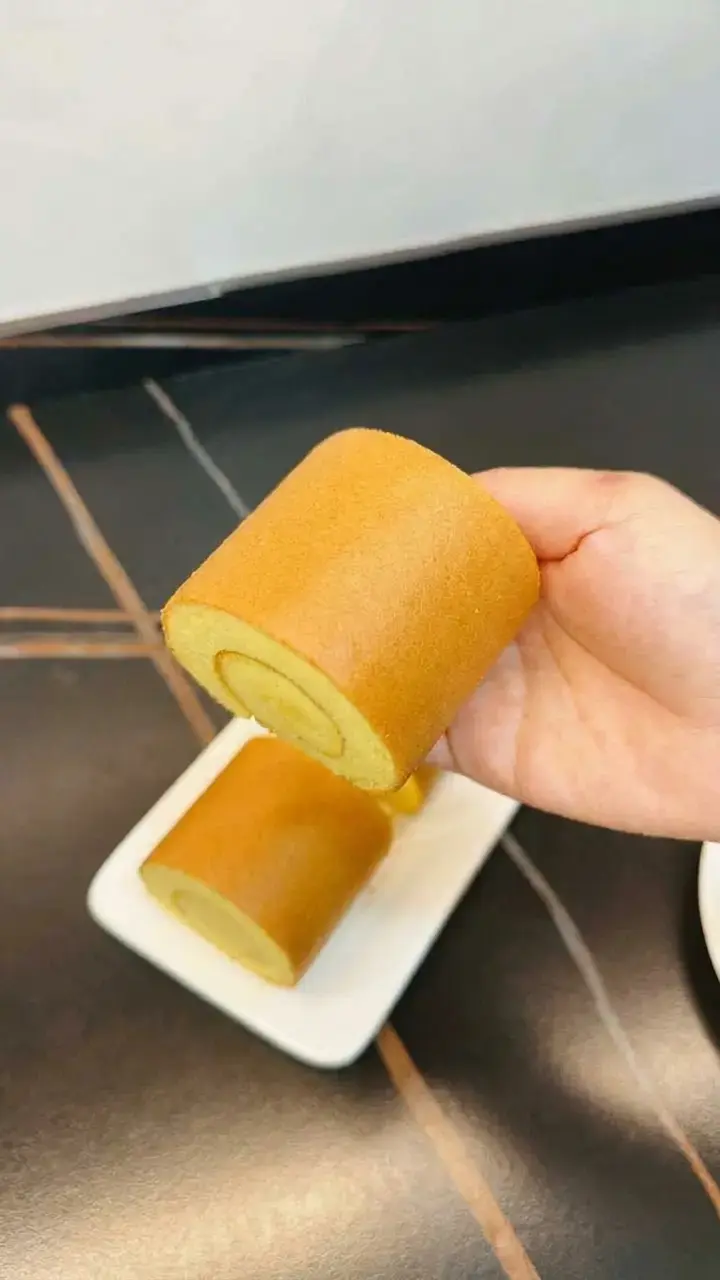
Trust your senses over the clock. Every oven runs a little differently. I know my oven runs about 10 degrees hot, so I start checking color and springiness a couple of minutes early. The cake should be evenly golden and feel firm but bouncy on top.
Roll while the cake is still warm. Once a sponge cools completely, the starches firm up and it becomes brittle. You want it just hot enough that you can hold the tray without oven mitts, about 5 to 10 minutes out of the oven. That flexibility is your best friend for a smooth spiral.
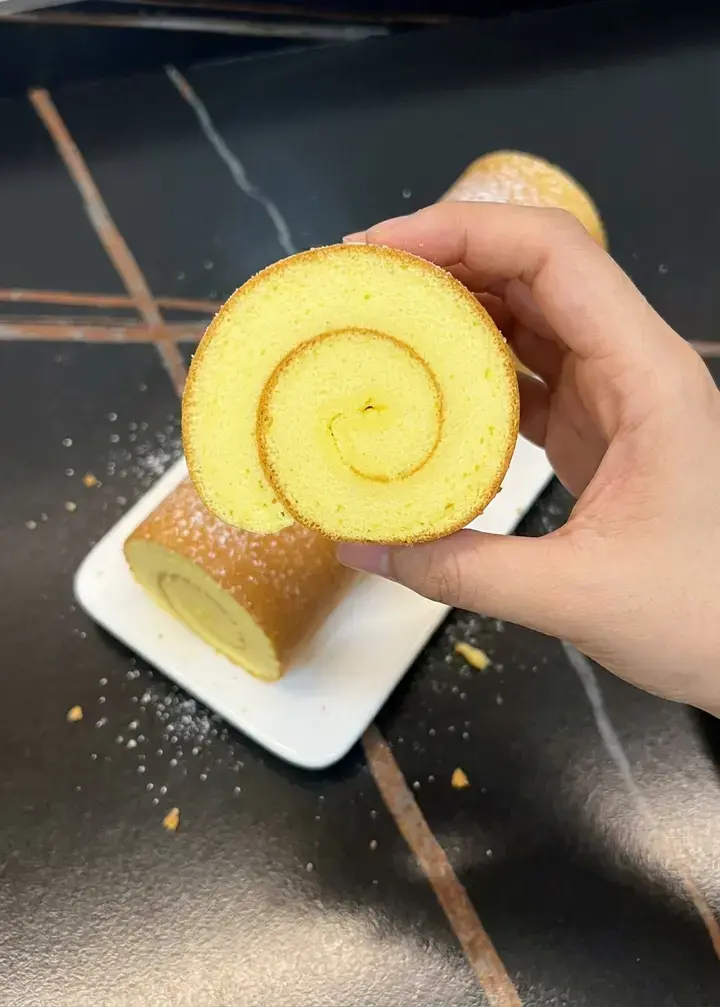
Spread the batter evenly. An uneven layer bakes unevenly, and thin spots can burn or crack later. Take an extra minute to smooth the surface and fill the corners of the tray. The few extra seconds of tapping also help settle large bubbles that might cause weak spots.
Remember, a warm cake rolls without a fuss; a cold cake will fight you with every inch.
Once you try this basic recipe, you can easily add your favorite fillings for a completely new treat. A layer of whipped cream and fresh mango, a smear of matcha custard, or even a sprinkle of pork floss turns the same soft sponge into something entirely your own.
Frequently Asked Questions
What is a Chinese Swiss roll and how is it different from a classic Swiss roll cake?
How can I prevent my Chinese Swiss roll from cracking when I roll it?
Can I use all-purpose flour or a different oil for Chinese Swiss roll in the United States?
How should I fill, store, and serve a homemade Chinese Swiss roll?
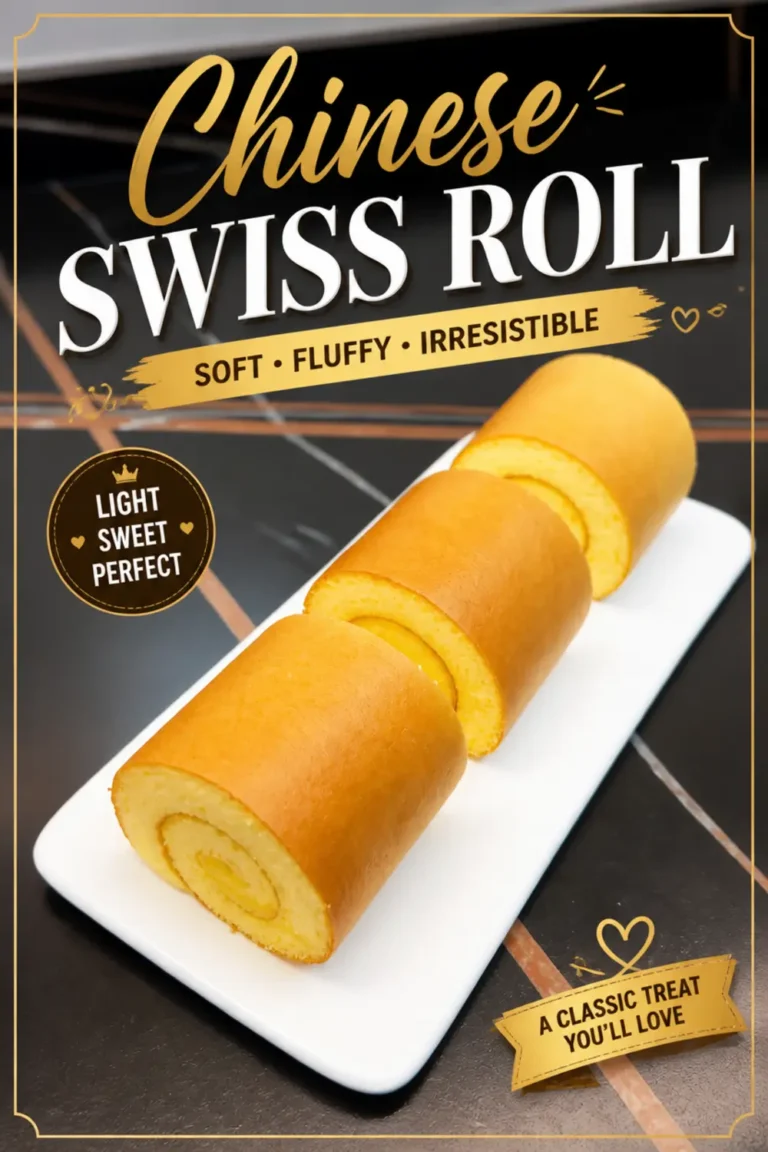
Chinese Swiss Roll – Soft and Fluffy
What Is a Chinese Swiss Roll? A Chinese Swiss Roll is the kind of cake that stops you mid conversation the first time you try it.
- Total Time: 0 min
- Yield: 4 1x
Ingredients
5 large eggs, 60-65g each
40 g corn oil
60 g milk
60 g cake flour, low-gluten flour
50 g white sugar
3 g lemon juice
Instructions
Step 1: Preparation
1-Preheat the oven to 150°C (top and: Preheat the oven to 150°C (top and bottom heat).
2-Prepare two clean, dry bowls-one for the: Prepare two clean, dry bowls-one for the egg whites and one for the egg yolks. Ensure they are free of oil and water to prevent any interference with the egg white whipping process.
3-Separate the eggs, placing the whites in: Separate the eggs, placing the whites in one bowl and the yolks in another. To make the egg whites easier to whip later, place the bowl of egg whites in the freezer for 10 minutes.
Step 2: Make the Egg Yolk Batter
4-In a separate bowl, combine 40g corn: In a separate bowl, combine 40g corn oil and 60g milk, whisking until emulsified.
5-Sift 60g cake flour into the milk: Sift 60g cake flour into the milk and oil mixture, stirring until there are no lumps or dry spots.
6-Add the egg yolks to the batter: Add the egg yolks to the batter and gently fold with a spatula in a “Z” motion until the batter becomes smooth and glossy. Set aside.
Step 3: Whip the Egg Whites
7-Remove the egg whites from the freezer: Remove the egg whites from the freezer and add 3g lemon juice to help stabilize the meringue.
8-Using an electric mixer, whip the egg: Using an electric mixer, whip the egg whites on high speed for about 50 seconds until they form large bubbles.
9-Gradually add 50g white sugar in three: Gradually add 50g white sugar in three portions: After the first addition, whip until large bubbles form. Add the second portion and whip until the bubbles become finer. Add the final portion of sugar and continue to whip until soft peaks form, where the egg whites curve slightly when the whisk is lifted.
Step 4: Combine the Batter
10-Gently fold 1/3 of the whipped egg: Gently fold 1/3 of the whipped egg whites into the egg yolk batter using a spatula. Fold carefully, ensuring you don’t deflate the mixture.
11-Once incorporated, add the remaining egg whites: Once incorporated, add the remaining egg whites to the mixture and gently fold until the batter is smooth and fully combined. Avoid overmixing to preserve the airiness of the batter.
Step 5: Baking
12-Line a baking tray with parchment paper: Line a baking tray with parchment paper. Pour the batter onto the tray and use a spatula to spread it evenly, ensuring the surface is smooth.
13-Tap the tray gently on the counter: Tap the tray gently on the counter to release any air bubbles.
14-Place the tray into the preheated oven: Place the tray into the preheated oven and bake at 150°C for 20 minutes. After that, increase the top heat to 160°C while keeping the bottom heat at 150°C, and bake for an additional 10 minutes until the cake is golden brown and springs back when lightly pressed.
Step 6: Rolling the Cake
15-Once baked, carefully remove the cake from: Once baked, carefully remove the cake from the oven and place it on a cooling rack. Let it cool until it’s warm to the touch.
16-Place a sheet of parchment paper on: Place a sheet of parchment paper on top of the cake, then flip it over so that the parchment paper is underneath. Carefully peel off the parchment paper that lined the cake during baking.
17-While the cake is still warm and: While the cake is still warm and flexible, place a rolling pin at the edge of the cake. Gently start rolling the cake with the help of the parchment paper. Pull the parchment paper back as you roll to keep it out of the way.
18-Once the cake is fully rolled, use: Once the cake is fully rolled, use a spatula to tighten the roll and make sure it holds its shape. Let the cake set for 30 minutes.
Step 7: Slice and Serve
19-After the cake has set, slice it: After the cake has set, slice it into even pieces and serve. Enjoy the light and airy texture of this delicious Chinese Swiss Roll!
Last Step:
Please leave a rating and comment letting us know how you liked this recipe! This helps our business to thrive and continue providing free, high-quality recipes for you.- Prep Time: 40 min
- Cook Time: 30 min
- Method: bake
Nutrition
- Calories: 278
- Sugar: 13
- Sodium: 84
- Fat: 16
- Saturated Fat: 3
- Carbohydrates: 24
- Fiber: 1
- Protein: 9
- Cholesterol: 206