Crispy Pan Fried Zucchini
I love a good summer side dish that comes together fast and disappears even faster. When my garden overflows with zucchini, this crispy pan fried zucchini is my go to solution.
There is something incredibly satisfying about biting into a golden brown slice that crackles under your teeth, revealing tender, juicy zucchini inside. The secret is a simple three step breading station: seasoned flour, beaten eggs, and a generous Parmesan bread crumb mixture.
Each round gets a quick pan fry in hot oil until the coating turns beautifully crisp. The whole process takes just 20 minutes, making it perfect for busy weeknights when you need a little something special on the plate.

My kids used to turn their noses up at zucchini, but once I started making these crunchy “green coins,” they couldn’t get enough. Even my husband, who claims he is not a vegetable guy, will sneak seconds.
The key is to serve them right away while the crust is at its peak, because like most fried foods, they lose their magic if they sit too long.
Jump to:
- Crispy Pan Fried Zucchini
- Crispy Fried Zucchini Overview
- Recipe Ingredients
- How To Make Pan Fried Zucchini
- Recipe Tips
- How To Store Leftovers
- FAQs
- How do you keep pan fried zucchini crispy?
- What is the best breading for crispy fried zucchini?
- Can you use panko instead of regular breadcrumbs for fried zucchini?
- How do you reheat leftover crispy fried zucchini?
- Crispy Pan Fried Zucchini
- Ingredients
- Instructions
- Last Step:
- Nutrition
- Did you make this recipe?
Crispy Fried Zucchini Overview
This recipe transforms humble zucchini into a crave worthy side dish that rivals your favorite restaurant appetizer. The combination of bread crumbs and Parmesan creates a savory, nutty crust that clings beautifully to each slice of zucchini.
Using medium sized zucchinis ensures the rounds are not too watery, which helps the coating stay crisp. I have tried this method with both regular bread crumbs and panko, and while both work, the finer bread crumbs pack more tightly and deliver a consistent golden color.
The Parmesan adds a salty depth, so you do not need much additional seasoning. One crucial tip: make sure your oil is properly heated before adding the zucchini, or the breading will absorb too much grease and turn limp.
When the oil shimmers and a pinch of flour sizzles on contact, you know it is ready. This dish is best eaten the day you make it, because the crispy exterior softens as it sits.
However, I have reheated leftovers in a hot skillet or air fryer and they regain some crunch, though never quite the same fresh off the stove experience.
I first discovered this technique at a family gathering years ago, and it has remained a staple ever since. It is proof that simple ingredients, when treated right, can become something truly special. adapted from this recipe
Recipe Ingredients
I like to gather everything before starting because the frying goes quickly. Here is what you need:
- 2 medium sized zucchinis, sliced into 1/2 inch rounds
- 3/4 cup all purpose flour
- 2 large eggs, beaten
- 1/2 teaspoon salt
- 1/4 teaspoon ground black pepper
- 1 cup bread crumbs (plain or seasoned, depending on your preference)
- 1/2 cup Parmesan cheese, freshly grated if possible, plus more for serving
- 1/4 cup vegetable oil, or another neutral oil like canola or sunflower
For the best results, select firm, dark green zucchinis with no soft spots. The Parmesan should be finely grated so it blends evenly into the crumbs. I often use a box grater and mix it directly into the bread crumb bowl.
The flour gets a simple salt and pepper boost, which seasons the outer layer without overpowering the delicate zucchini. When measuring oil, remember you may need a bit more if your pan is large, but a quarter cup is usually enough for a 10 inch skillet.
If you are new to frying, a good thermometer or the shimmer test takes the guesswork out.
How To Make Pan Fried Zucchini
Follow these steps and you will have a golden, crunchy side dish in no time.
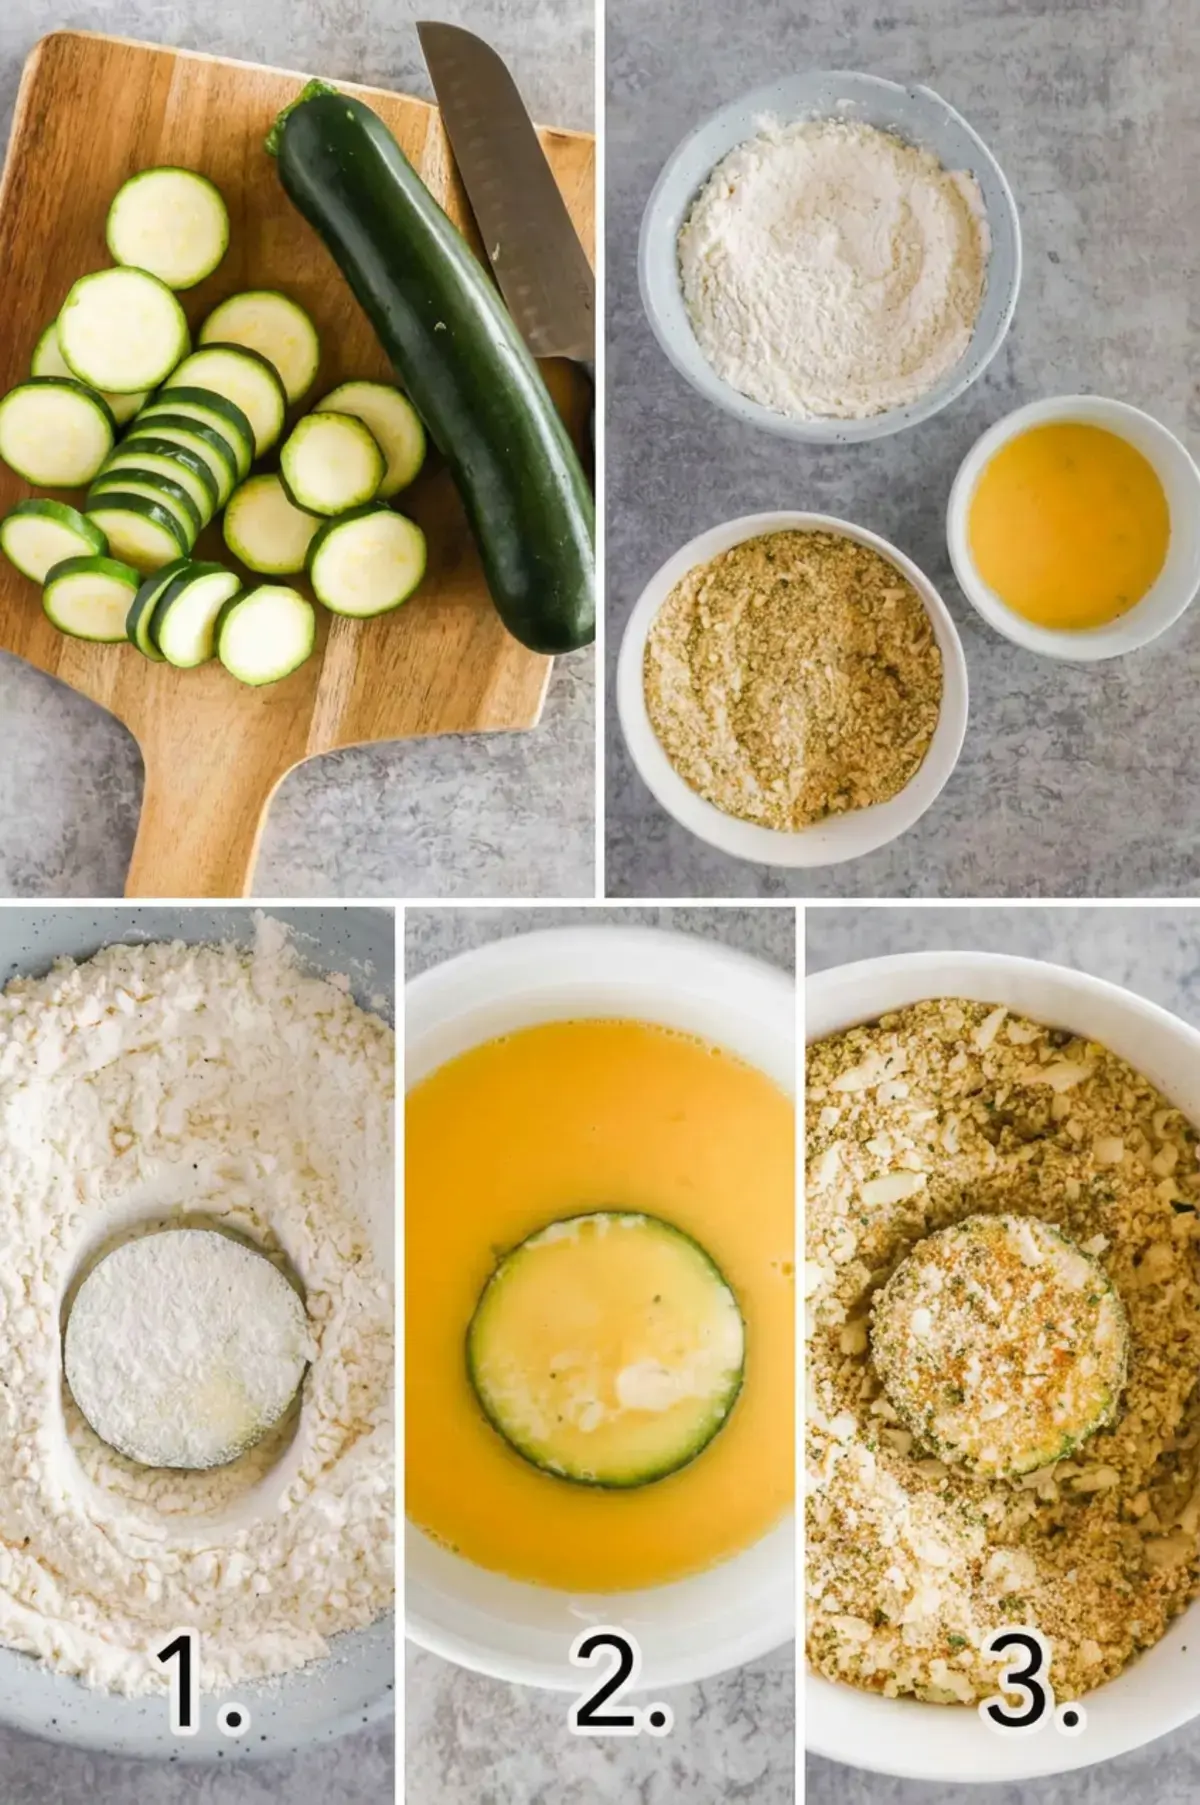
- Slice the zucchini. Wash and dry the zucchinis, then trim off both ends. Cut them into even 1/2 inch thick rounds. This thickness holds its shape while cooking and gives you that tender bite inside.
- Set up your breading station. Grab three shallow bowls. In the first, combine the all purpose flour, salt, and ground black pepper. In the second, lightly beat the two eggs until the yolks and whites are smooth. In the third, stir together the bread crumbs and Parmesan cheese.
- Coat each slice. Working one round at a time, dredge the zucchini in the seasoned flour and shake off any excess. Then dip it into the egg, letting the extra drip back into the bowl. Finally, place it in the bread crumb mixture and press gently so the crumbs stick all over. Set the coated slice on a clean plate and repeat with the remaining rounds.
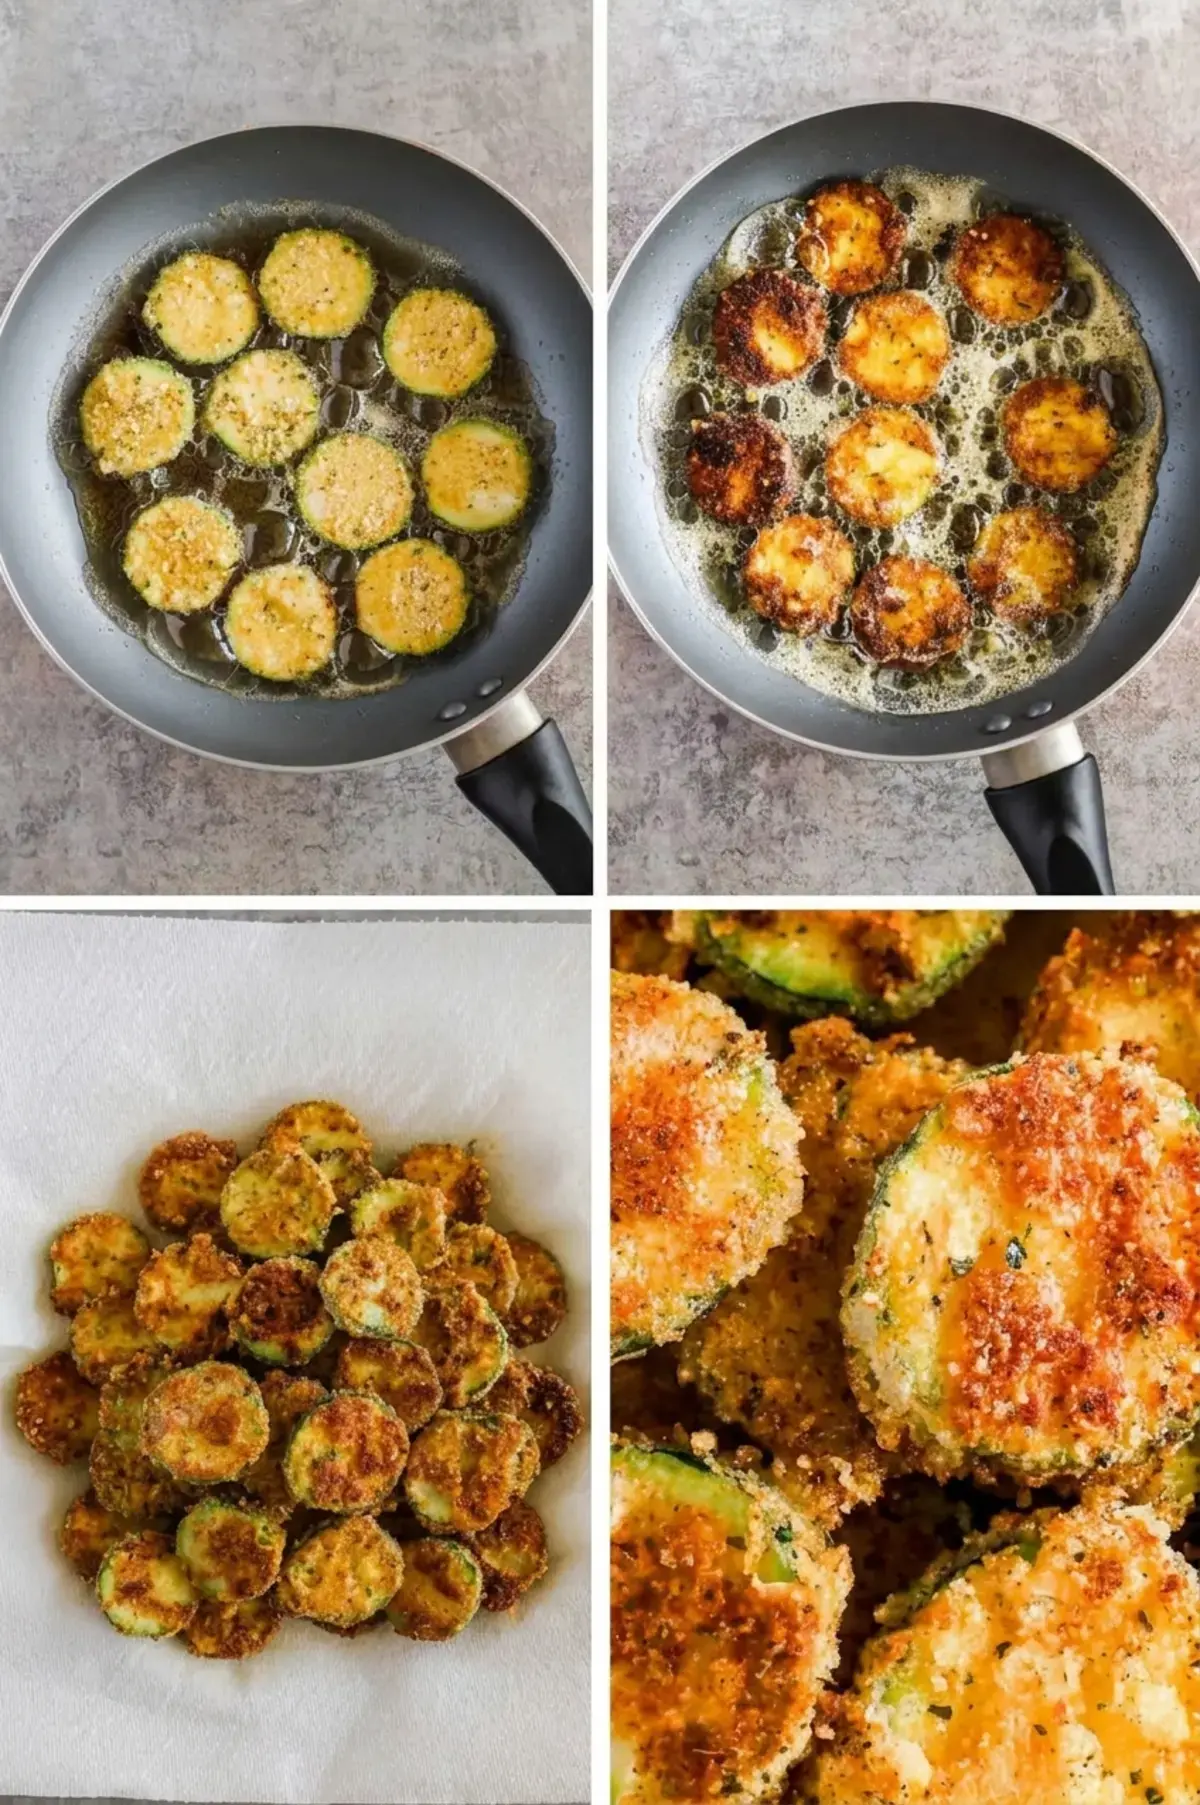
- Heat the oil. Pour the vegetable oil into a large frying pan and place it over medium high heat. Wait until the oil shimmers and a tiny pinch of flour dropped in sizzles immediately. While the oil heats, line a plate with paper towels to drain the cooked zucchini.
- Fry to perfection. Carefully add several zucchini slices to the hot oil without crowding the pan. Cook for 1 to 2 minutes per side, until the crust turns deep golden brown and crispy. Use tongs to transfer the finished slices to the paper towel lined plate. Continue cooking the remaining batches, adding a bit more oil if needed. Serve immediately while hot and crunchy.
This method has never failed me. The thin layer of flour helps the egg cling, and the egg binds the crumb mixture so it does not fall off in the oil. I find that working in small batches keeps the oil temperature steady and prevents soggy zucchini. If you hear a gentle sizzle, everything is on track.
Recipe Tips
Through trial and error, I have picked up a few tricks that make all the difference.
- Slice thickness matters. For thin, floppy chips that cook extra fast and give you more crunch per bite, slice about 1/4 inch thick. For a juicier interior with a firm bite, stick to the 1/2 inch rounds. Both are delicious, just pick the texture you prefer.
- Watch the pan temperature. If the oil is not hot enough, the coating will soak up oil and turn greasy instead of crispy. Medium high heat works well on most stovetops, but you may need to adjust if your burner runs hot. The shimmer test is your best friend.
- Serve without delay. These beauties are at their peak right out of the pan. Set them on the table while still crackling, and they will disappear before you can plate the main dish. If you absolutely must hold them, keep them in a single layer on a wire rack set over a baking sheet in a warm oven (200°F) for no more than 10 minutes.
- Parmesan choice. Pre shredded cheese often contains anti caking agents that prevent it from melting smoothly. I always grate my own from a block of Parmesan for the best flavor and texture.
One evening I had friends over and served these as an appetizer with a side of marinara dipping sauce. It was a huge hit, and now they request it every time they visit. It is easy to double the batch for a crowd, just work in relays and keep the first ones warm in the oven.
How To Store Leftovers
Realistically, leftovers are rare because these vanish quickly, but if you do have a few slices left, here is how to handle them.
- Refrigerator. Place cooled zucchini in an airtight container, separating layers with parchment paper to minimize sticking. They will keep for up to 2 days, but expect them to lose their crispness. The coating will soften, though the flavor stays nice.
- Reheating. To bring back some crunch, reheat the slices in a hot skillet with a tiny drizzle of oil over medium heat for about a minute per side. An air fryer at 375°F for 2 to 3 minutes also works wonders. Avoid the microwave, which will turn them into a sad, soggy mess.
I have even chopped up leftover pan fried zucchini and tossed them into a pasta salad the next day. The parmesan coating adds a nice savory note. While fresh off the stove is unbeatable, a little creativity keeps food waste at bay.
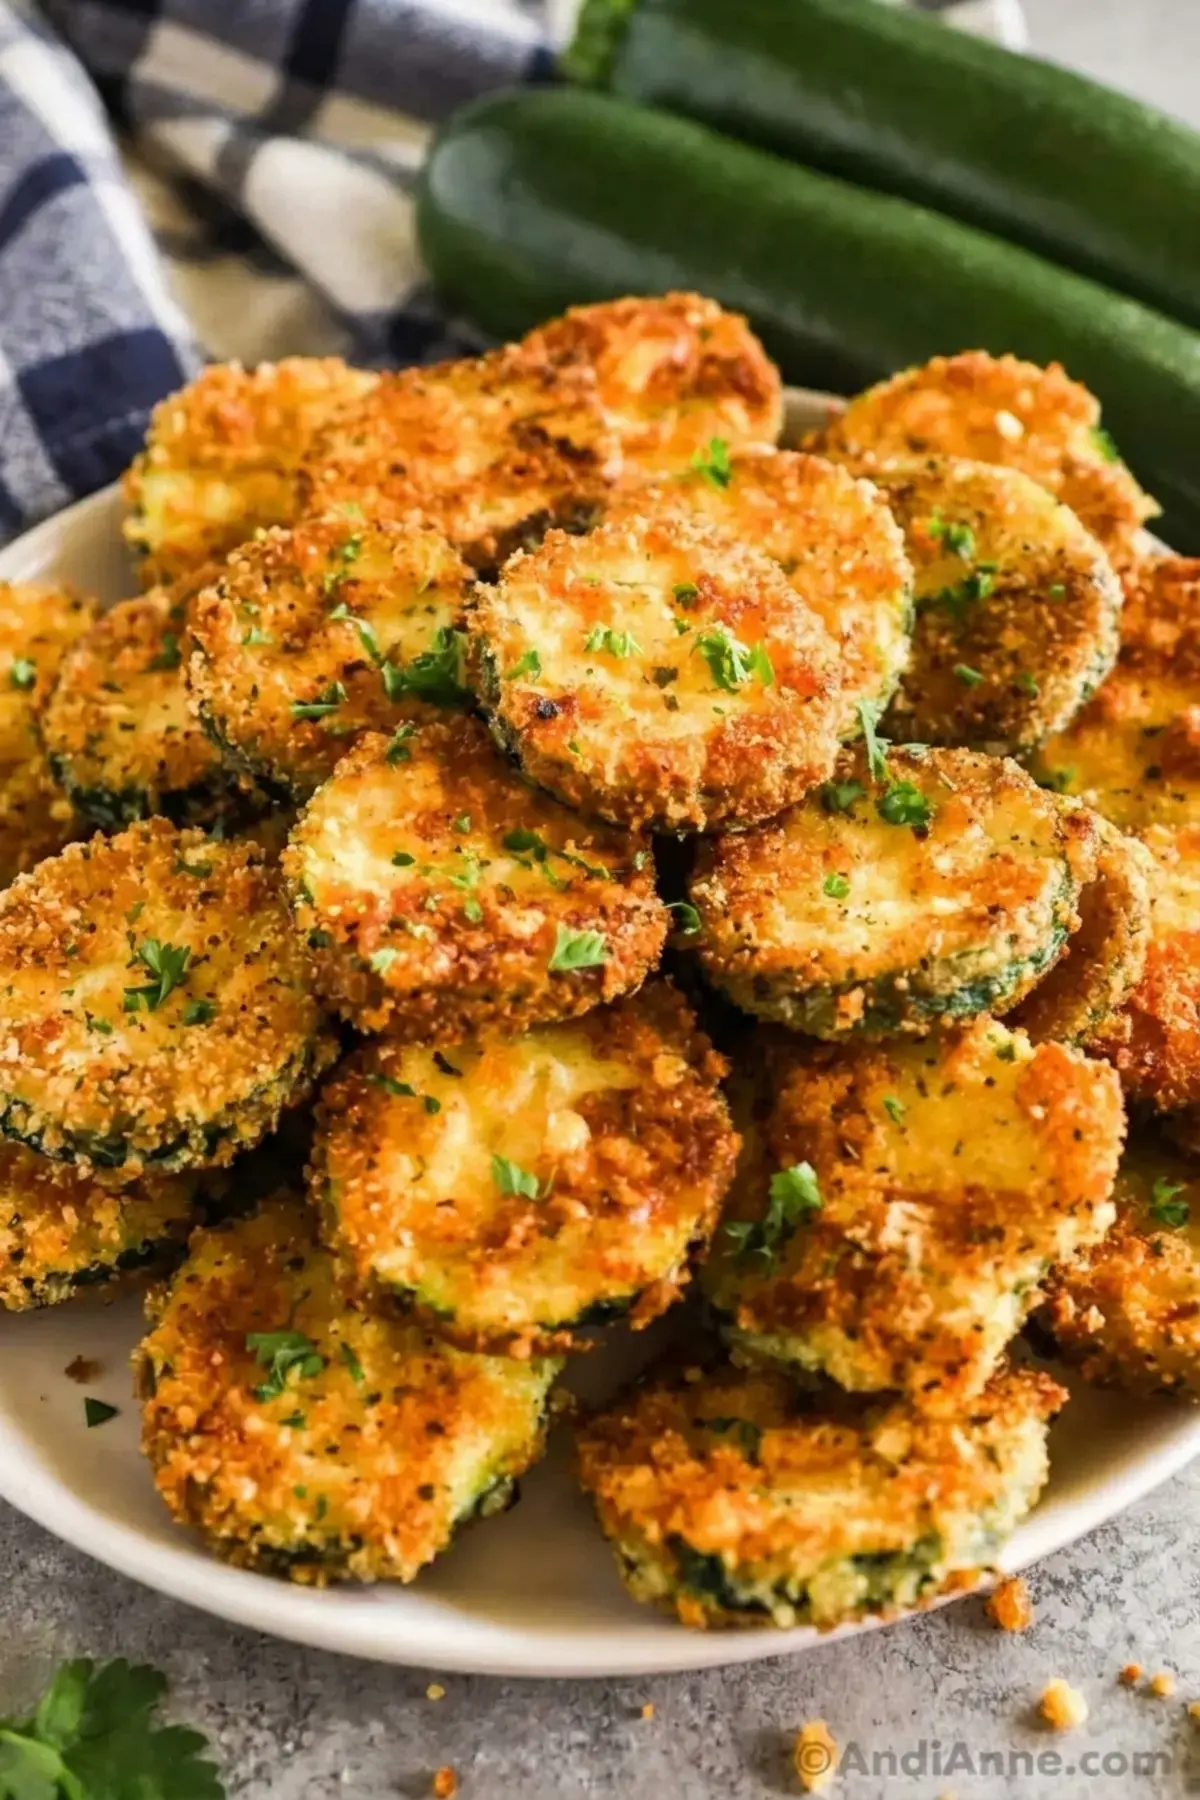
Nutrition per serving (1/4 of recipe): 289 calories, 41g carbohydrates, 14g protein, 7g fat, 3g saturated fat, 3g fiber, 4g sugar, 728mg sodium, 90mg cholesterol.
FAQs
How do you keep pan fried zucchini crispy?
What is the best breading for crispy fried zucchini?
Can you use panko instead of regular breadcrumbs for fried zucchini?
How do you reheat leftover crispy fried zucchini?
Crispy Pan Fried Zucchini
Crispy Pan Fried Zucchini I love a good summer side dish that comes together fast and disappears even faster. When my garden overflows with zucchini, this crispy pan fried zucchini is my go to solution.
- Total Time: 20 min
- Yield: 4 servings 1x
Ingredients
2 medium sized zucchinis, sliced into ½” rounds
¾ cup all-purpose flour
2 large eggs, beaten
½ tsp salt
¼ tsp ground black pepper
1 cup bread crumbs
½ cup parmesan cheese
¼ cup vegetable oil, for frying
Instructions
1-Prep 2 medium-sized zucchinis by first washing,: Prep 2 medium-sized zucchinis by first washing, then cutting the ends off. Slice them evenly into ½” thick, round slices and set aside.
2-Using a shallow bowl, add ¾ cup: Using a shallow bowl, add ¾ cup all-purpose flour, ½ tsp salt, ¼ tsp ground black pepper, and mix. In another shallow bowl, crack 2 large eggs and whisk. In a third shallow bowl, add 1 cup bread crumbs, and ½ cup parmesan cheese then mix.
3-Now, dredge a slice of zucchini through: Now, dredge a slice of zucchini through the flour, shaking off excess. Add it to the egg bowl, then toss it with the bread crumb and parmesan mixture and place it on a plate. Repeat with the rest of the zucchini slices.
4-Heat ¼ cup vegetable oil in a: Heat ¼ cup vegetable oil in a frying pan over medium-high heat until the oil begins to shimmer. While that’s heating, set a plate next to the stove with a paper towel on top. This will soak up any excess oil from the zucchini slices after the cooking process.
5-Cook each zucchini for 1-2 minutes on: Cook each zucchini for 1-2 minutes on each side, or until golden crispy. Use tongs to place finished slices onto a paper towel and allow to cool. Serve immediately.
Last Step:
Please leave a rating and comment letting us know how you liked this recipe! This helps our business to thrive and continue providing free, high-quality recipes for you.- Prep Time: 10 min
- Cook Time: 10 min
- Method: stovetop
Nutrition
- Calories: 289kcal
- Sugar: 4g
- Sodium: 728mg
- Fat: 7g
- Saturated Fat: 3g
- Carbohydrates: 41g
- Fiber: 3g
- Protein: 14g
- Cholesterol: 90mg