Copycat Claussen Pickle Recipe: 5 Reasons It Tops Store Bought
Growing up, I can still picture my grandmother standing at the kitchen counter on a Saturday morning, carefully arranging cucumbers into a tall glass jar.
She would hum softly to herself while measuring out dill and garlic, and the whole kitchen smelled sharp and bright with vinegar. Those were the pickles I grew up on, and honestly, nothing from a grocery store shelf ever came close to matching them.
That is, until I discovered Claussen pickles. They had that same satisfying snap, that same garlicky tang that reminded me of afternoons in Grandma’s kitchen.

But the price tag on the store version kept adding up, especially when my family started going through a jar every few days.
So I set out to recreate that crunch at home, and after plenty of trial and error, I landed on a recipe that honestly rivals the original.
This copycat Claussen pickle recipe combines 10 cups of fresh cucumbers with a simple vinegar brine, dill seed, garlic, and mustard seeds. You will love how these pickles turn out crunchy every time, just like the ones Grandma made.
The best part is that you only need a handful of ingredients, a few clean jars, and about 25 minutes to put everything together.
Once they are tucked in the fridge, the flavors deepen over time, and you will have a ready supply of crisp, tangy pickles for sandwiches, snacks, and everything in between.
Let me walk you through exactly why this recipe beats the store bought version every single time.
Jump to:
Why You’ll Love This Recipe
There are so many reasons this copycat pickle recipe has earned a permanent spot in my kitchen rotation, but let me share the five that matter most to me.
First, the crunch is absolutely unmatched. When you start with firm, fresh cucumbers and follow a careful brining process, the texture stays snappy and satisfying rather than going soft. That signature crunch is what makes Claussen pickles so recognizable, and this recipe captures it beautifully every single time.
Second, you do not need any fancy equipment to make these. No pressure canner, no vacuum sealer, no special gadgets. A large pot, some clean jars, and basic measuring tools are all it takes. If you have ever made a simple refrigerator pickle before, you already have every skill this recipe requires.
Third, the flavors are completely customizable. You can keep it classic with dill and garlic, or add mustard seeds, peppercorns, or even a pinch of red pepper flakes to make the recipe your own. The brine is a forgiving canvas, and once you understand the basic ratio, you can experiment freely with herbs and spices.
Fourth, these pickles are a wonderfully healthy, low calorie snack. Cucumbers are naturally light, and the brine adds bold flavor without heavy ingredients. They are perfect for anyone watching their intake but still wanting something with a real bite and satisfying crunch.
Fifth, they cost a fraction of what you would pay at the store. A bag of fresh cucumbers and a few pantry staples go a remarkably long way, and you end up with a much bigger batch for less money than a single premium jar.
Ingredients Notes
The ingredients for this recipe are simple, but choosing the right ones makes all the difference between a crunchy pickle and a soggy disappointment. Let me break down what you need and why each ingredient matters.
The base of this recipe is 10 cups of cucumbers, sliced into spears or chips. You want ones that are fresh, firm, and preferably small. Kirby cucumbers or other pickling varieties work best because their skin holds up well and their flesh stays crisp.
Avoid large, waxed slicing cucumbers if you can, because their higher water content tends to produce softer pickles. Give each cucumber a gentle squeeze before buying. If it feels firm all the way through, it is a good pick.
For the brine, the recipe calls for 0.5 cup of white vinegar, 2 tablespoons of pickling salt, and 1 tablespoon of sugar, brought to a boil with water in a large pot.
Distilled white vinegar gives that classic sharp tang that is so recognizable in Claussen style pickles. If you prefer a slightly sweeter, rounder flavor, apple cider vinegar can work as a substitute, but it will change the overall profile in a noticeable way.
Fresh garlic is important here. You need 4 peeled cloves, and you should skip the garlic powder entirely. Whole cloves infuse the brine with a warm, savory depth that powder simply cannot match.
Dill is another key player. The recipe uses 2 tablespoons of dill seed, which delivers that classic deli pickle aroma. Fresh dill sprigs are also wonderful if you have them on hand. If you cannot find fresh dill, dried dill can work, but use a slightly smaller amount since dried herbs are more concentrated.
One tablespoon of mustard seeds rounds out the spice profile, adding a subtle warmth and complexity to each bite. Use pickling salt or kosher salt rather than table salt, since table salt contains additives that can cloud the brine and leave a metallic aftertaste.
Recipe Steps
Now let me walk you through the process from start to finish. This is a straightforward recipe, but each step plays a role in getting that signature crunch and flavor. The total time comes to about 25 minutes, with 10 minutes of prep and a short stint on the stovetop.
Step 1
Start by rinsing your cucumbers thoroughly under cold running water. Even if they look clean from the market, a quick rinse removes any dirt or residue that could interfere with the brine. Trim about a quarter of an inch off each end of every cucumber.
The blossom end in particular contains enzymes that can soften pickles over time, so trimming it is a small step with a big payoff for texture.
Next, slice the cucumbers to your preferred shape. You can cut them into rounds for sandwich chips, longer spears for snacking straight from the jar, or halves for a classic deli look. The key is keeping the pieces a consistent size so they brine evenly.
Uneven slices mean some pieces will be perfectly tangy while others are still bland and underdeveloped in flavor.
Step 2
In a large pot, combine 0.5 cup of white vinegar, water, 2 tablespoons of pickling salt, and 1 tablespoon of sugar. Bring the mixture to a boil over medium heat, stirring gently until the salt and sugar are fully dissolved. Once it reaches a boil, remove the pot from the heat.
The sugar may seem like an unusual addition for a dill pickle, but it plays an important balancing role. It tempers the sharpness of the vinegar and rounds out the overall flavor profile. You will not taste sweetness in the finished pickle, but you will notice a more complete, satisfying tang that keeps you coming back for another bite.
Step 3
While the brine finishes heating, get your jars ready. Sterilize them by running them through the dishwasher on a hot cycle or boiling them in a large pot of water for 10 minutes. Clean jars are essential for food safety and for keeping your pickles fresh for as long as possible.
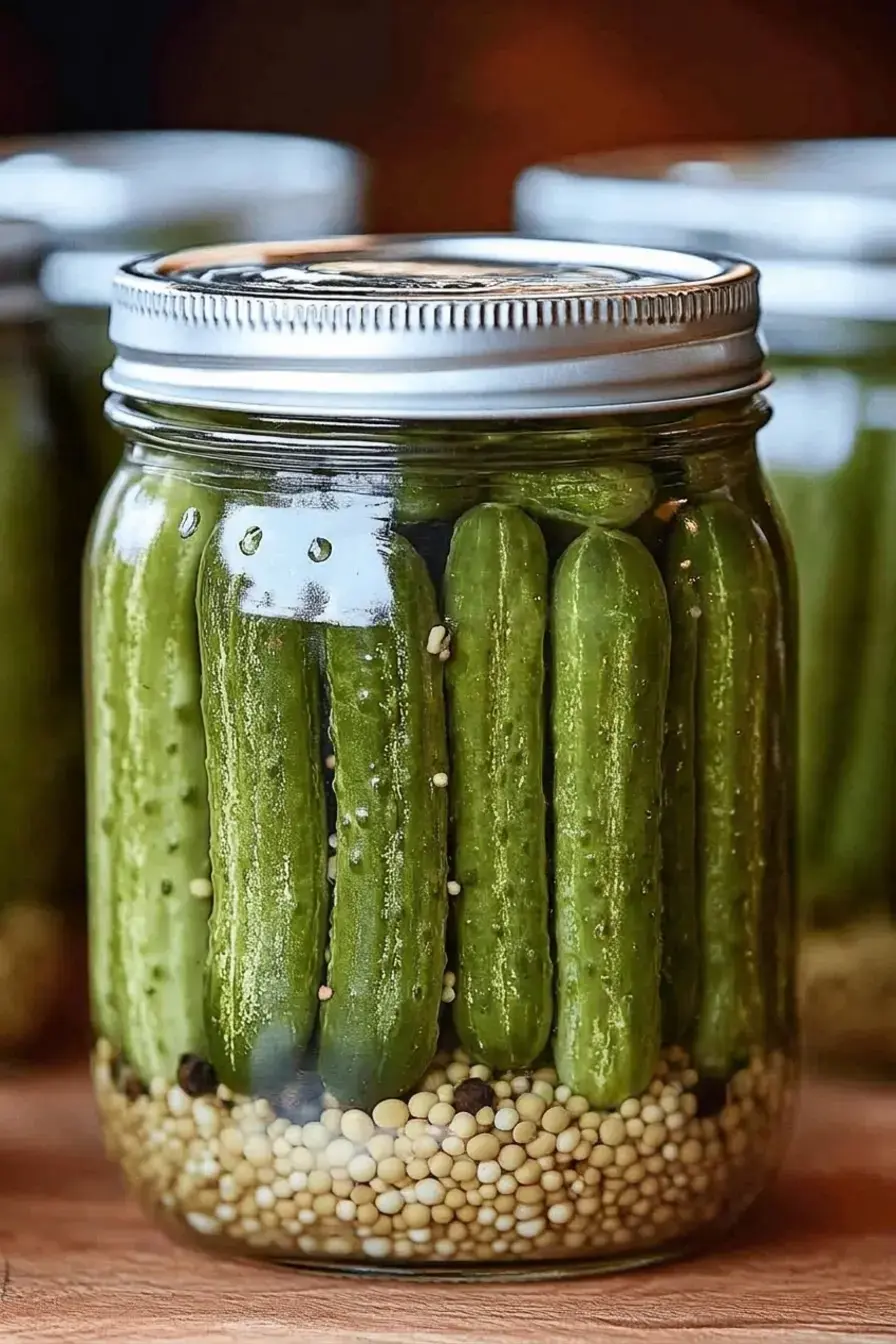
To each sterilized jar, add your aromatics. Drop in the 4 peeled garlic cloves, 2 tablespoons of dill seed, and 1 tablespoon of mustard seeds.
If you like a little warmth, this is the moment to add a slice of jalapeno or a pinch of red pepper flakes.
These ingredients will sit at the bottom of the jar and slowly infuse the brine as the pickles marinate over the coming days.
Step 4
Now pack your prepared cucumber slices into the jars on top of the aromatics. You want them to be fairly tight so you can fit plenty in each jar, but be careful not to crush or bruise them. Crammed cucumbers will not brine evenly and may end up with soft spots that ruin the crunch.
Leave about half an inch of headspace at the top of each jar. This space allows the brine to cover all the cucumbers completely and gives you room to seal the lid without the liquid overflowing. If you are making a large batch, work one jar at a time and fill each one before moving to the next.
Step 5
Pour the hot vinegar mixture into each jar, making sure every single piece of cucumber is fully submerged. If the brine does not quite cover the top layer, add a little more water or vinegar to bring the level up.
Any cucumbers poking above the brine line will not pickle properly and may spoil, so take a moment to check that everything is under liquid.
Seal the jars tightly with their lids and let them cool to room temperature. Once cooled, place the jars in the refrigerator and let them marinate for at least 48 hours before opening the first jar.
The flavor will continue to develop and deepen over the first week, so if you can wait, your patience will be rewarded with an even more flavorful pickle.
Storage Options
Once your pickles are made, storage is refreshingly simple. Keep the jars in the refrigerator at all times, tightly sealed. The cold environment slows down any bacterial growth and helps the cucumbers maintain their satisfying crunch.
These refrigerator pickles will keep for one to three months when stored properly. A few things help extend their shelf life. Make sure your jars are clean and sterilized before filling.
Keep the brine concentration consistent. And always use a clean utensil when reaching in for a pickle. Introducing bacteria from a dirty fork or fingers can shorten the shelf life significantly and even lead to spoilage.
Freezing is not recommended for these pickles under any circumstances. The water content inside cucumbers expands when frozen, which ruptures the cell walls and leaves you with a limp, mushy texture once thawed. If you have a large batch that you are worried about finishing in time, consider sharing with friends, neighbors, or coworkers instead.
For longer storage beyond refrigeration, proper water bath canning methods with fully sterilized and vacuum sealed jars would be required. However, this recipe is designed specifically as a refrigerator pickle, so the simplest and safest approach is to keep them cold and enjoy them within the recommended timeframe.
These pickles are traditionally served straight from the fridge. The cold temperature actually enhances the crunch and makes the brine taste sharper and more refreshing on the palate.
Variations & Substitutions
One of the best things about this recipe is how easily it adapts to different tastes and dietary needs. Here are some of my favorite ways to switch things up.
If you like a little heat, add sliced jalapenos or a pinch of red pepper flakes to the jar alongside the garlic and dill. The heat infuses through the brine and gives every bite a warm, spicy kick without overpowering the classic dill flavor. Start with a small amount and add more next time if you want it bolder.
For a sweeter profile, add an extra tablespoon or two of sugar to the brine. This moves the pickles closer to a sweet and sour style that is wonderful on burgers and in salads. The sugar mellows the vinegar and creates a more rounded, approachable flavor that kids tend to love.
If dill is not your favorite herb, try swapping it for fresh basil or oregano. This gives the pickles a distinctly Mediterranean character that pairs beautifully with Italian sandwiches, panini, or antipasto plates. The swap is simple and the results are surprisingly delicious.
For those watching their sodium intake, reduced sodium salt can be used in place of standard pickling salt. Just be aware that the pickles may not keep quite as long, since salt acts as a natural preservative in the brine.
You can also use a sugar substitute if you want to reduce sugar without losing the balancing effect it brings to the overall flavor.
Serving Suggestions
These pickles are incredibly versatile, and once you have a jar in the fridge, you will find yourself reaching for them constantly. Here are some of my favorite ways to enjoy them.
The classic move is to serve them alongside a sandwich or a juicy burger. Their tangy crunch cuts through rich, savory flavors and adds a refreshing contrast that brightens every bite. At a backyard BBQ, a plate of these pickles next to grilled burgers and hot dogs is always the first thing to disappear from the table.
Chop them up and fold them into potato salad for an extra layer of flavor and texture. The briny tang brightens the whole dish and saves you from needing to add as much salt or vinegar separately. The same trick works beautifully in macaroni salad or coleslaw.
They make an excellent standalone snack, especially on a hot summer afternoon. Sometimes I grab a spear right out of the jar for a quick, satisfying bite that is light but full of flavor. With only about 25 minutes of prep and a few simple ingredients, you always have a healthy option ready and waiting.
For entertaining, arrange them on a party platter with cheeses, cured meats, olives, and crackers. The pickles add bright color and a sharp, acidic note that balances the richer items on the board. Guests always appreciate something homemade, and these pickles look beautiful arranged in a simple bowl or scattered across a wooden board.
You can also chop them finely and stir them into deviled egg filling, tuna salad, or chicken salad. Anywhere you want a punch of acidity and crunch, these pickles deliver in the most satisfying way.