What Are 3 Ingredient Butter Cookies?
These 3 ingredient butter cookies are homemade Danish style butter cookies made with only softened butter, powdered sugar, and all purpose flour.
They are egg free, which means the short ingredient list stays very simple and the dough comes together without any eggs or added leavening.
The finished cookies are crisp, buttery, and sweet, and they remind me of the blue tin cookies from the store, but fresher and less waxy.
This recipe is based on the 3 Ingredient Butter Cookies recipe from Kirbie’s Cravings. The source describes these as piped cookies that taste better than many store bought Danish butter cookies.

Since they have no eggs and no leavening, the texture comes from the way the butter and powdered sugar are creamed. The butter gives richness, the powdered sugar helps create a crisp finish, and the flour holds the shape.
You do not need a long ingredient list or a special trip to the store. When the dough is piped into swirls or circles, the cookies look fancy enough for a holiday plate or a simple afternoon coffee.
I like to make a batch when I want a buttery treat without pulling out eggs or waiting too long for ingredients to come together.
This is not a soft baked cookie. The edges and surface should turn light brown, and the center should become crisp as it cools. That crispness is what makes these cookies feel close to the classic Danish style.
Jump to:
- What Are 3 Ingredient Butter Cookies?
- Why You’ll Love This Recipe
- Ingredient Notes
- How to Make Danish Butter Cookies
- Piping and Shaping
- Baking Notes
- FAQs
- What are the three ingredients in these butter cookies?
- Can I use granulated sugar instead of powdered sugar?
- Why did my butter cookies spread too much?
- How should I store these butter cookies to keep them crisp?
- 3 Ingredient Butter Cookies
- Ingredients
- Instructions
- Last Step:
- Nutrition
- Did you make this recipe?
Why You’ll Love This Recipe
The biggest reason I return to this recipe is that it keeps the ingredient list exceptionally short. You only need butter, powdered sugar, and all purpose flour. There are no eggs, no baking powder, and no heavy cream. That makes the recipe easy to remember and easy to scale if you want fewer cookies or a double batch.
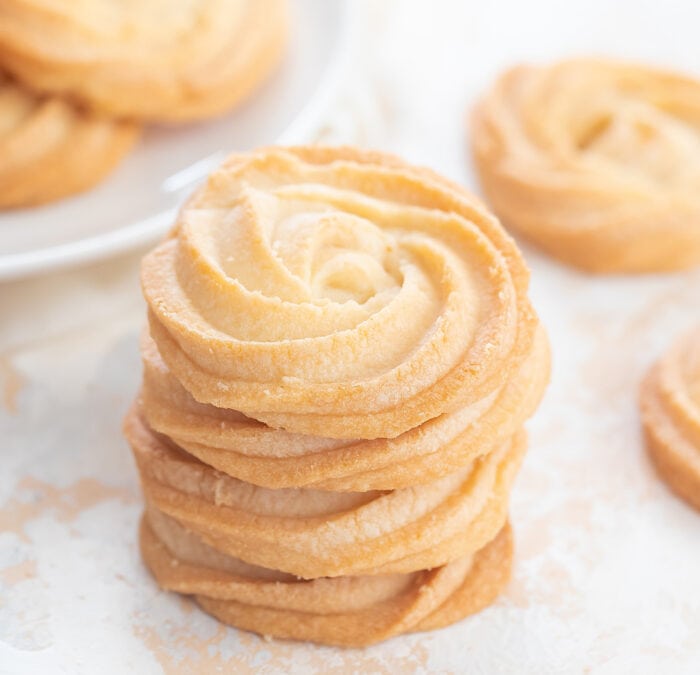
Another reason is the texture. The dough is soft enough to pipe through a large open star tip, so you can create swirls that look like the cookies from a fancy tin. If you prefer a shape closer to commercial Danish butter cookies, you can pipe circles instead. Both shapes bake into crisp, light cookies with a delicate buttery flavor.
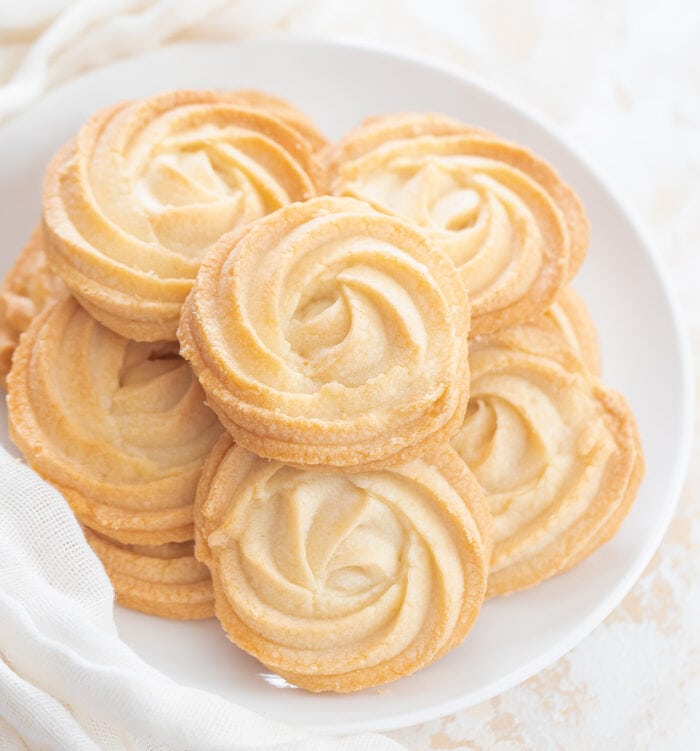
Because the dough has no eggs, it is a nice option when you are baking for someone with an egg restriction or when you simply ran out of eggs. You still get a rich result because butter carries the flavor. The powdered sugar does more than sweeten; it helps the cookies develop that crisp snap.
I also love that these cookies are portioned by piping. You do not have to roll dough into exactly twenty four balls or worry about crowded sheet pans. The spacing is simple, and the dough is sturdy enough to hold the piped shape after a short chill.
Ingredient Notes
The ingredient list is short, so each choice matters. The source recipe uses unsalted butter, and that is what I use. Salted butter can be substituted if you want a slightly saltier contrast, but you do not need to add extra salt to the recipe.
| Ingredient | Amount | Why It Matters |
|---|---|---|
| Butter | 1 cup (227 g), softened and slightly melted | Provides richness and creates the right piping consistency |
| Powdered sugar | 1 cup (118 g) | Sweetens the cookies and helps create the crisp texture |
| All purpose flour | 2 cups (256 g) | Gives the dough structure and holds the piped shape |
Use powdered sugar, not castor sugar. The fine texture is part of what makes these cookies crisp.
Powdered sugar is essential here. It is sometimes called icing sugar, and the source notes that castor sugar is not recommended for this recipe. The fine texture of powdered sugar blends smoothly into the butter and helps keep the cookie light and crisp rather than dense. I have not tested the recipe with any other sweetener.
Use all purpose flour for the most reliable result. The source has not tested the cookies with gluten free flour, so if you need a gluten free version, you may need to experiment with a blend designed for baking.
For a more fragrant cookie, add 1 teaspoon of vanilla extract along with the flour. I add vanilla when I want a warmer aroma, but the plain version still tastes buttery and sweet.
How to Make Danish Butter Cookies
The method is simple, but the creaming step is the one that matters most. Start by preheating the oven to 350°F (177°C). Line two large baking sheets with a silicone baking mat or parchment paper.
- In a large mixing bowl, add the softened and slightly melted butter and the powdered sugar. Cream them at the highest speed for about 5 minutes, or until the mixture is light, fluffy, and white. If you are using a stand mixer, stop and scrape the sides of the bowl a few times with a spatula. The wire whisk attachment works well for this step.
- Add the all purpose flour. Mix at low speed, then gradually increase the speed once the flour is incorporated. The mixture will look crumbly at first, but it should come together into a thick, soft dough that resembles a thick paste. Stop mixing as soon as the dough forms.
- Add the dough to a piping bag fitted with a large open star tip. Pipe swirls or circles, leaving about 1 inch of space between the cookies.
- Place the piped cookies in the fridge for 30 minutes so the dough is chilled. This helps prevent the cookies from spreading too much during baking.
- Bake one sheet at a time in the middle of the oven for about 15 to 20 minutes, or until the edges and surface start to turn light brown. Let the cookies cool on the baking sheet before removing them.
The source recipe takes about 20 minutes of active prep time and 15 to 20 minutes of baking time, plus the 30 minute chill. The cookies should cool on the sheet because they are still fragile while warm. Once cooled, they become crisp and easy to lift.
Piping and Shaping
This dough is intentionally soft enough to pipe, which is what gives the cookies their classic look. I use a large open star tip with a half inch opening, such as an Ateco 826 tip. The open star creates ridges on the surface and helps the cookies bake evenly while keeping that decorative swirl shape.
Hold the piping bag straight above the baking sheet and apply steady pressure. For a spiral swirl, start in the center and pipe outward in a circle.
For a shape closer to commercial Danish butter cookies, pipe a full circle and then fill or close the center. Keep the cookies about 1 inch apart because the dough will settle slightly in the oven.
After piping, the brief fridge rest is important. It firms the butter in the dough so the swirls do not melt into flat puddles. If your kitchen is cold, the dough may pipe more slowly, but the chill step still helps keep the shape clean.
If you do not want to pipe, the source provides an alternative. Form the dough into small balls and flatten them into very flat discs. You can press a fork into the tops to add a simple pattern.
The texture will be best if the discs are very flat, because thick cookies will not become as crisp as the piped version.
Baking Notes
Bake one cookie sheet at a time on the middle oven rack. The source found that baking both sheets at the same time caused uneven browning, so a single center rack gives the most consistent color. I follow that even when it means an extra few minutes of waiting because the cookies come out evenly golden.
Check the cookies around 15 minutes. The light brown edges are the best visual cue that they are crisp and ready to cool.
The cookies are done when the edges and surface begin to turn a light brown. In my oven, that takes about 18 to 20 minutes, which matches the longer end of the source range. Start checking around 15 minutes if your oven runs hot. Once they are out, let them cool on the cookie sheet before moving them.
Make sure the butter is very soft and slightly melted before you begin. If the butter is too firm, the dough will be difficult to pipe and the cookies may not have that light, crisp texture. I have learned through testing that slightly melted butter makes a big difference in how smoothly the dough moves through the piping bag.
Store uneaten cookies in an airtight container at room temperature. A serving of one cookie has about 123 calories, 13 grams of carbohydrates, 1 gram of protein, 7 grams of fat, 5 grams of saturated fat, 0.3 grams of fiber, and 5 grams of sugar. The cookies keep their crispness for several days when stored properly.
FAQs
What are the three ingredients in these butter cookies?
Can I use granulated sugar instead of powdered sugar?
Why did my butter cookies spread too much?
How should I store these butter cookies to keep them crisp?

3 Ingredient Butter Cookies
What Are 3 Ingredient Butter Cookies? These 3 ingredient butter cookies are homemade Danish style butter cookies made with only softened butter, powdered sugar, and all purpose flour.
- Total Time: 40 min
- Yield: 24 cookies 1x
Ingredients
Ingredients
1 cup butter, softened and slightly melted (see notes)
1 cup powdered sugar
2 cups all purpose flour
Instructions
Instructions
1-Preheat oven to 350°F (177°C): Preheat oven to 350°F (177°C). Line 2 large baking sheets with silicone baking mat or parchment paper.
2-In a large mixing bowl, add butter: In a large mixing bowl, add butter and sugar. Cream at highest speed for about 5 minutes or until light and fluffy. The mixture should turn from yellow to white and look like whipped cream when you are done. If you are using a stand mixer, make sure to stop and scrape the sides of your bowl a few times with a spatula so that all the butter gets creamed. I used the wire whisk attachment with the stand mixer.
3-Add in the flour: Add in the flour. Mix in at low speed and then gradually increase speed once flour is incorporated. The mixture will be crumbly at first but then should form a thick, soft dough, almost like a thick paste. You can stop mixing once the dough comes together.
4-Add dough to a piping bag: Add dough to a piping bag. Using a large open star tip (I used one with a 1/2 inch opening), pipe swirls or whatever design you prefer. Space cookies 1 inch apart. See notes for other options if you don’t wish to pipe the cookies. Place piped cookies into fridge for 30 minutes so the dough is chilled. This will prevent the cookies from spreading too much when they bake.
5-Place one cookie sheet into the middle: Place one cookie sheet into the middle of your oven. Bake cookies for about 15-20 minutes or until edges and surface start to turn a light brown. (Mine took about 18-20 minutes). Remove cookies from oven and bake the second tray. Let cookies cool on cookie sheet before removing. Store uneaten cookies in an airtight container.
Last Step:
Please leave a rating and comment letting us know how you liked this recipe! This helps our business to thrive and continue providing free, high-quality recipes for you.- Prep Time: 20 min
- Cook Time: 20 min
- Method: bake
Nutrition
- Calories: 123
- Sugar: 5
- Fat: 7
- Saturated Fat: 5
- Carbohydrates: 13
- Fiber: 0.3
- Protein: 1