Ingredients
– 2/3 cup peanut butter for rich nutty flavor and sticky base
– 2 tablespoons butter or oil such as avocado oil or coconut oil for softening the mixture to smooth dough
– 3/4 cup protein powder unflavored or vanilla for main protein boost and firming up
– 1/3 cup sweetener for sweetness without sugar
– 1/4 cup almond flour for binding the mixture and low carb
– 2 tablespoons hemp seeds optional for extra protein, texture and nutty taste
– 1/8 teaspoon salt if peanut butter is unsalted to balance sweetness and bring out peanut butter flavor
– 1 teaspoon vanilla extract adjust if using vanilla protein for warm flavor and dessert taste
– 1/4 cup chocolate chips optional for classic peanut butter and chocolate finish
Instructions
1-First Step: Melt the peanut butter and butter Add the 2/3 cup peanut butter and 2 tablespoons butter or oil to a microwave-safe bowl. Warm it in short bursts until the mixture loosens up and stirs smoothly. This step matters because peanut butter can be thick, and warming it makes the rest of the ingredients blend much easier. If you are using a natural creamy peanut butter, give it a good stir first because oil separation can make the texture uneven. You can also use another creamy nut butter if that is what you have on hand. Almond butter or cashew butter will change the flavor a bit, but they still work well in high protein low carb protein balls.
2-Second Step: Add the dry ingredients Mix in the 3/4 cup protein powder, 1/3 cup sweetener, and 1/4 cup almond flour. If you are using 2 tablespoons hemp seeds, add them now too. Stir until the mixture starts looking crumbly, then keep mixing until it begins to come together as dough. The best protein powder for this recipe is usually a protein isolate such as whey, egg white, plant-based isolate, or collagen. These powders tend to absorb moisture better and give you a firmer result. If your protein powder is very dry, you may need a tiny splash more oil. If it is very soft or fluffy, a spoonful more almond flour can help.
3-Third Step: Add the flavor boosters Stir in the 1 teaspoon vanilla extract and 1/8 teaspoon salt if your peanut butter is unsalted. Vanilla adds a warm, sweet flavor that makes the dough taste like a treat. Salt sharpens the peanut butter flavor, so do not skip it if your nut butter does not already contain salt. If you are using vanilla protein powder, you can reduce the vanilla extract a little. If you are using unflavored protein powder, the full teaspoon gives the dough a better dessert-style flavor. This small adjustment helps the recipe taste balanced instead of flat.
4-Fourth Step: Fix the texture if needed At this point, the dough should be thick, soft, and easy to press together. If it feels too stiff or dry, add a little more butter or oil. If it feels too sticky or goopy, add a bit more almond flour. This is one of the most helpful parts of making protein balls because protein powders can vary a lot from brand to brand. Powdered sweeteners like erythritol usually work better than gritty granulated versions. They blend into the dough more smoothly and help keep the finished balls pleasant to bite into. If you are using a sweetener blend, taste the mixture before rolling so you can adjust sweetness if needed.
5-Fifth Step: Stir in the chocolate chips If you want a more classic peanut butter treat, fold in the 1/4 cup chocolate chips. They add a little sweetness and make the protein balls feel more like a dessert snack. If you prefer a cleaner low carb version, you can leave them out and still get plenty of flavor. For the best texture, use mini chocolate chips or chop larger chips into smaller pieces. That helps them spread through the dough more evenly. If your kitchen is warm, chill the dough for a few minutes before adding chocolate so the chips do not melt.
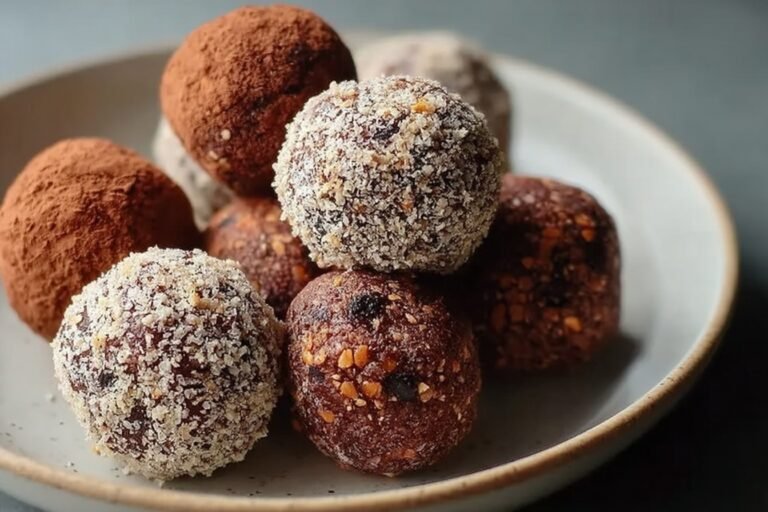
6-Sixth Step: Roll into balls Scoop the dough and roll it into 1-inch balls. You should get about 20 balls total, which makes 10 servings at 2 balls per serving. A small cookie scoop can help keep them even, but a spoon works just fine too. Press the dough firmly as you roll so the balls hold together well. If the mixture cracks at the edges, warm it slightly with your hands. If it sticks to your palms, lightly dampen your hands or chill the dough for a few minutes before rolling.
7-Final Step: Chill until firm Place the rolled protein balls on a plate or tray and refrigerate them until firm. This helps the fat in the peanut butter and butter set up, which gives the balls their best shape and chew. Once chilled, they are ready to eat right away. These no-bake protein balls are ideal for quick breakfasts, lunchbox snacks, and post-workout bites. They travel well, and that makes them a great option for students, commuters, and families who need grab-and-go food. If you like quick breakfast recipes, you might also enjoy these high protein breakfast burritos for another filling start to the day.
Last Step:
Please leave a rating and comment letting us know how you liked this recipe! This helps our business to thrive and continue providing free, high-quality recipes for you.Notes
🥜 Choose natural creamy peanut butter or substitute with almond butter for variety.
💪 Use whey isolate or plant-based protein; adjust flour for consistency.
🧊 Keep on counter 5 days, fridge 2 weeks, or freeze for months.
- Prep Time: 15 minutes
- Chill Time: 30 minutes
- Category: Snack
- Method: No Bake
- Cuisine: American
- Diet: Vegetarian
Nutrition
- Serving Size: 2 balls
- Calories: 192 kcal
- Sugar: 2g
- Sodium: 100mg
- Fat: 14.6g
- Saturated Fat: 3g
- Unsaturated Fat: 11g
- Trans Fat: 0g
- Carbohydrates: 6.8g
- Fiber: 3g
- Protein: 12.1g
- Cholesterol: 5mg