

Slice and Bake Christmas Cookies
These slice and bake Christmas cookies start with one batch of soft sugar cookie dough and end with something that looks far fussier than it really is.
The idea comes straight from the tube cookies many of us grew up with, but the homemade version tastes better and lets you choose your own holiday shapes.
The original recipe comes from Crowded Kitchen, and you can read Crowded Kitchen’s slice and bake Christmas cookies if you want to see the source.

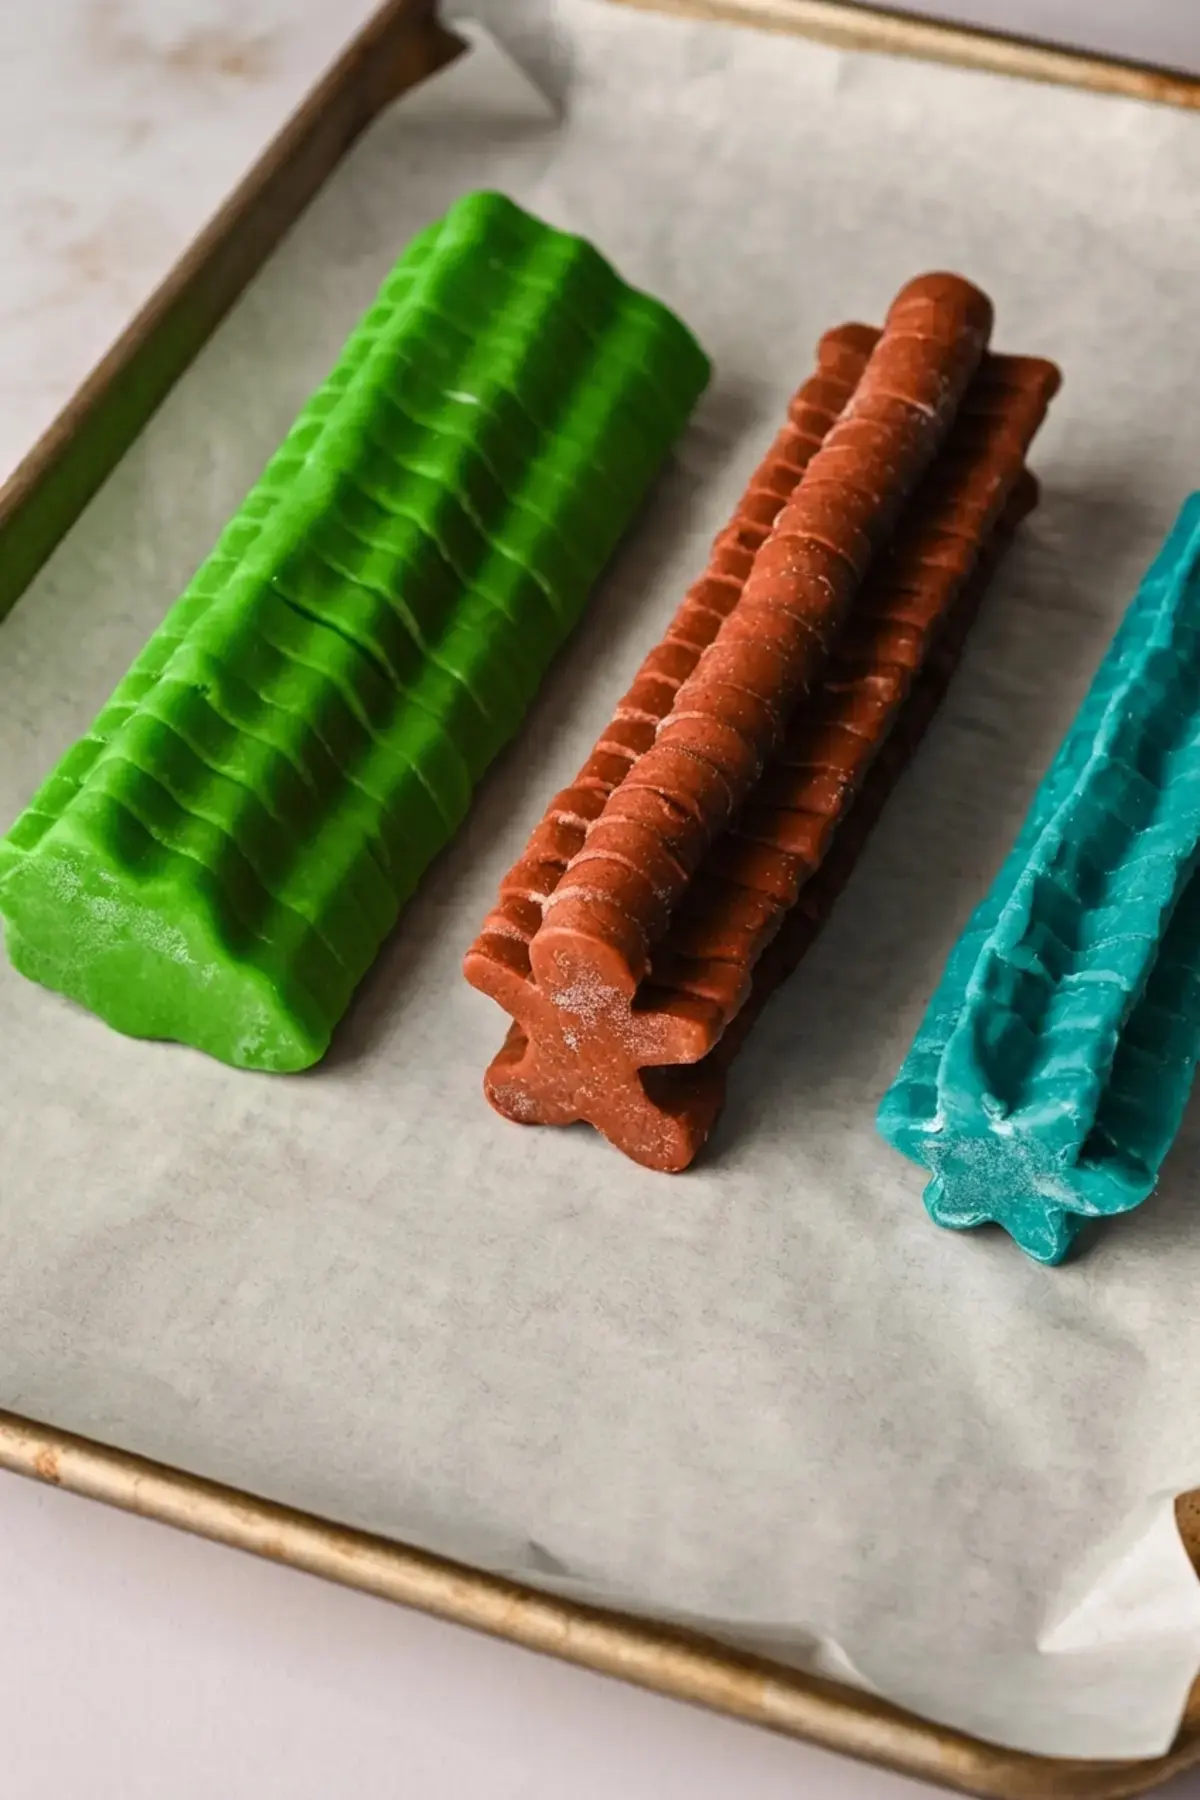
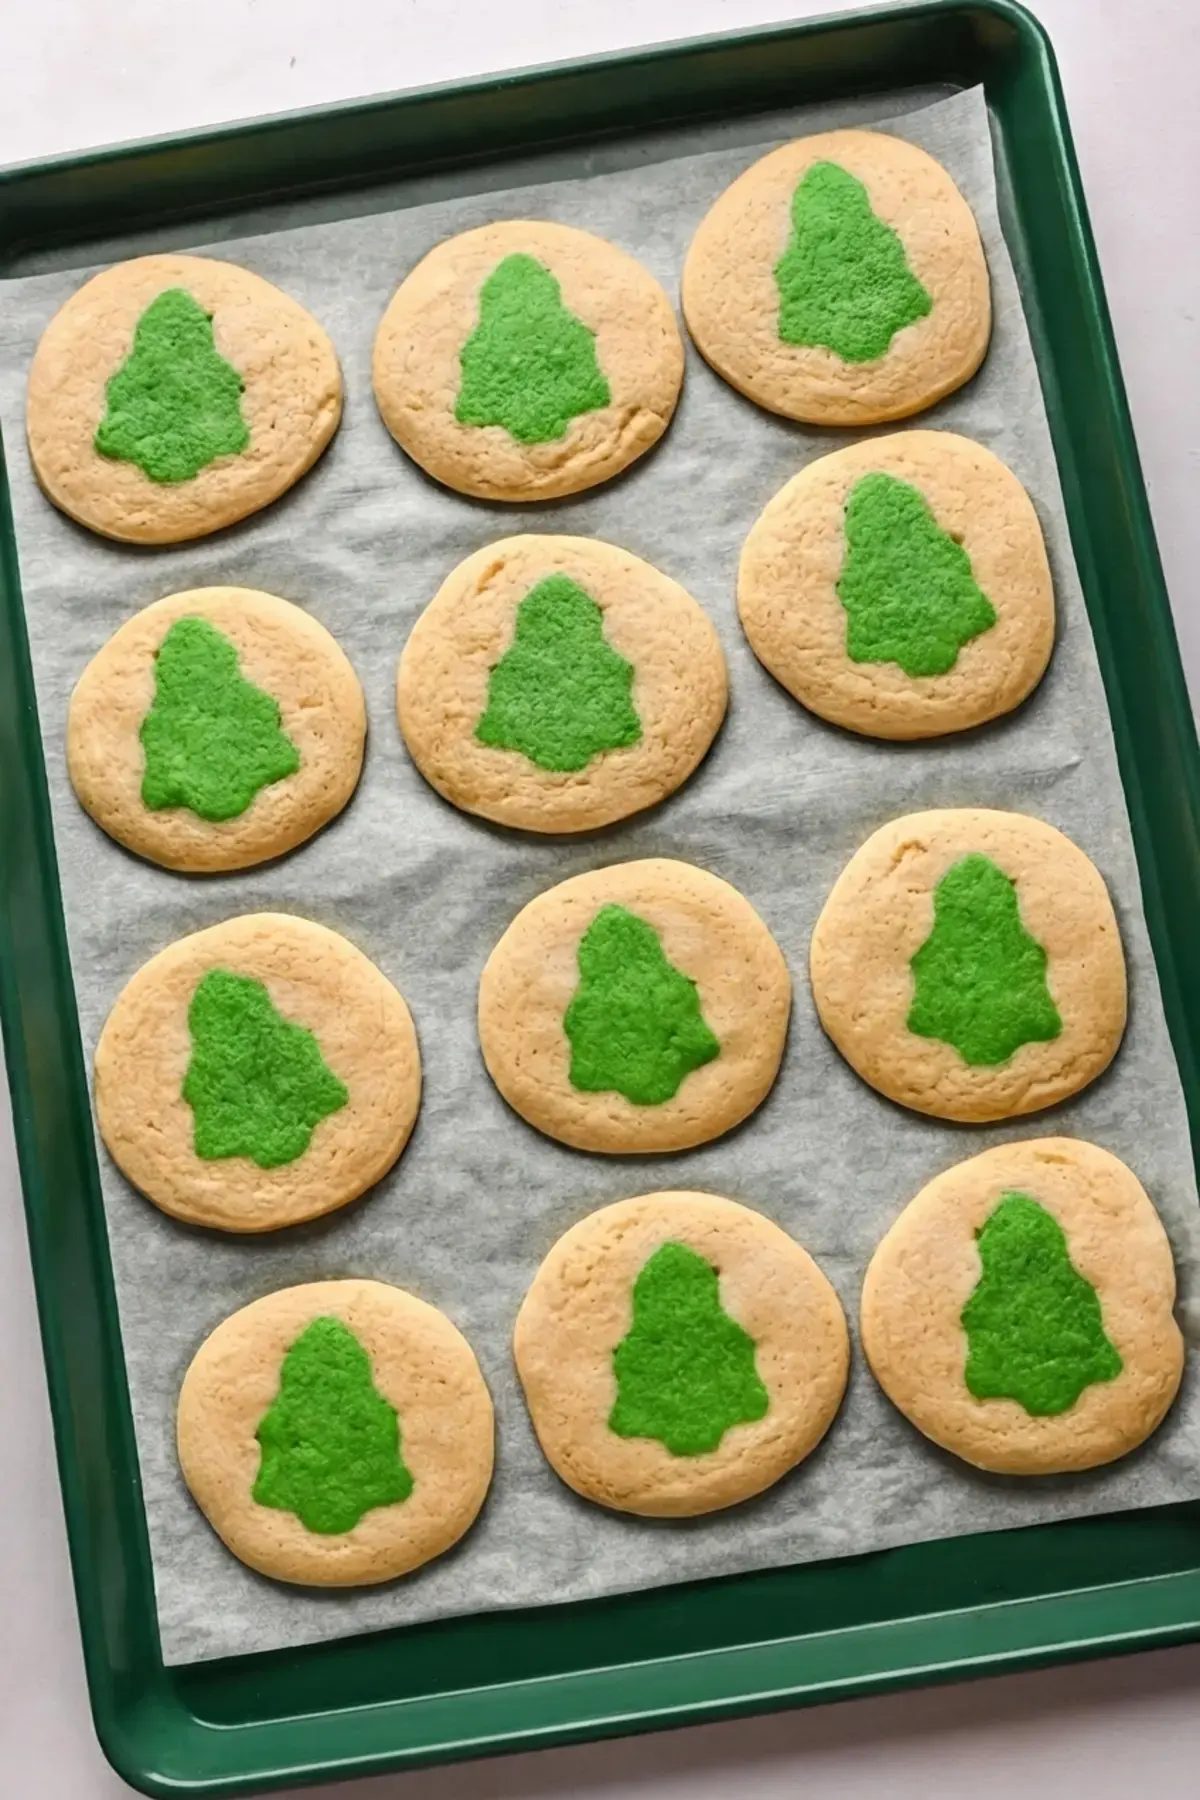
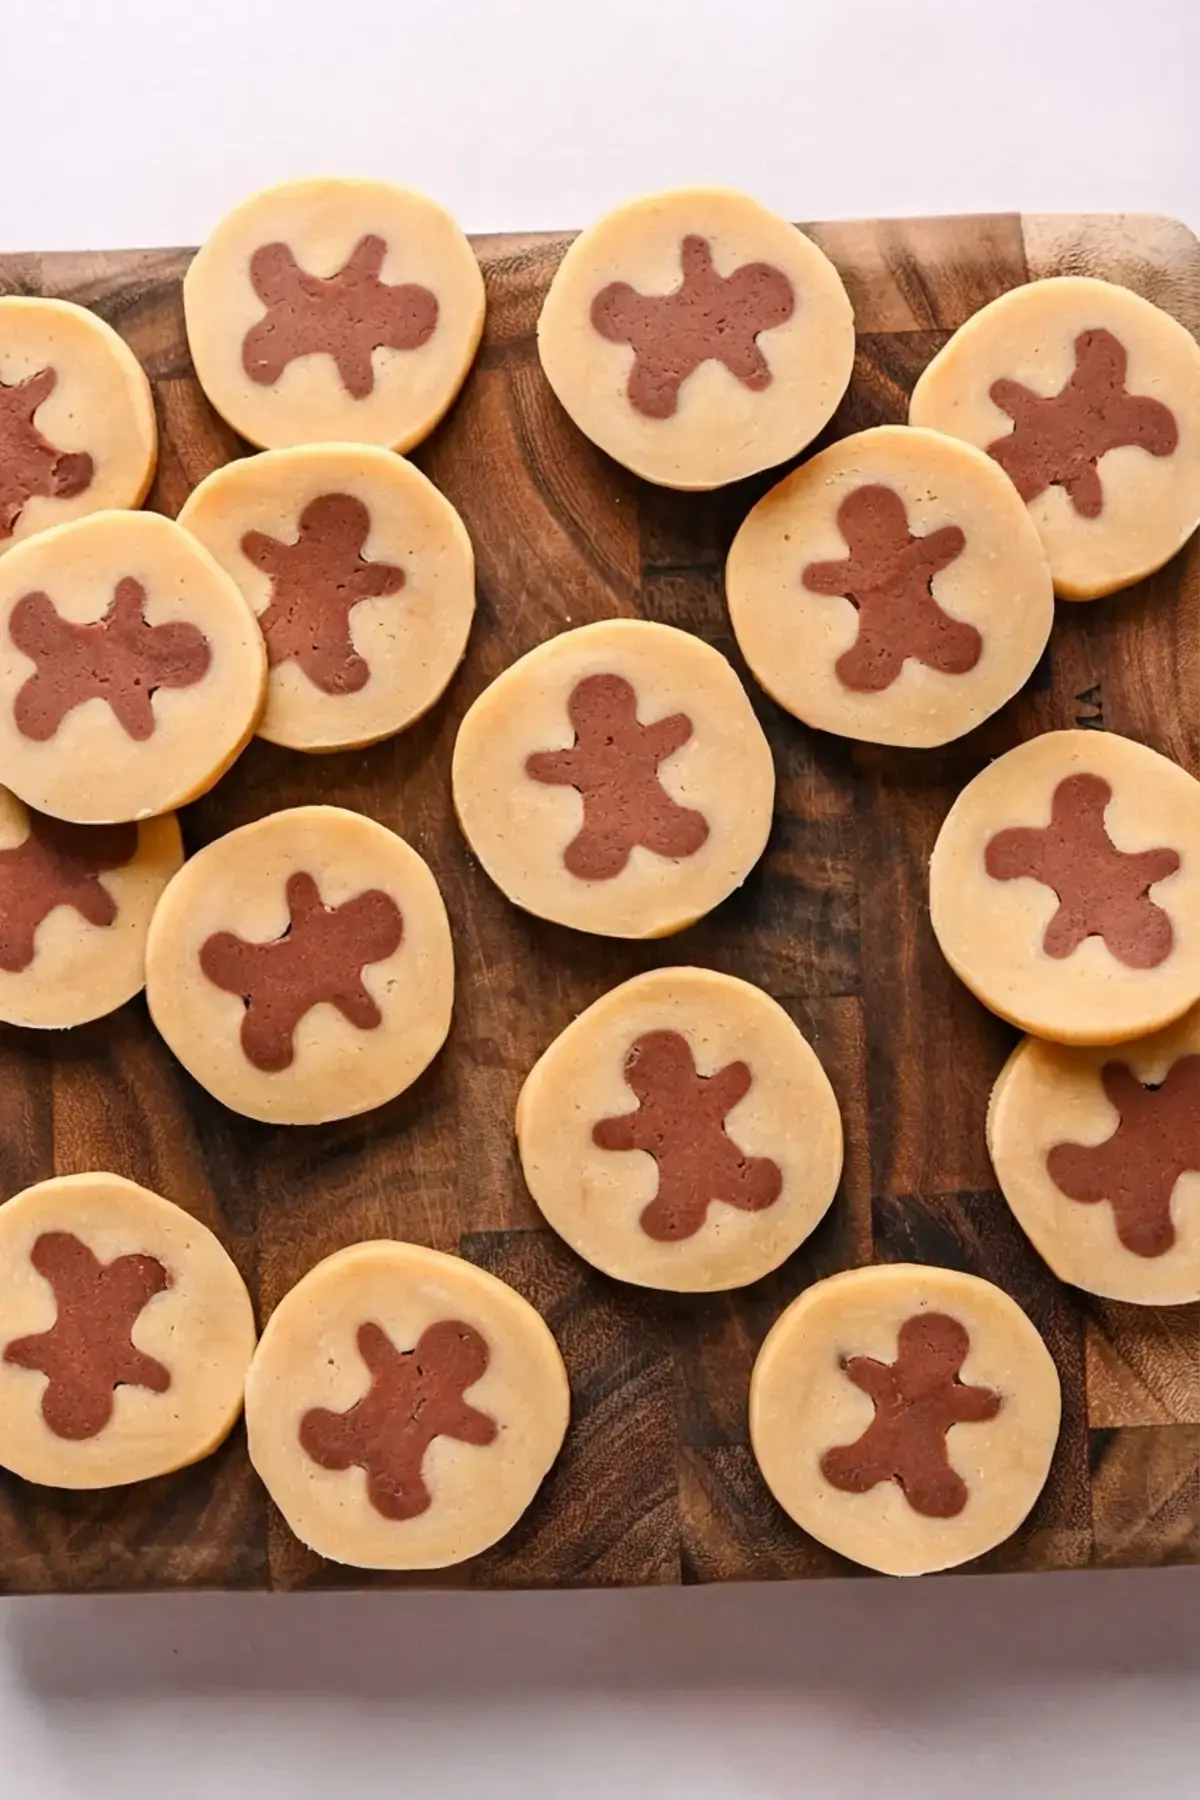
The method is simple once you see it. Mix one batch of sugar cookie dough, tint part of it with food coloring, cut that colored dough into shapes like Christmas trees and gingerbread men, stack the shapes into a log, then wrap the log in the plain dough.
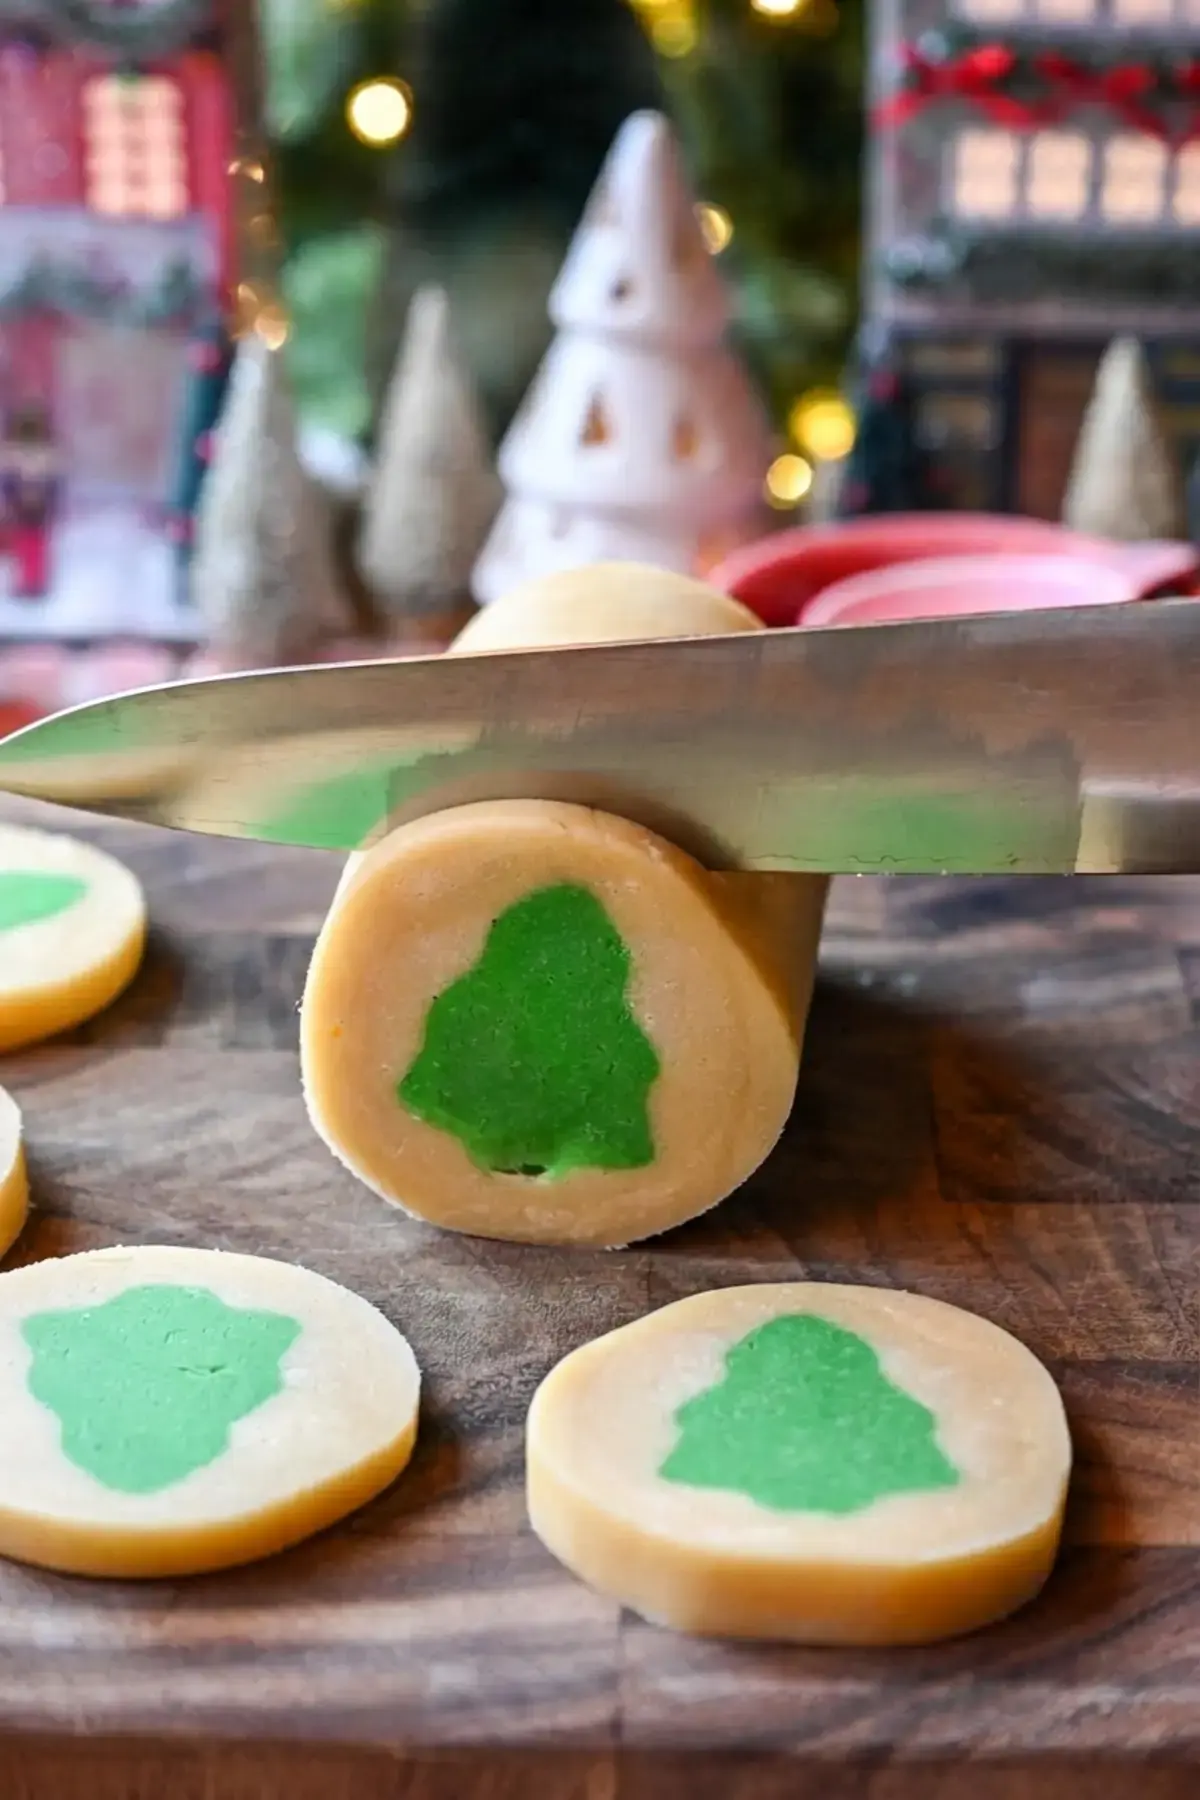
When you slice the finished log, every cookie shows a little shape inside.
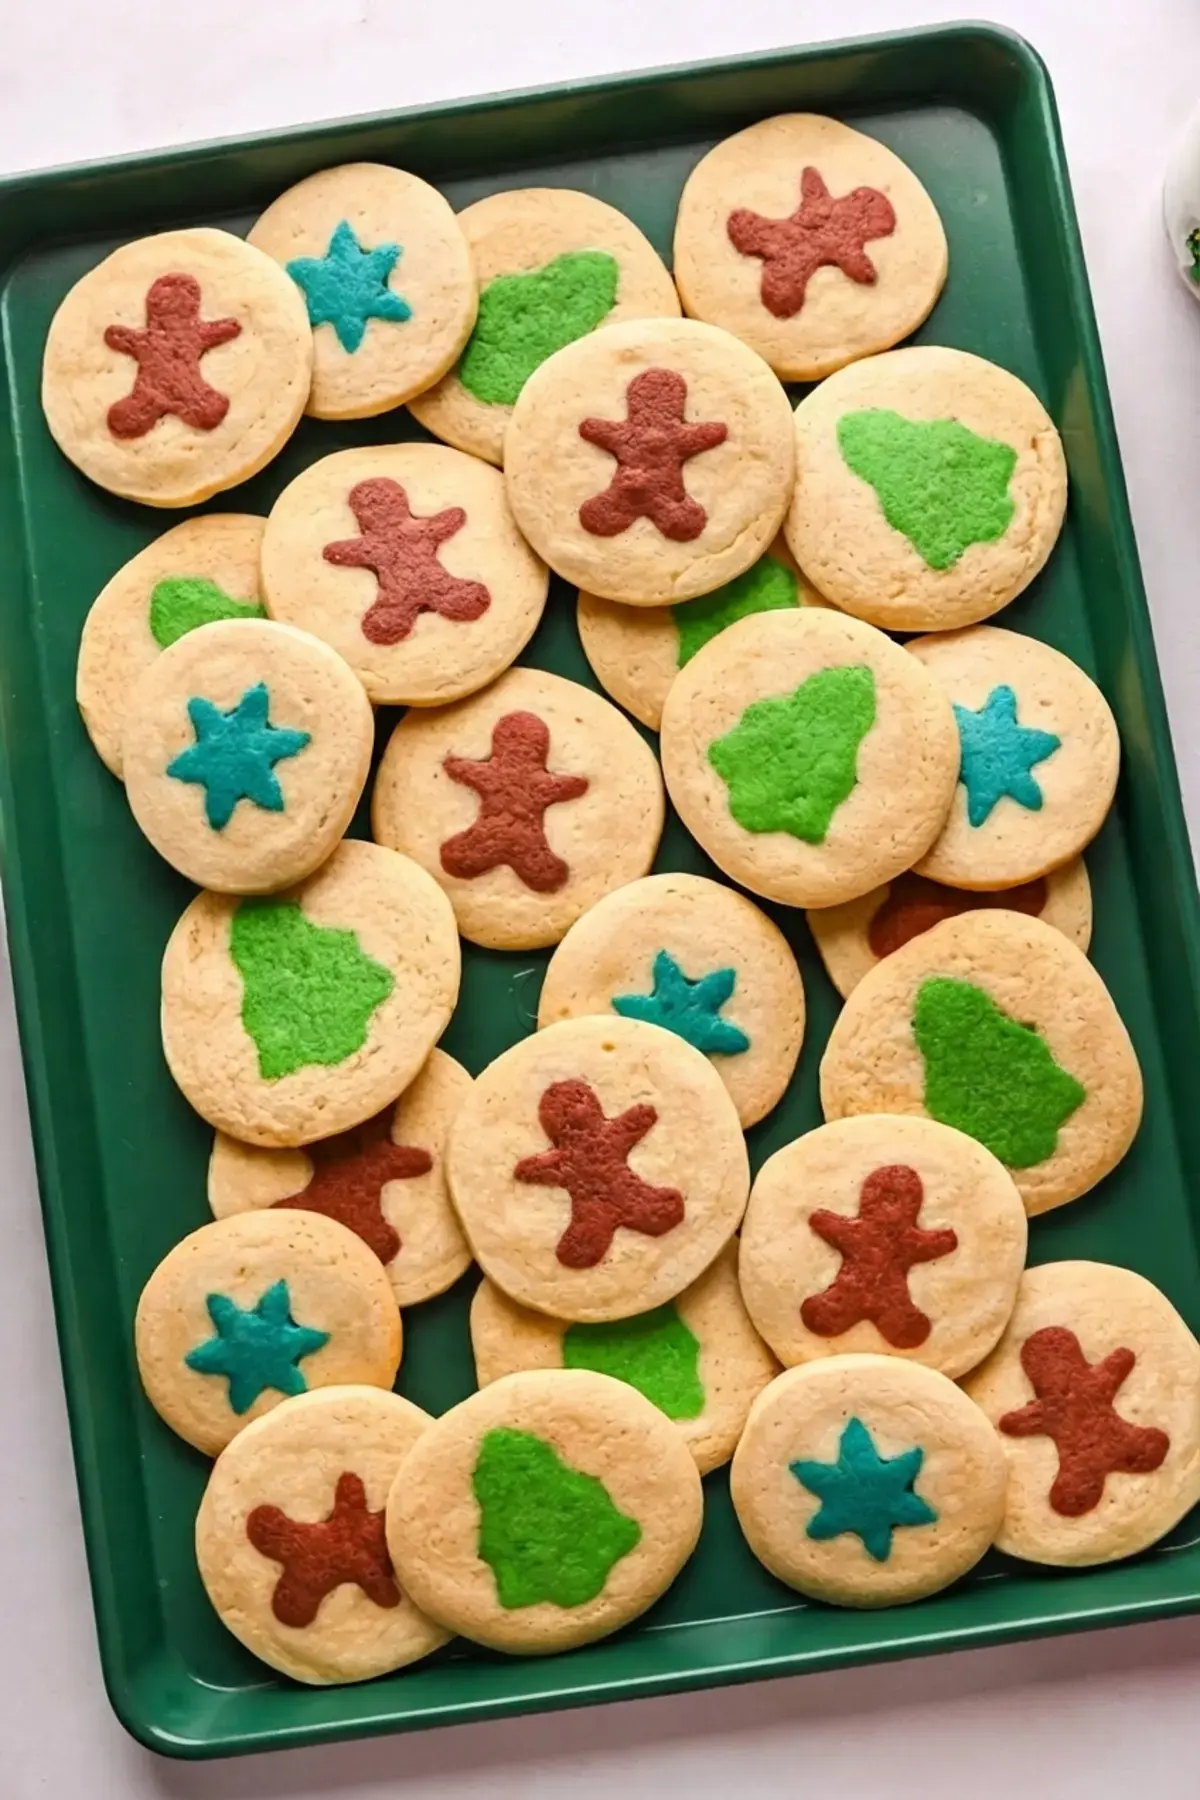
Green was used for the trees, brown made by mixing green and red for the gingerbread men, and blue for the snowflakes. The dough needs plenty of chilling time, so plan for a relaxed baking project rather than a last minute sprint.
One batch makes about 2 dozen cookies, and it is a lovely place to start if you are baking your way through the season.
Jump to:
- Slice and Bake Christmas Cookies
- Slice and Bake Christmas Cookies Ingredients
- How to Make Slice and Bake Christmas Cookies
- Substitutions and Variations
- Be patient! Chilling the dough is key.
- More Tips
- FAQs
- How do you make slice and bake Christmas cookies?
- Why are my slice and bake cookies blurry?
- Can you freeze slice and bake cookie dough?
- What shapes work best for slice and bake cookies?
- Slice and Bake Christmas Cookies
- Ingredients
- Instructions
- Last Step:
- Nutrition
- Did you make this recipe?
Slice and Bake Christmas Cookies Ingredients
You need one batch of dough, plus a few drops of coloring for the hidden shapes. Here is what goes into it:
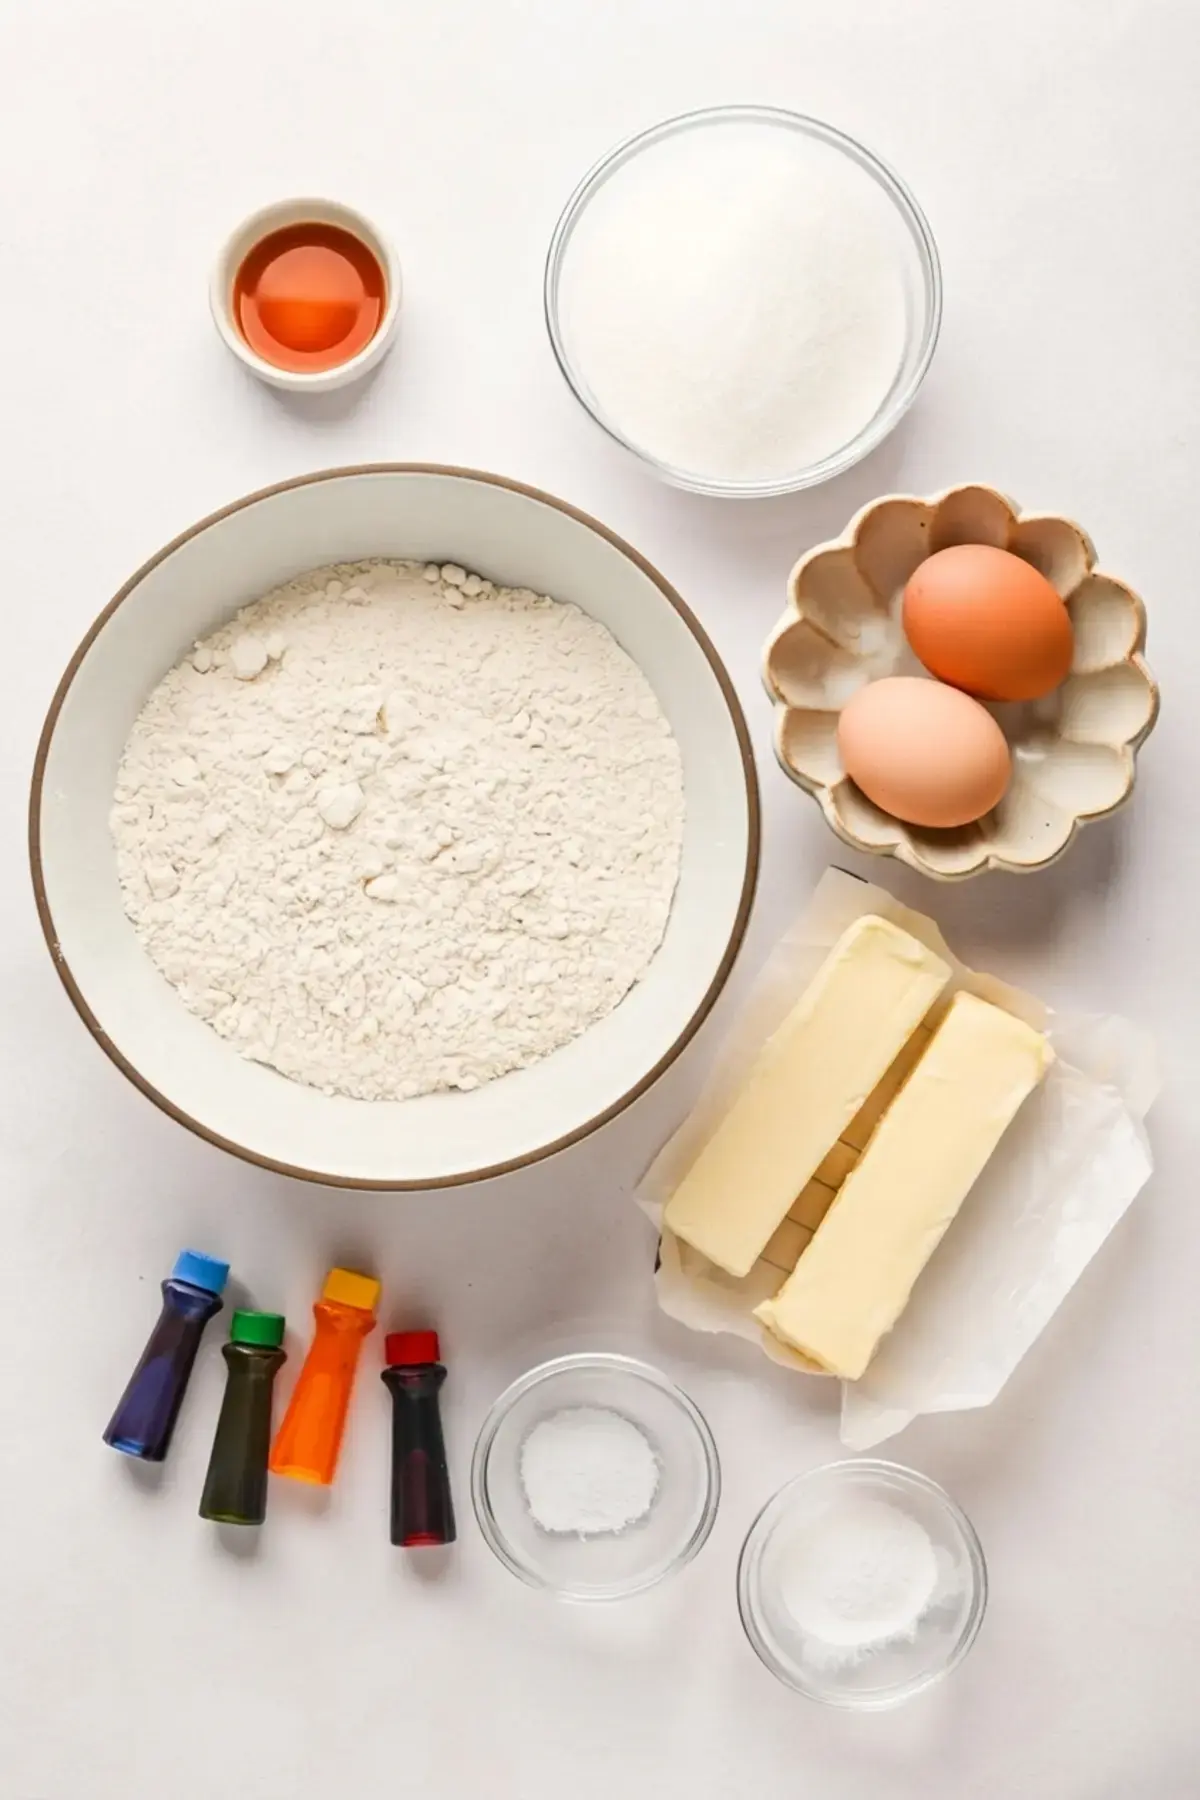
- 2 1/2 cups all purpose flour, spooned and leveled
- 1 cup granulated sugar
- 3/4 cup unsalted butter, softened to room temperature
- 2 large eggs
- 1 teaspoon baking powder
- 1 teaspoon vanilla extract
- 1/2 teaspoon kosher salt
- Food coloring, gel or natural, just a few drops
Regular all purpose flour is what this recipe uses, and it has not been tested with gluten free flour. White granulated sugar gives the right color and texture, so it is the best choice here. Let the butter sit out for a few hours until it is genuinely soft, because cold butter will not cream properly with the sugar.
Baking powder provides a gentle lift. Do not swap in baking soda, since it will not have the same effect and leaves an unpleasant flavor. The kosher salt balances the sweetness, and the vanilla builds that classic sugar cookie taste. Feel free to add a little more vanilla, or use almond extract instead if you like that flavor.
Gel food coloring gives the most vibrant colors. Natural coloring works too, but you need a generous amount because some of the color bakes out in the oven, and you will likely need an extra 1 to 2 tablespoons of flour to keep the dough workable.

How to Make Slice and Bake Christmas Cookies
These quantities make one shape. If you want trees and gingerbread men in the same batch, multiply the recipe for each additional shape.
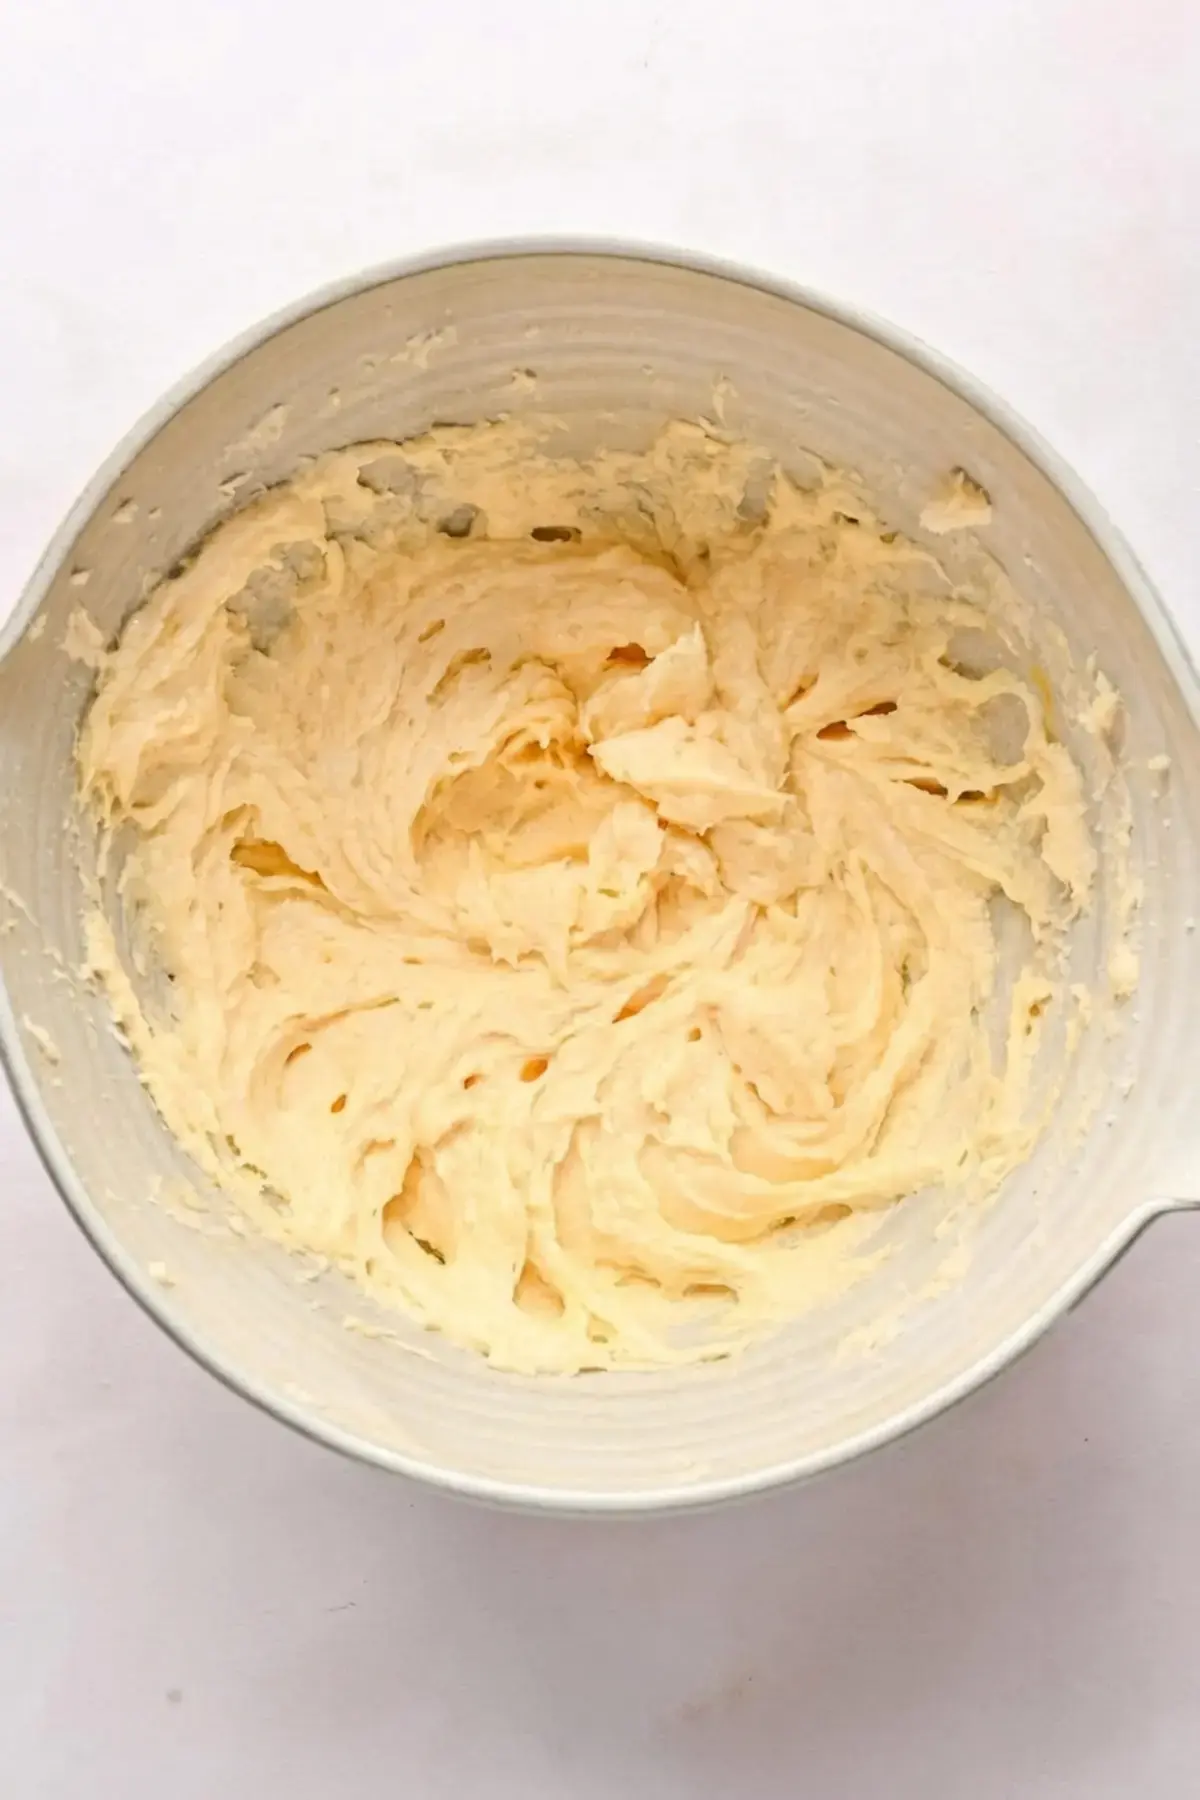
- Add the butter, sugar, and vanilla extract to a large mixing bowl or the bowl of a stand mixer. Beat at medium speed until light and fluffy, about 3 minutes.
- Add the eggs one at a time, mixing just until combined.
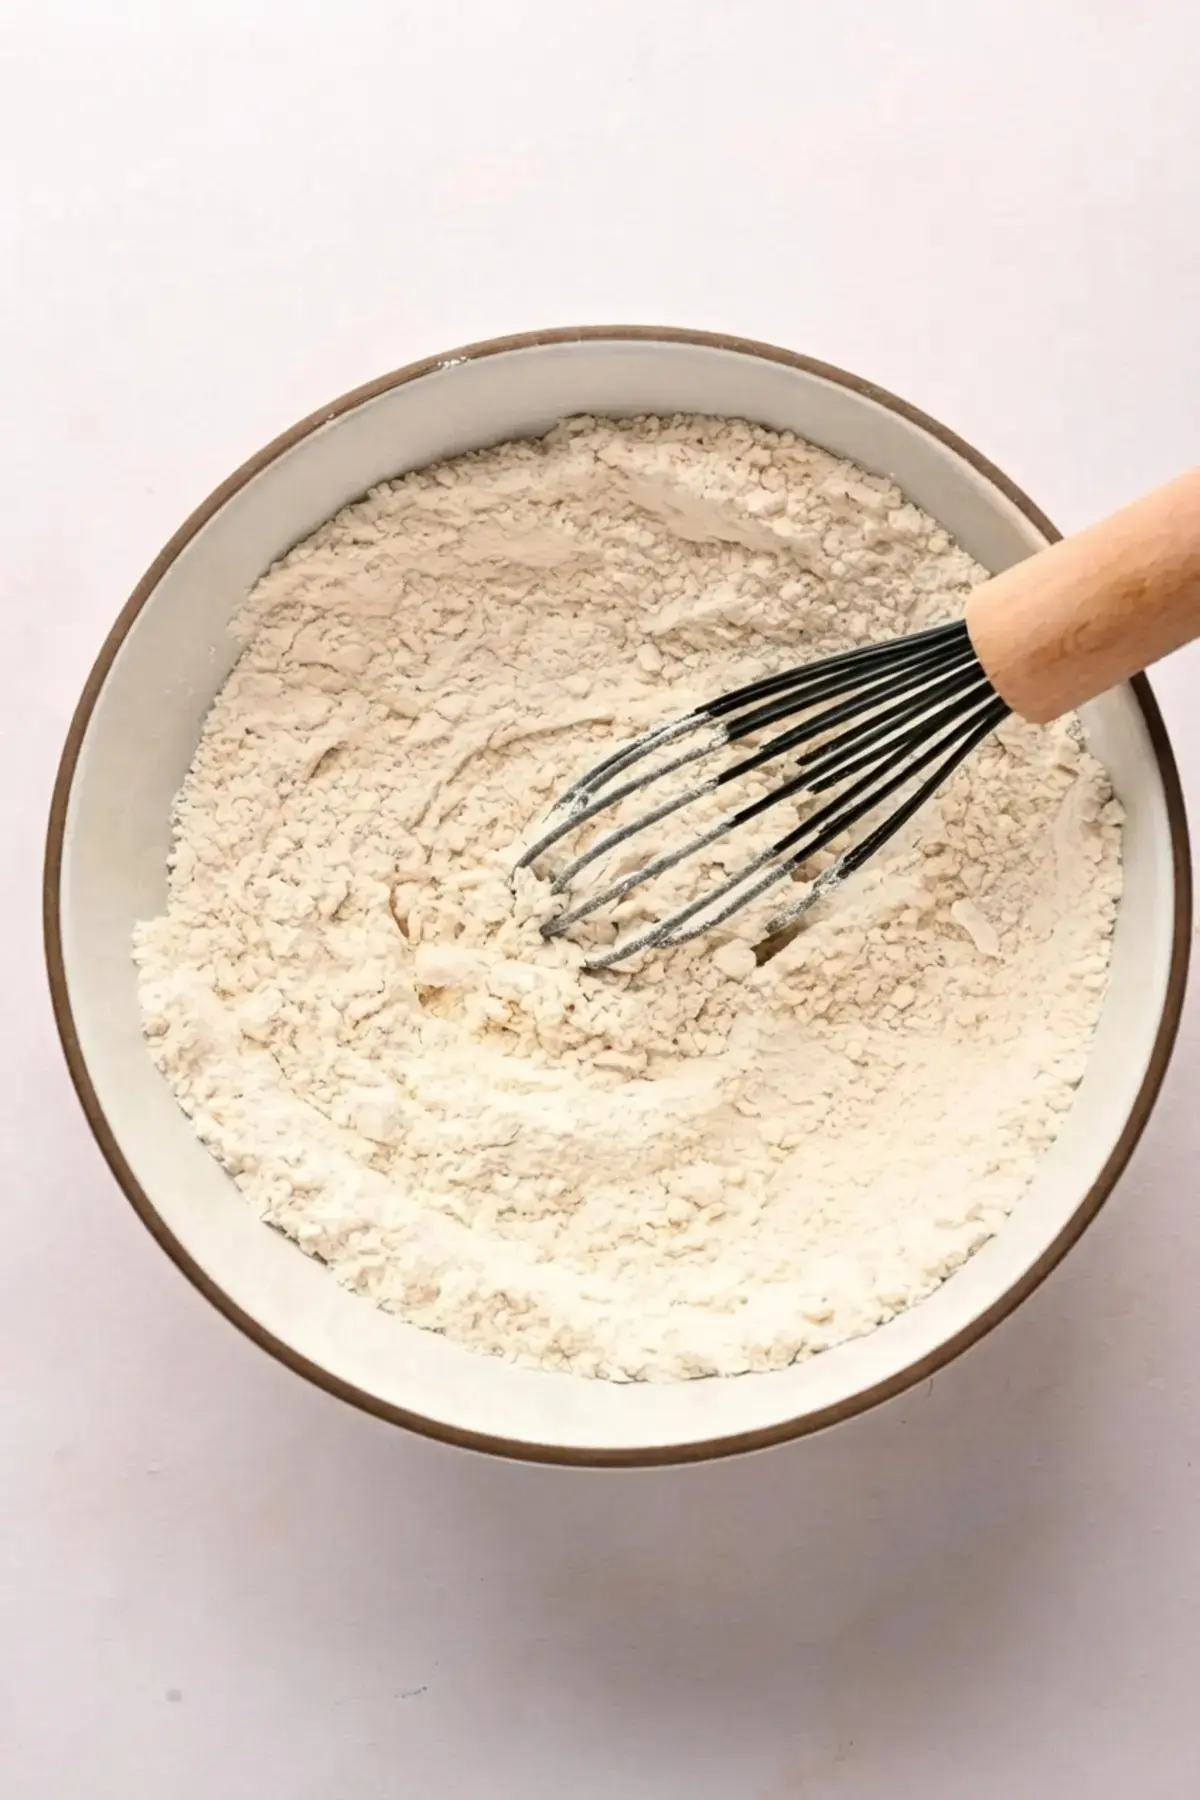
- In a separate bowl, whisk together the flour, baking powder, and salt.
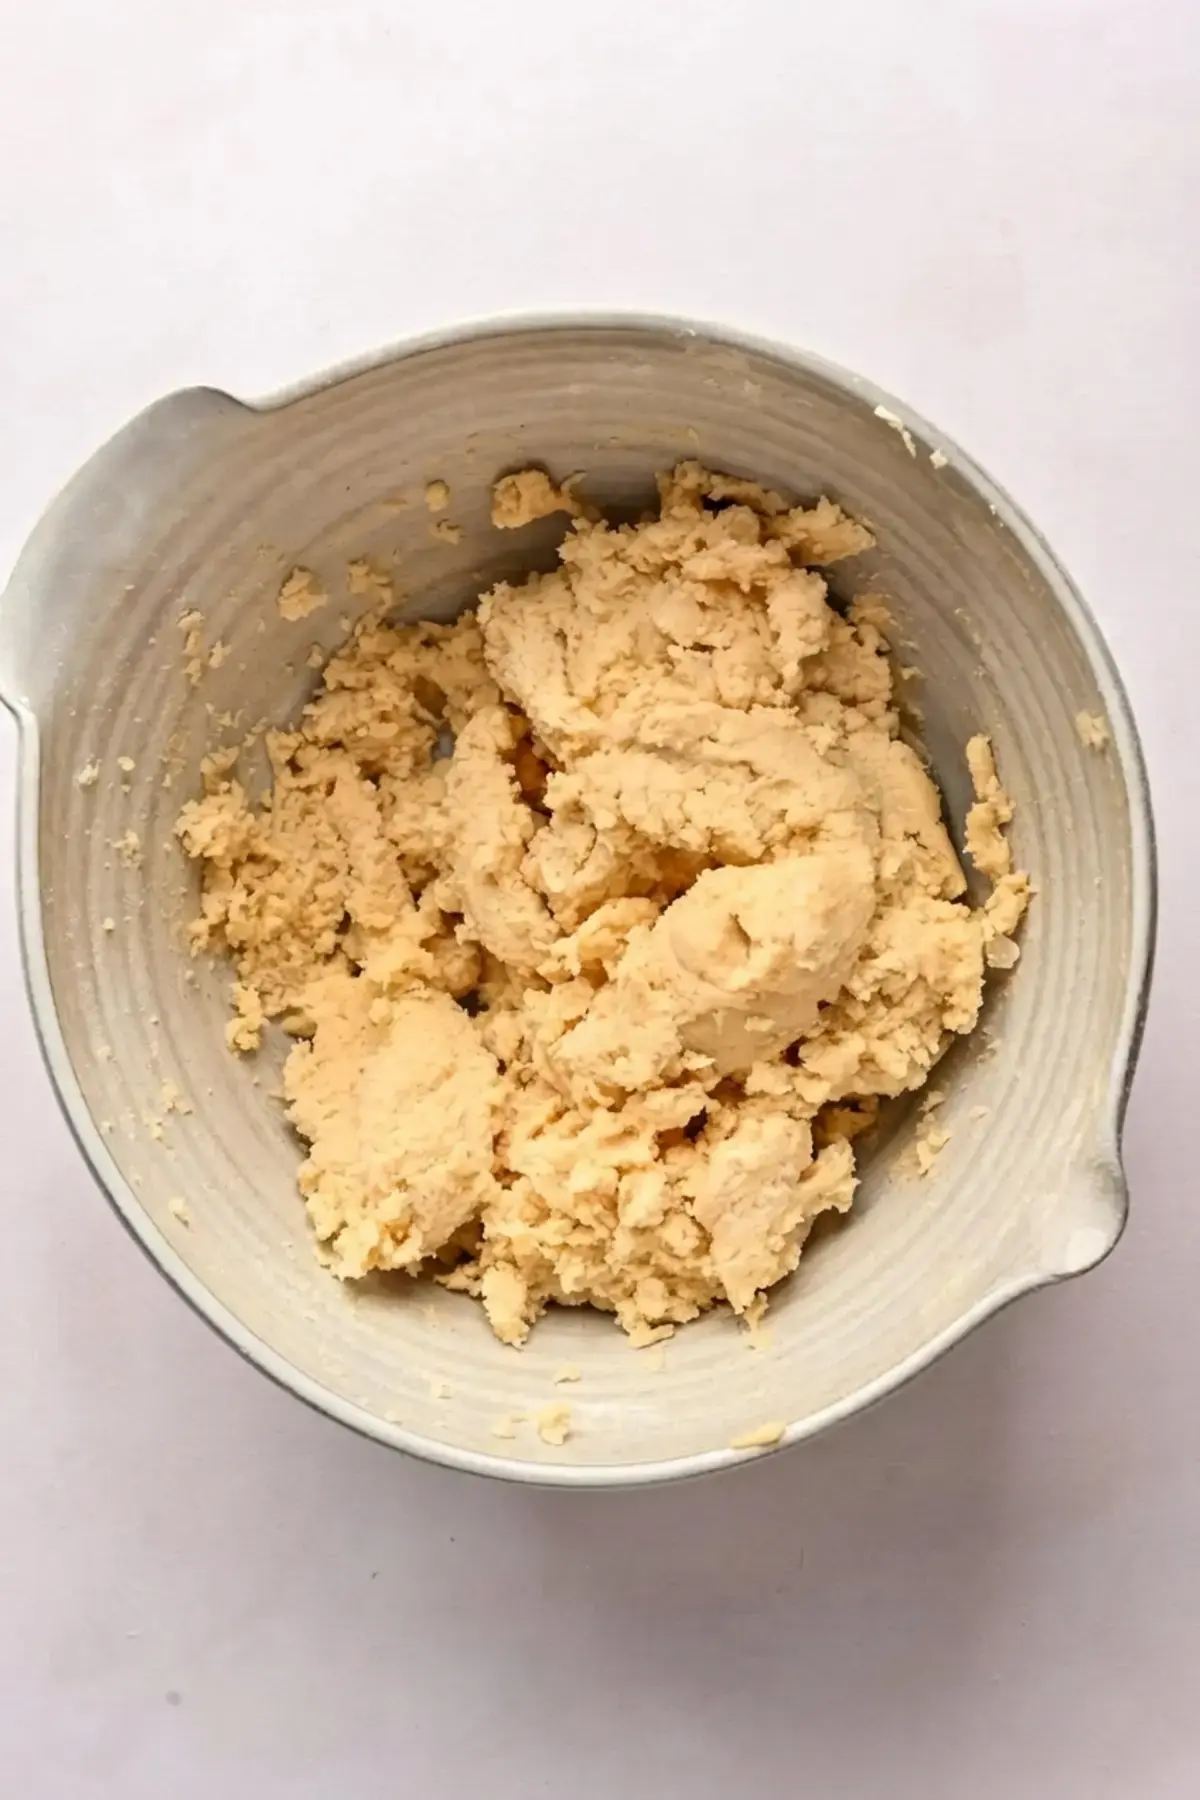
- Add the dry ingredients to the wet ingredients in 3 to 4 batches until the dough comes together. If it feels too wet, add 1 to 2 tablespoons more flour. The dough should be very soft, but it should not stick to your fingers too much. If you used natural food coloring, you will likely need that extra flour.
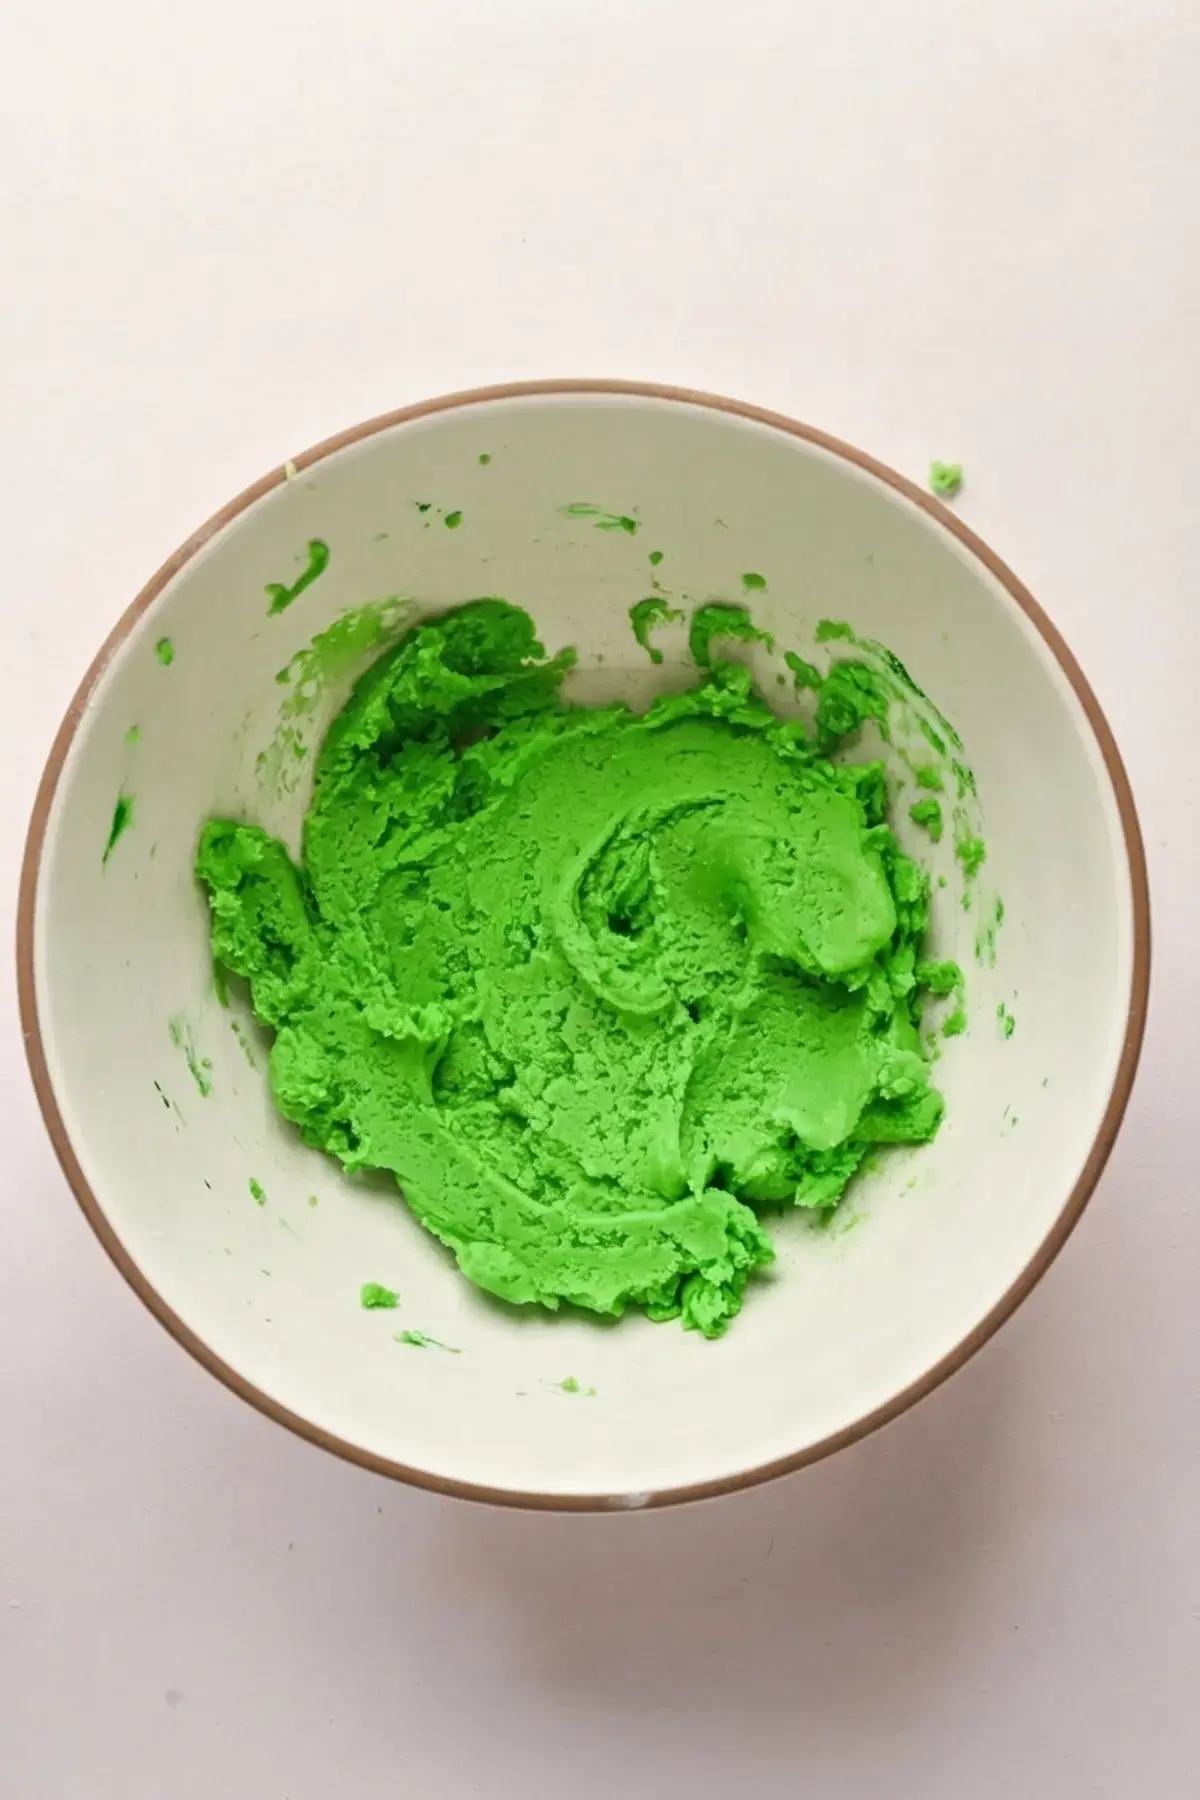
- Remove about 10 ounces of dough, roughly one third of the batch, and place it in a separate bowl. Add several drops of food coloring and mix until combined, adding more until you reach the shade you want. Keep the remaining two thirds plain for coating the shapes.
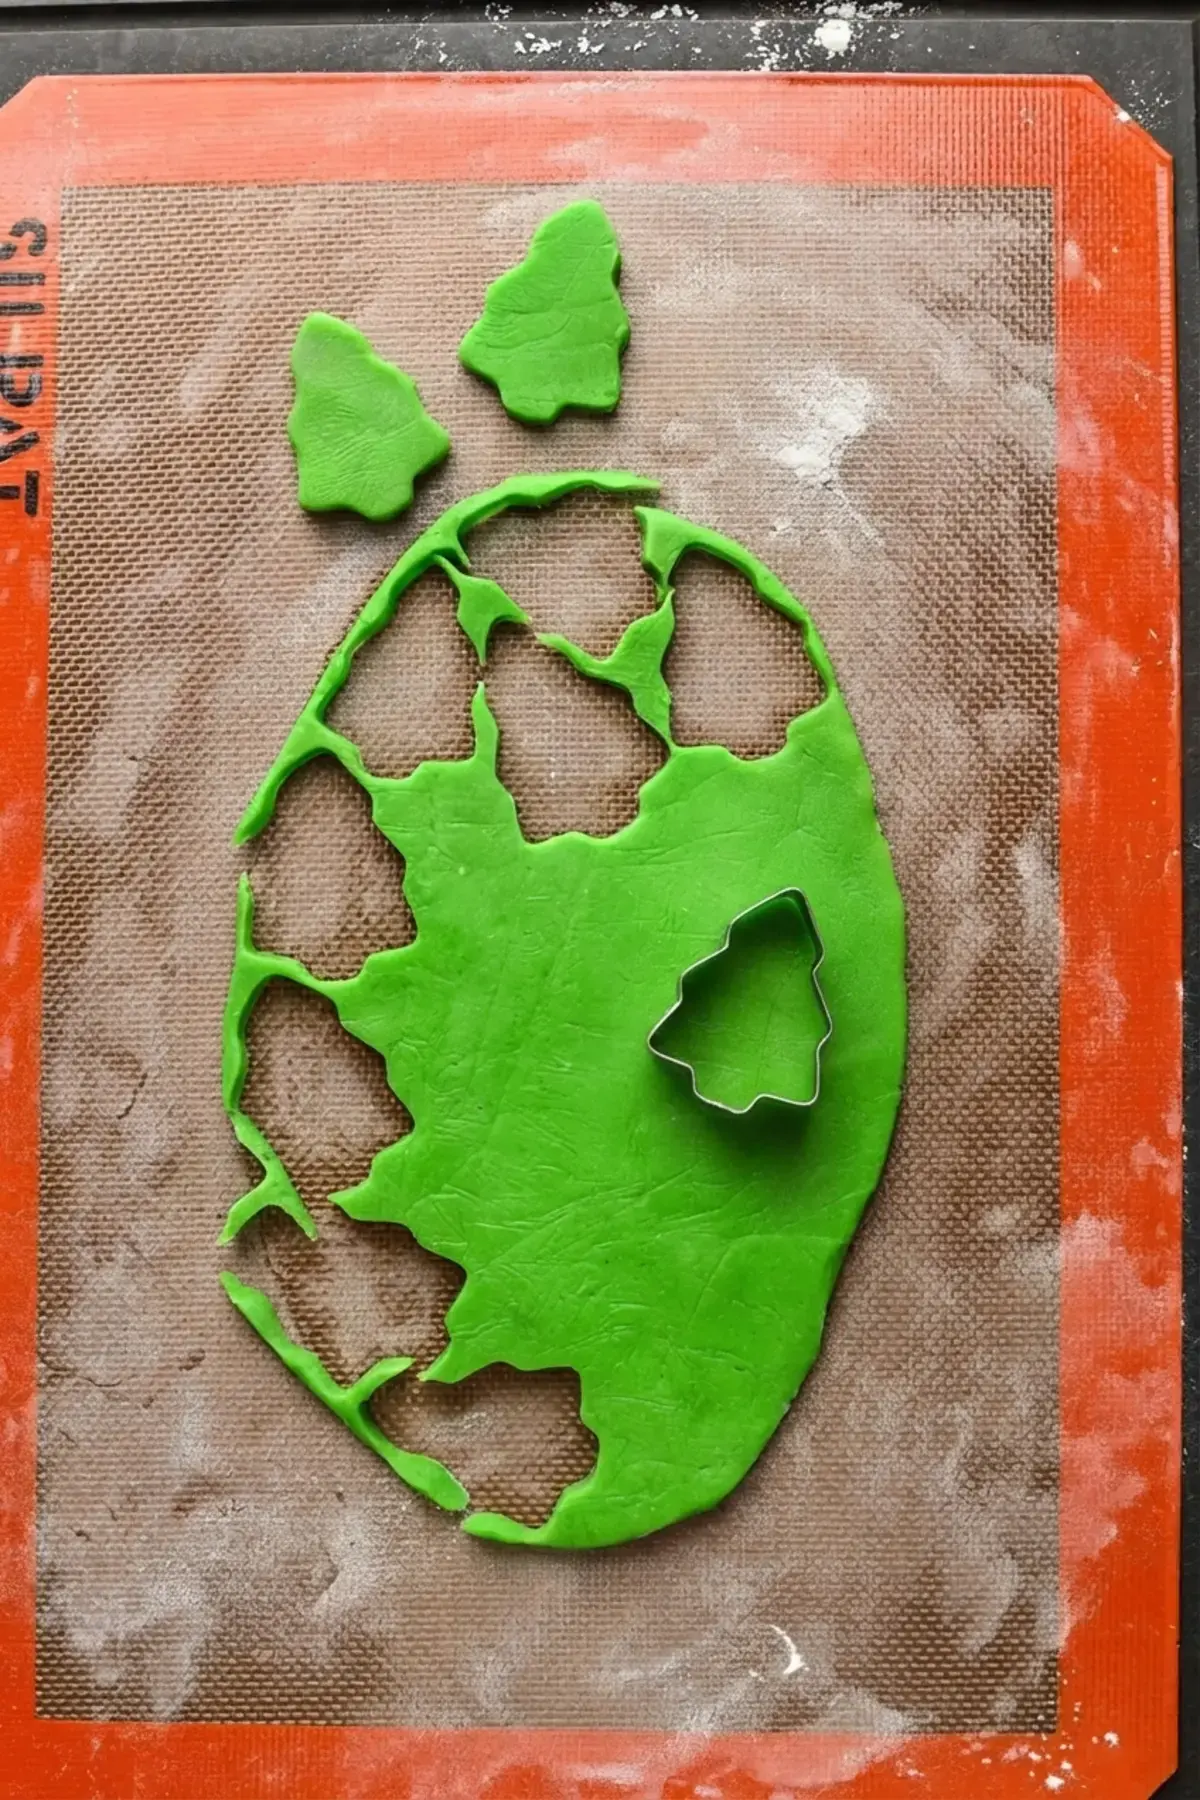
- Place the colored dough in the freezer for 5 to 10 minutes, then roll it into a rectangle about 1/2 inch thick on a lightly floured surface. Return it to the freezer for about 30 minutes. Chilled dough cuts far more cleanly.
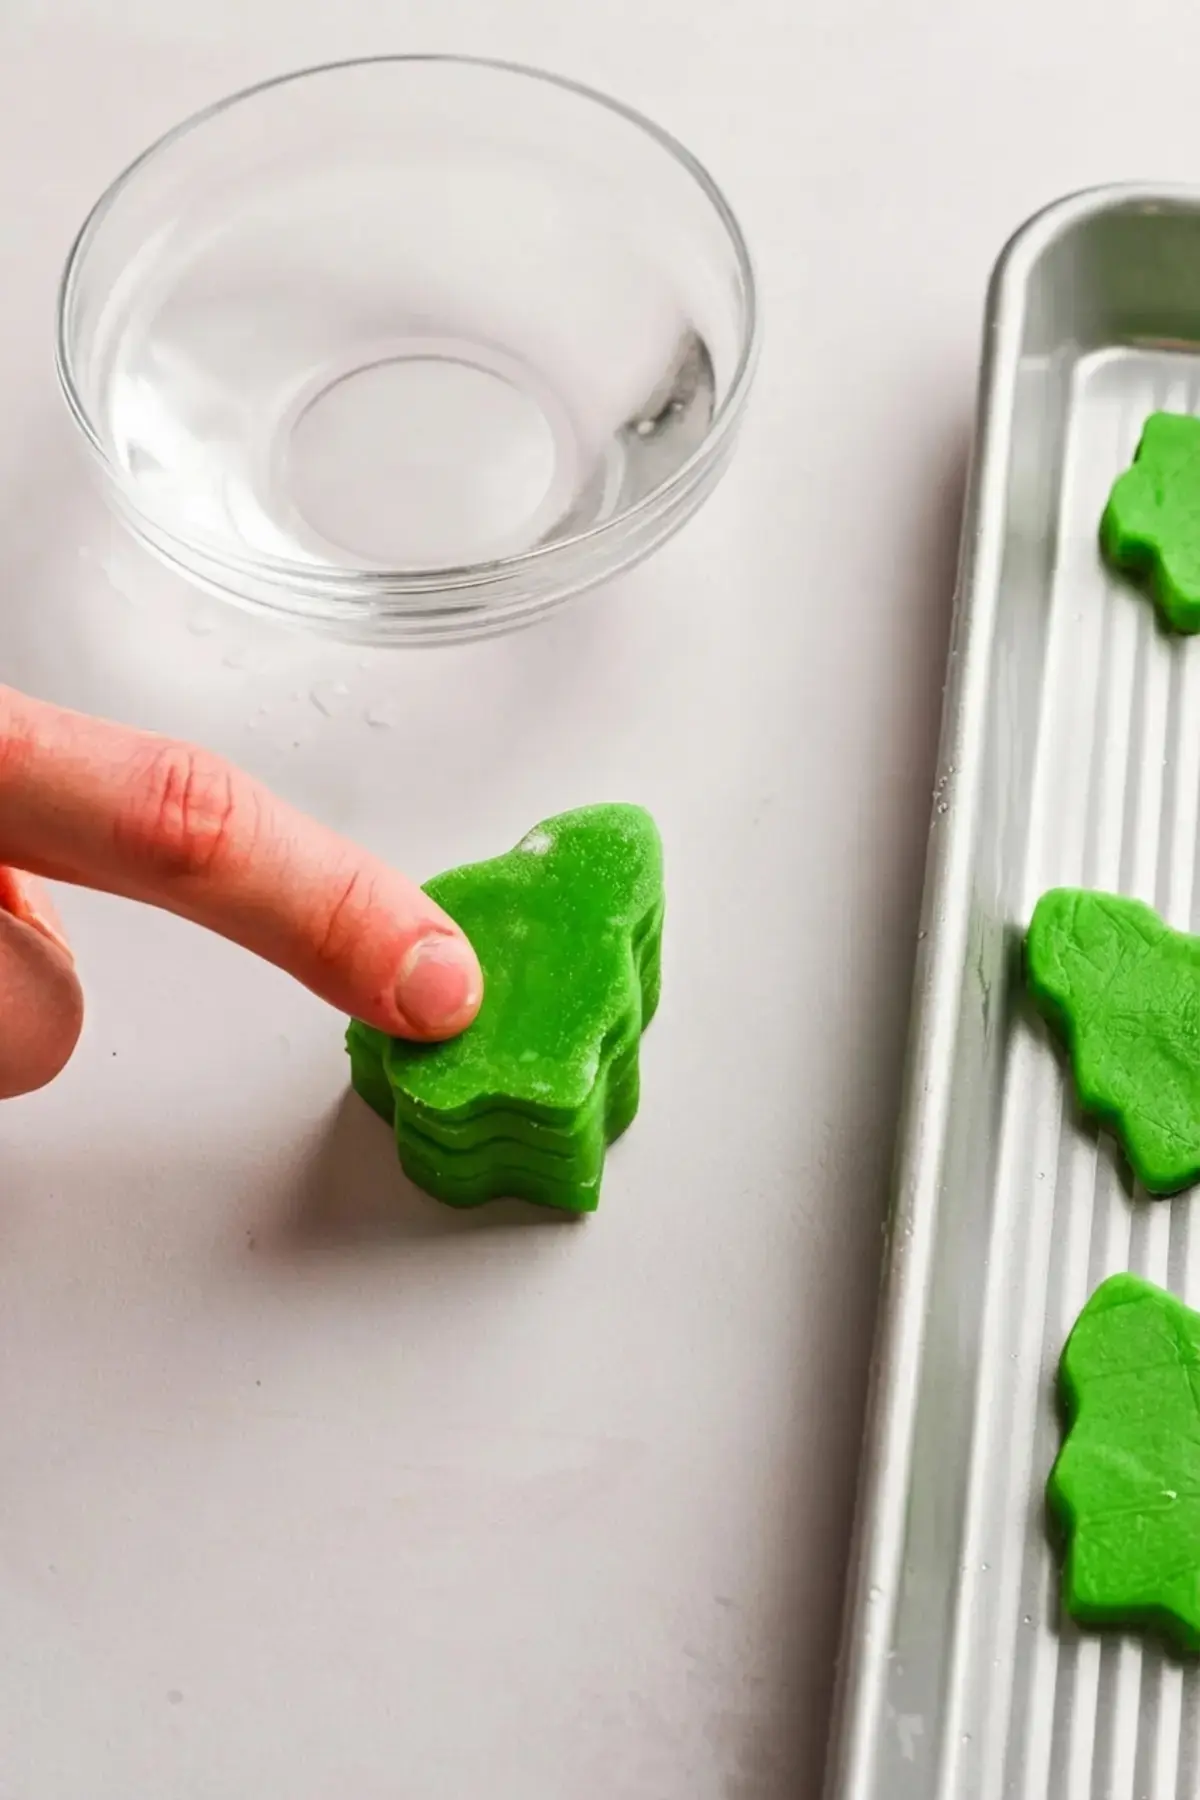
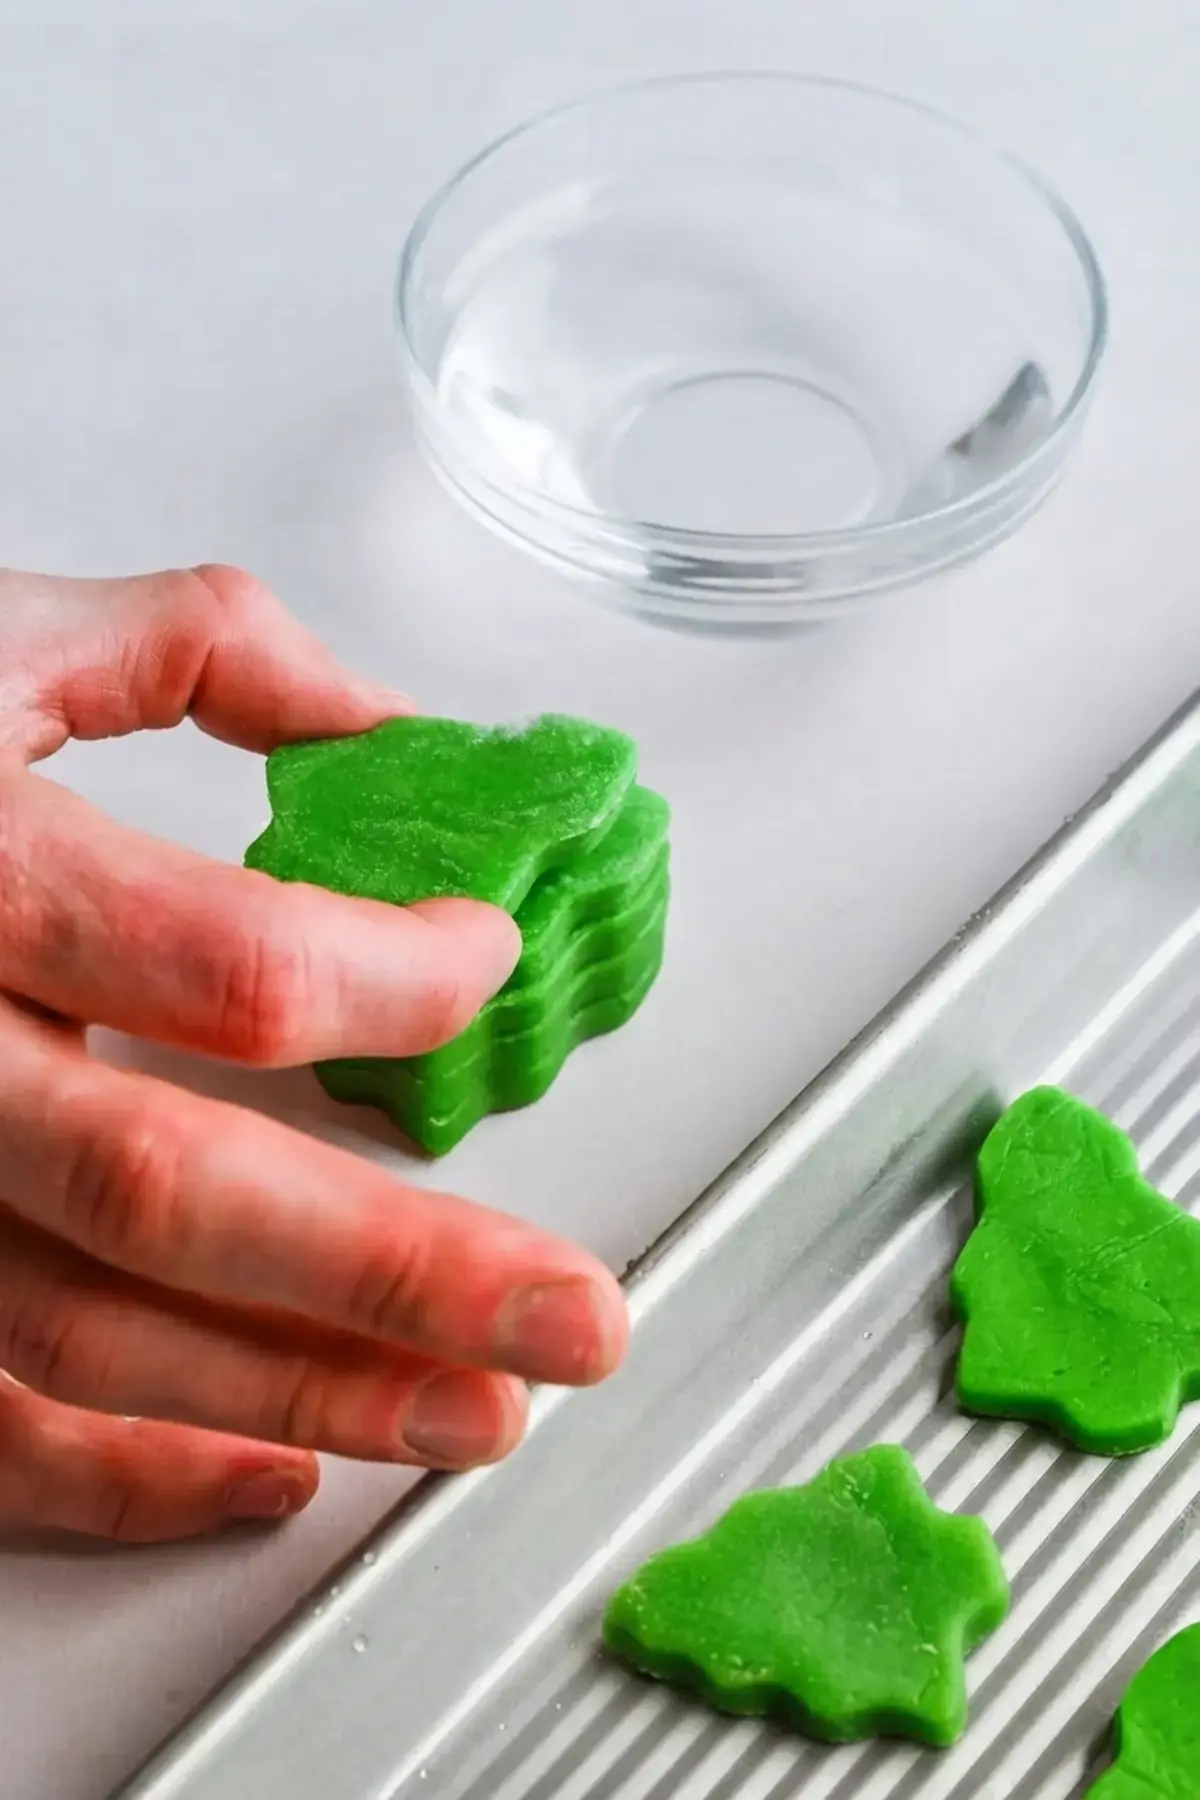
- Use a small cookie cutter, roughly 1.5 inches across, to cut out your shape. Dip a finger in a little water and rub it on the floured side of the cookie before pressing it onto another cutout. You only need a tiny amount of water. Repeat with all the shapes until they form a log about 10 inches long.
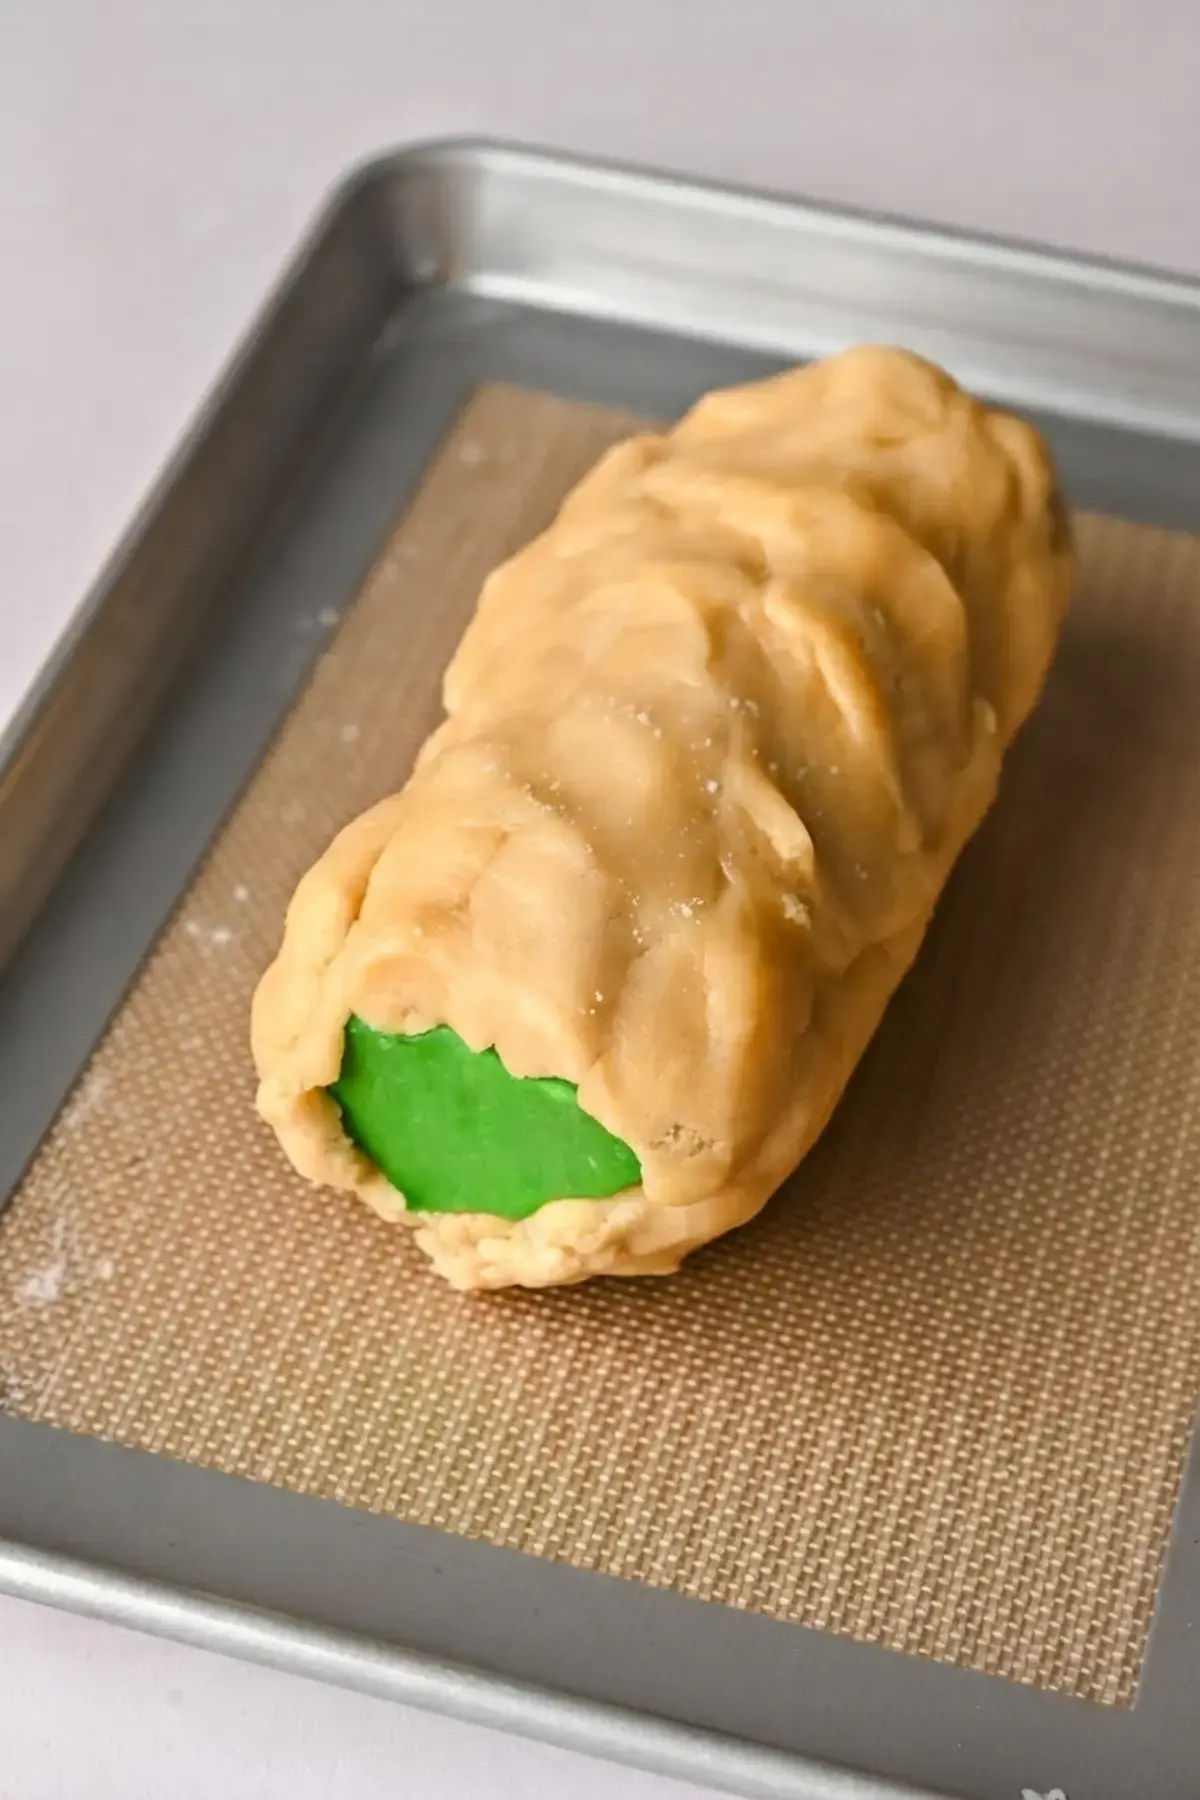
- Return the log to the freezer for 2 hours, or until it is frozen solid. Many bakers make these over two days and leave the log in the freezer overnight. Take it out and press the plain dough directly onto and around the frozen shape, working it in firmly so you do not end up with gaps. Leaving the ends open helps you see how much dough you need for an even circle. Roll it into a smooth log on a lightly floured surface.
- Wrap the log in plastic wrap and chill in the fridge for at least 30 minutes.
- Preheat the oven to 350 degrees F and line 2 baking sheets with parchment paper.
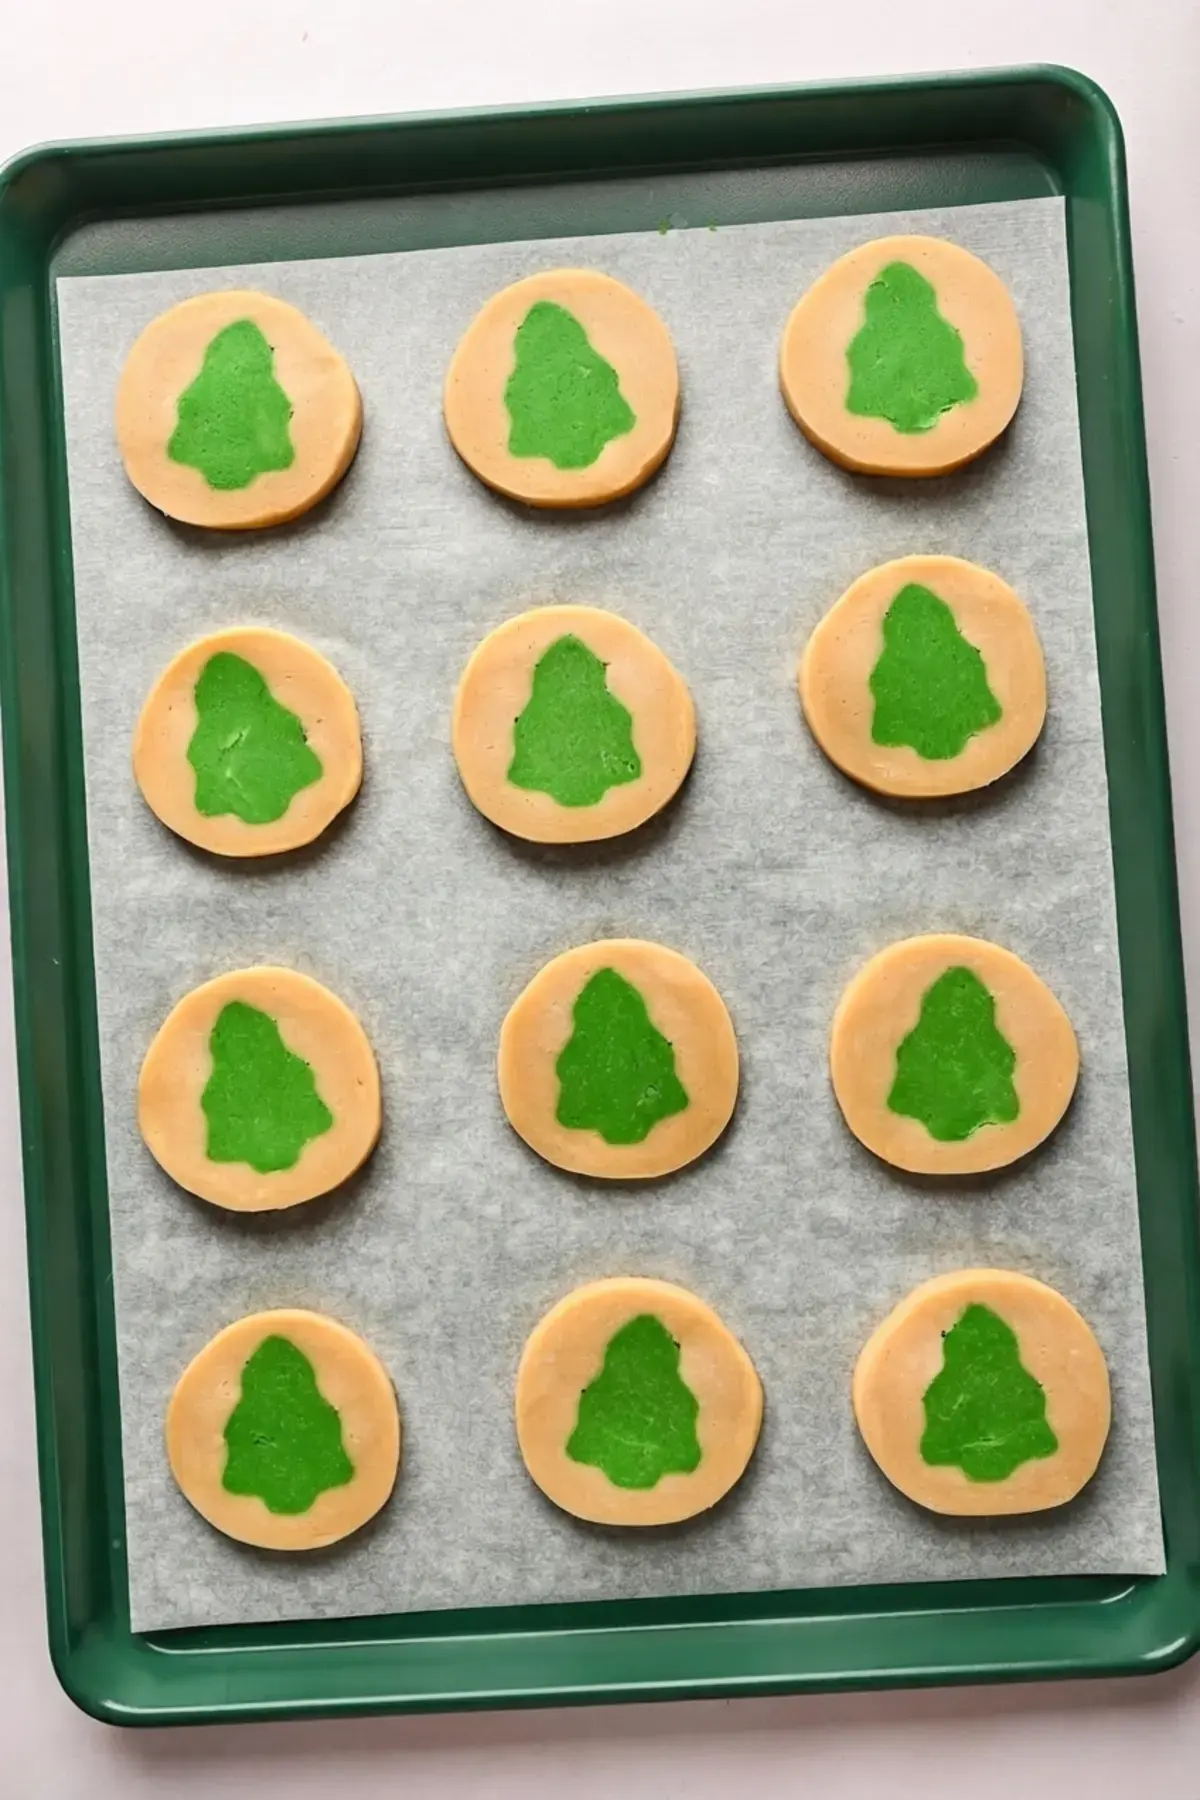
- When you are ready to bake, slice the dough into 1/4 inch rounds, then space them 2 inches apart on the baking sheets. Bake for about 12 minutes, until the bottoms are light golden brown. Remove from the oven and let cool.
The chilling stages are easy to keep straight if you think of them as four separate rests.
| Stage | Where | How long |
|---|---|---|
| Colored dough before rolling | Freezer | 5 to 10 minutes |
| Rolled colored dough before cutting | Freezer | About 30 minutes |
| Assembled shape log | Freezer | 2 hours or overnight |
| Coated log | Refrigerator | At least 30 minutes |
Chilling is doing the heavy lifting here, so the recipe card lists 4 hours 12 minutes total, with 4 hours of prep and 12 minutes in the oven. Most of that time is hands off.

If you want more detail on forming and freezing the logs, our guide to cookie dough logs for slice and bake cookies walks through the same idea step by step.
Substitutions and Variations
For a gluten free version, swap the all purpose flour for a gluten free 1:1 flour. That swap has not been tested, so keep your expectations realistic and be ready to adjust the flour if the dough feels soft.
For a vegan version, use a vegan sugar cookie dough and follow the same shaping, chilling, and baking process. The hidden shape idea works with any dough that holds a firm chill.
Shape choice matters more than you might think. Rounder shapes with fewer protruding points hold up best. Christmas trees and gingerbread men worked well, while snowflakes did not, because the pointed edges were hard to keep intact.
For an optional crunchy crust, roll the finished log in coarse sugar before it chills, and the baked slices come out with a light sugar coating. To add flavor, increase the vanilla or add another extract such as almond.
If you like comparing approaches, this easy icebox Christmas cookie recipe is a helpful read.
Be patient! Chilling the dough is key.
Chilling is what makes the design work. The colored dough needs time in the freezer before you roll and cut it, and if it is too soft, the shapes are nearly impossible to remove from the cutter without stretching or tearing. Give it the full chill and you will be rewarded with crisp, clean edges.
Do not skip the freezing steps. A soft log will blur the shapes you worked so hard to build.
The log of stacked shapes needs to be frozen solid before the plain dough goes on. If the shape log is soft, it will distort as you press the coating dough around it, and the design inside will smudge. This is the step that separates a clean slice from a messy one.
More Tips
If you are assembling everything in one day, leave the plain dough out of the refrigerator. It should stay very soft and pliable so it presses easily around the frozen log. If you are working over two days, cover the plain dough and refrigerate it overnight, then bring it back to room temperature before shaping.
The trees and gingerbread men in the original recipe were made with the smallest cutter in each set. Whatever shape you choose, pick a cutter large enough that the design still reads clearly in a 1/4 inch slice. The same method works for other holidays, such as ghost shapes for Halloween or hearts for Valentine’s Day.
If you want to eat the raw dough more safely, heat treat the flour to pasteurize it and use pasteurized eggs. Flour is the ingredient people forget about in raw dough.
Measure your flour by spooning it into the cup and leveling it with a knife, or weigh it for accuracy. Too much flour dries the dough out and makes the shapes harder to form. A few extra grams here and there add up fast across 2 1/2 cups.
Tightly wrapped dough freezes well for up to a few months. Let it sit at room temperature for a few minutes before slicing and baking.
Natural food coloring needs to be used generously, and it may fade slightly during baking. Gel coloring holds its color better, which is why it is the easier choice for these cookies.
For reference, the source nutrition lists a serving size of 2 cookies at 330 calories, 44.5 grams of carbohydrates, 20.2 grams of sugar, 15.1 grams of fat, 4.6 grams of protein, 0.9 grams of fiber, and 80 milligrams of sodium. Your numbers will shift a little depending on the flour and coloring you use.
For more ways to change the flavor and color of the dough, see our ideas for slice and bake cookies with flavor ideas.
FAQs
How do you make slice and bake Christmas cookies?
Why are my slice and bake cookies blurry?
Can you freeze slice and bake cookie dough?
What shapes work best for slice and bake cookies?

Slice and Bake Christmas Cookies
Slice and Bake Christmas Cookies These slice and bake Christmas cookies start with one batch of soft sugar cookie dough and end with something that looks far fussier than it really is. The idea comes straight from the tube cookies many of us grew up with, but the homemade version tastes better and lets you choose your own holiday shapes.
- Total Time: 252 min
- Yield: ~2 dozen cookies
Ingredients
2 1/2 cups all-purpose flour, spooned and leveled
1 cup granulated sugar
3/4 cups unsalted butter, softened to room temperature
2 large eggs
1 teaspoon baking powder
1 teaspoon vanilla extract
1/2 teaspoon kosher salt
food coloring, gel or natural
Instructions
1-Add butter, sugar and vanilla extract to: Add butter, sugar and vanilla extract to a large mixing bowl (or stand mixer). Beat at medium speed until light and fluffy, about 3 minutes.
2-Add in eggs one at a time,: Add in eggs one at a time, mixing just until combined.
3-In a separate bowl, whisk together the: In a separate bowl, whisk together the flour, baking powder and salt.
4-Add the dry ingredients to the wet: Add the dry ingredients to the wet ingredients in 3-4 batches, until the dough comes together. Add 1-2 tablespoons more flour if needed if the dough is too wet. It should be very soft, but shouldn’t stick to your fingers too much. If you used natural food coloring, you will likely need to add in the additional flour.
5-Remove about about 10 ounces (~⅓) of: Remove about about 10 ounces (~⅓) of the dough and place in a separate bowl. Add in several drops of food coloring and mix until combined. Add more food coloring to reach desired hue.
6-Place the colored dough in the freezer: Place the colored dough in the freezer for 5-10 minutes, then roll out into a rectangle about ½-inch thick on a lightly floured surface. Return to the freezer for 30 minutes. This will make it much easier to cut out your chosen shape.
7-Use a small cookie cutter (roughly 1: Use a small cookie cutter (roughly 1.5″ across) to cut out your shape. Dip a finger in a little bit of water and rub on the floured side of the cookie before adhering to another cut out shape. This helps them stick together, but don’t overdo the water, you only need a tiny amount. Repeat with all cut out shapes until you have a log about 10 inches long.
8-Return the log to the freezer for: Return the log to the freezer for 2 hours, or until frozen solid. (We typically make these over two days and leave the log in the freezer overnight.) Remove from freezer and press the plain cookie dough directly onto and around the shape. Make sure to really press it in so you don’t end up with any gaps. We like to leave the ends open so we can see how much dough we need to make an even circle around the shape. Roll into a smooth log on a lightly floured surface.
9-Wrap the log in plastic wrap and: Wrap the log in plastic wrap and chill in the fridge for at least 30 minutes.
10-Preheat your oven to 350˚F and line: Preheat your oven to 350˚F and line 2 baking sheets with parchment paper.
11-When you’re ready to bake, slice the: When you’re ready to bake, slice the dough into ¼” rounds, then space 2 inches apart on the baking sheets. Bake for ~12 minutes, or until the bottoms are light golden brown. Remove from the oven and let cool.
Last Step:
Please leave a rating and comment letting us know how you liked this recipe! This helps our business to thrive and continue providing free, high-quality recipes for you.- Prep Time: 240 min
- Cook Time: 12 min
- Method: bake
Nutrition
- Calories: 330
- Sugar: 20.2 g
- Sodium: 80 mg
- Fat: 15.1 g
- Carbohydrates: 44.5 g
- Fiber: 0.9 g
- Protein: 4.6 g