Tangy Asian Style Pickled Onions
Have you ever wondered how a simple condiment can turn a basic meal into something memorable? These tangy Asian style pickled onions do exactly that.
With their vivid pink hue and a perfect balance of sweet, tangy, and just a whisper of heat, they add a bright pop of flavor to nearly anything you serve. I remember the first time I spooned a little heap of these onto a taco.

My family went from polite nods to reaching for the jar in record time. It is that kind of condiment, effortless but transformative.
Jump to:
- Tangy Asian Style Pickled Onions
- Introduction
- Ingredients List
- Timing
- Step by Step Instructions
- Healthier Alternatives for the Recipe
- Serving Suggestions
- Common Mistakes to Avoid
- Storing Tips for the Recipe
- FAQs
- How long do tangy Asian style pickled onions last in the refrigerator?
- What type of vinegar works best for this recipe?
- Can I use other types of onions instead of red onions?
- How can I make these pickled onions less spicy?
- Conclusion
- Tangy Asian Style Pickled Onions
- Ingredients
- Instructions
- Last Step:
- Nutrition
- Did you make this recipe?
Introduction
Pickled onions might seem like a small detail, but they have a way of waking up every bite. The Asian style twist here comes from rice vinegar, which gives a clean, mild acidity that does not bully your taste buds.
A touch of sugar rounds out the sharpness, and when you add optional sesame seeds and chili flakes, you get a condiment that feels both familiar and exciting.
Best of all, you can pull this together in about ten minutes of hands on time, then let the fridge do the rest.
Whether you are a busy parent looking to jazz up weeknight sandwiches or a food enthusiast who loves to experiment, these pickled onions are a little secret weapon you will keep within reach.
Ingredients List
You only need a handful of everyday ingredients to get started. Here is what goes into the jar:
- 2 medium red onions, thinly sliced, Their natural sweetness and vibrant color make them the perfect choice.
- 1 cup rice vinegar, The star of the brine. It delivers that clean, signature tang without overpowering.
- 1/4 cup sugar, Just enough to balance the acidity. You can swap in honey or agave if you prefer.
- 1 tablespoon salt, I like kosher or sea salt for clean flavor. It helps draw out moisture and seasons the onions beautifully.
- 1/2 cup water, Keeps the brine from being too sharp straight up.
- 1 tablespoon sesame seeds (optional), For a nutty crunch that makes these onions feel extra special.
- 1 teaspoon chili flakes (optional), Adjust to your heat comfort. Even a pinch gives a gentle tingle.
Feel free to play around with the extras. If you do not have rice vinegar, apple cider vinegar can step in, though the flavor will be a bit fruitier. The sesame seeds add texture, but you can leave them out without losing the soul of the recipe.
Timing
One of the best things about this recipe is how little active time it demands. You will spend about 10 minutes prepping and heating the brine. After that, the pickling magic happens in the fridge.
Let the onions sit for at least one hour before you dig in. That first hour gives you a bright, fresh pickle. If you can wait overnight, the flavors deepen, and those pink rings become even more irresistible.
From start to first taste, plan for about 1 hour and 10 minutes. It is a small investment for a condiment that will perk up every meal for up to two weeks.
Step by Step Instructions
- Slice the onions. Peel the red onions and slice them as thinly as you can. I use a mandoline set to the thinnest setting to get uniform rings, but a sharp knife and a steady hand work fine, too. Place the onion slices in a medium heatproof bowl.
- Make the brine. In a small saucepan, combine the rice vinegar, sugar, salt, and water. Set the pan over medium heat and stir gently until the sugar and salt dissolve completely. You will see the liquid turn clear. Do not let it boil; just a gentle warmth is enough.
- Pour and cool. Carefully pour the hot brine over the onion slices, making sure every ring is submerged. Give them a gentle stir with a spoon. Then let the mixture sit on the counter to cool to room temperature, about 10 minutes. At this point, you can sprinkle in the optional sesame seeds and chili flakes if you are using them.
- Jar, chill, and wait. Transfer the onions and all that fragrant brine into a clean glass jar. Press the onions down so the brine covers them completely. Seal the jar tightly and slide it into the refrigerator. Let the onions pickle for at least one hour before serving. The longer they rest, the more the flavors marry.
That is it. In less than 15 minutes of hands on work, you have a jar of gorgeous, tangy goodness ready to brighten your next meal.
Healthier Alternatives for the Recipe
If you are watching your sugar intake or simply want to tweak the nutritional profile, these swaps keep the spirit of the recipe intact:
- Cut back on sugar. Halve the sugar or omit it entirely. The onions will be puckery but still delicious.
- Use a natural sweetener. A few drops of liquid stevia or a spoonful of monk fruit sweetener dissolve cleanly and cut the calories.
- Add more vegetables. Slide a few carrot ribbons or cucumber slices into the jar alongside the onions. They pickle just as well and add extra crunch.
- Experiment with unrefined sugars. Brown sugar or coconut sugar lend a deeper, molasses like note that pairs beautifully with the rice vinegar.
A serving of these pickled onions is naturally low in calories and fat, so even the classic version fits into a mindful eating plan without guilt.
Serving Suggestions
This is where the fun begins. Once your jar is ready, you will find excuses to spoon these onions onto everything. Here are a few of my favorite ways to use them:
- Tacos. Fish tacos, shrimp tacos, or even simple bean tacos turn vibrant with a tangle of pink onions on top. The brightness cuts through rich crema or avocado perfectly.
- Salads. Toss a few rings into a green salad or grain bowl. They double as both a dressing accent and a flavor burst.
- Sandwiches and burgers. Skip the raw onion and pile on a few pickled rings. They add crunch and tang without the harsh bite.
- Rice bowls. Whether you are making a poke style bowl, a teriyaki chicken bowl, or a simple bowl of steamed rice with veggies, a spoonful of these onions ties it together.
- Charcuterie and cheese boards. They are a gorgeous, piquant addition next to soft cheese and crackers.
Try adding these tangy onions to your tacos for a quick flavor boost that surprises everyone at the table. I promise you will get requests for the jar.
Common Mistakes to Avoid
Even a simple recipe can go sideways if you miss a small step. Keep these points in mind:
- Slicing onions too thick. Chunky rounds do not soften or pickle evenly. Aim for paper thin slices. That is what gives you that silky, tender texture.
- Skipping the cooling period. Pouring hot brine straight into the jar and refrigerating immediately can trap heat and make the onions turn mushy. Let them cool on the counter first.
- Using the wrong vinegar. Rice vinegar has a mild acidity that is key to the Asian profile. Standard white vinegar will be much sharper, and malt vinegar seems completely out of place. Apple cider vinegar is a decent backup if you are okay with a fruitier note.
- Not keeping onions submerged. Any onion tips peeking above the brine will discolor and spoil faster. Press them down each time you use the jar.
Storing Tips for the Recipe
To get the full two weeks of crisp, tangy enjoyment:
- Use a clean, sterilized jar. I run a glass jar through the dishwasher or pour boiling water over it before filling. A clean start keeps the pickles fresh longer.
- Refrigerate always. These are quick pickles, not shelf stable preserves, so the fridge is non negotiable.
- Keep the brine covering the onions. Each time you dip in, push any floating slices back under the liquid. A small glass weight or a clean spoon helps.
- Trust your senses. If the onions ever smell off or the brine turns cloudy and slimy, it is time to say goodbye. Usually, they are devoured long before that point.
FAQs
How long do tangy Asian style pickled onions last in the refrigerator?
What type of vinegar works best for this recipe?
Can I use other types of onions instead of red onions?
How can I make these pickled onions less spicy?
Conclusion
Tangy Asian style pickled onions are proof that the smallest touches often make the biggest difference. In just over an hour, with minimal effort and a handful of pantry staples, you can create a condiment that lifts everything from a Tuesday night taco to a weekend gathering.
The flavor is bright, the crunch is satisfying, and the satisfaction of pulling your own jar from the fridge never gets old. Give this recipe a try, and you might just find it becomes a permanent resident on your condiment shelf.
Print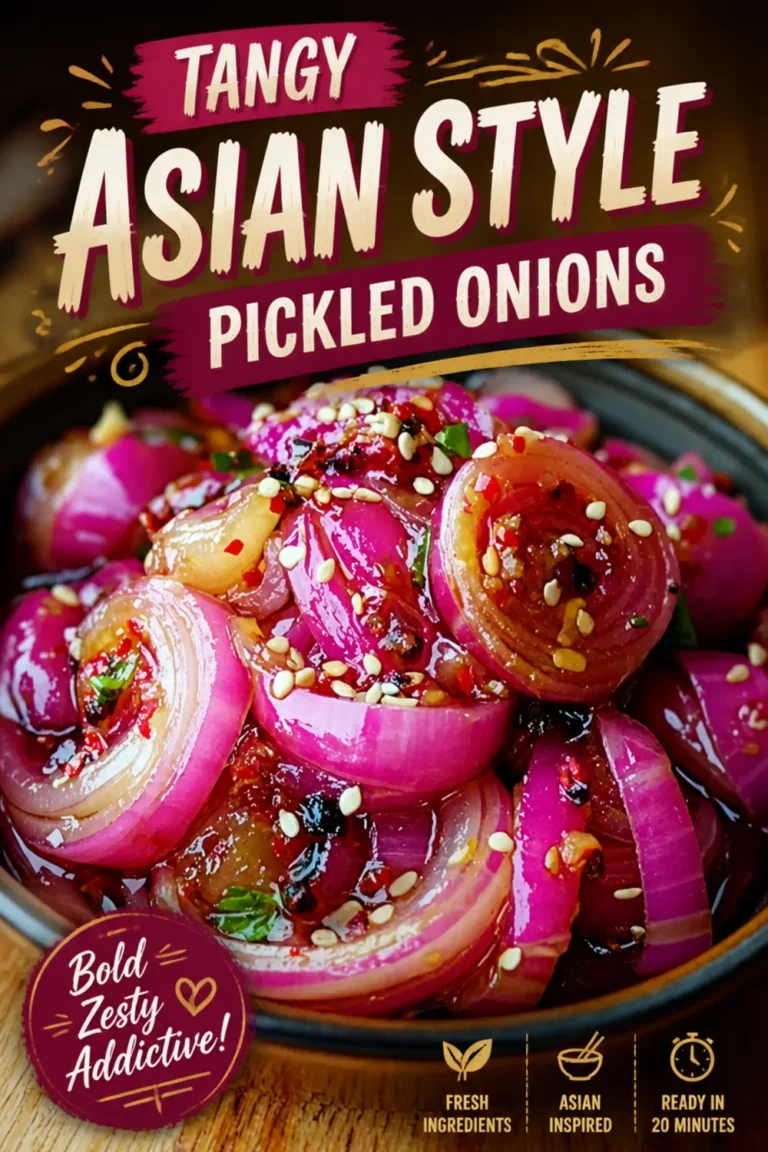
Tangy Asian Style Pickled Onions
Tangy Asian Style Pickled Onions Have you ever wondered how a simple condiment can turn a basic meal into something memorable? These tangy Asian style pickled onions do exactly that.
- Total Time: 1 hour 10 minutes
Ingredients
Ingredients
2 medium red onions, thinly sliced
1 cup rice vinegar
1/4 cup sugar
1 tablespoon salt
1/2 cup water
1 tablespoon sesame seeds
1 teaspoon chili flakes
Instructions
Instructions
1-Begin by slicing the red onions thinly: Begin by slicing the red onions thinly. A mandoline slicer can help achieve uniform thickness, which ensures even pickling. Place the slices in a bowl and set them aside.
2-In a small saucepan, combine the rice: In a small saucepan, combine the rice vinegar, sugar, salt, and water. Heat the mixture over medium heat, stirring until the sugar and salt dissolve completely.
3-Once the brine is ready, pour it: Once the brine is ready, pour it over the sliced onions in the bowl. Make sure the onions are fully submerged. Allow the mixture to cool to room temperature, which usually takes about 10 minutes.
4-Transfer the onions and brine into a: Transfer the onions and brine into a clean jar, seal it tightly, and refrigerate. For best results, let them pickle for at least one hour before serving. The flavors will deepen the longer they sit, so feel free to make them a day ahead!
Last Step:
Please leave a rating and comment letting us know how you liked this recipe! This helps our business to thrive and continue providing free, high-quality recipes for you.- Prep Time: 10 min
- Cook Time: 60 min
- Method: stovetop
Nutrition
- Serving Size: 1/4 cup
- Calories: 30
- Sugar: 6g
- Sodium: 300mg
- Fat: 0g
- Saturated Fat: 0g
- Carbohydrates: 8g
- Fiber: 0g
- Protein: 0g