
Tender Gluten Free Scones with Almond Flour
There is a moment, every single time, just before I open the oven door, where I find myself holding my breath. Baking gluten free has a way of teaching you that hope and doubt can sit side by side like old friends.
I have been chasing the perfect gluten free scone for years, ever since my dear friend confessed she missed the buttery, craggy ones her grandmother used to make. The first few batches were disappointments, dry, sandy, and a far cry from the real thing.
Then I discovered this combination of almond flour, oat flour, and sweet rice flour, and everything changed.
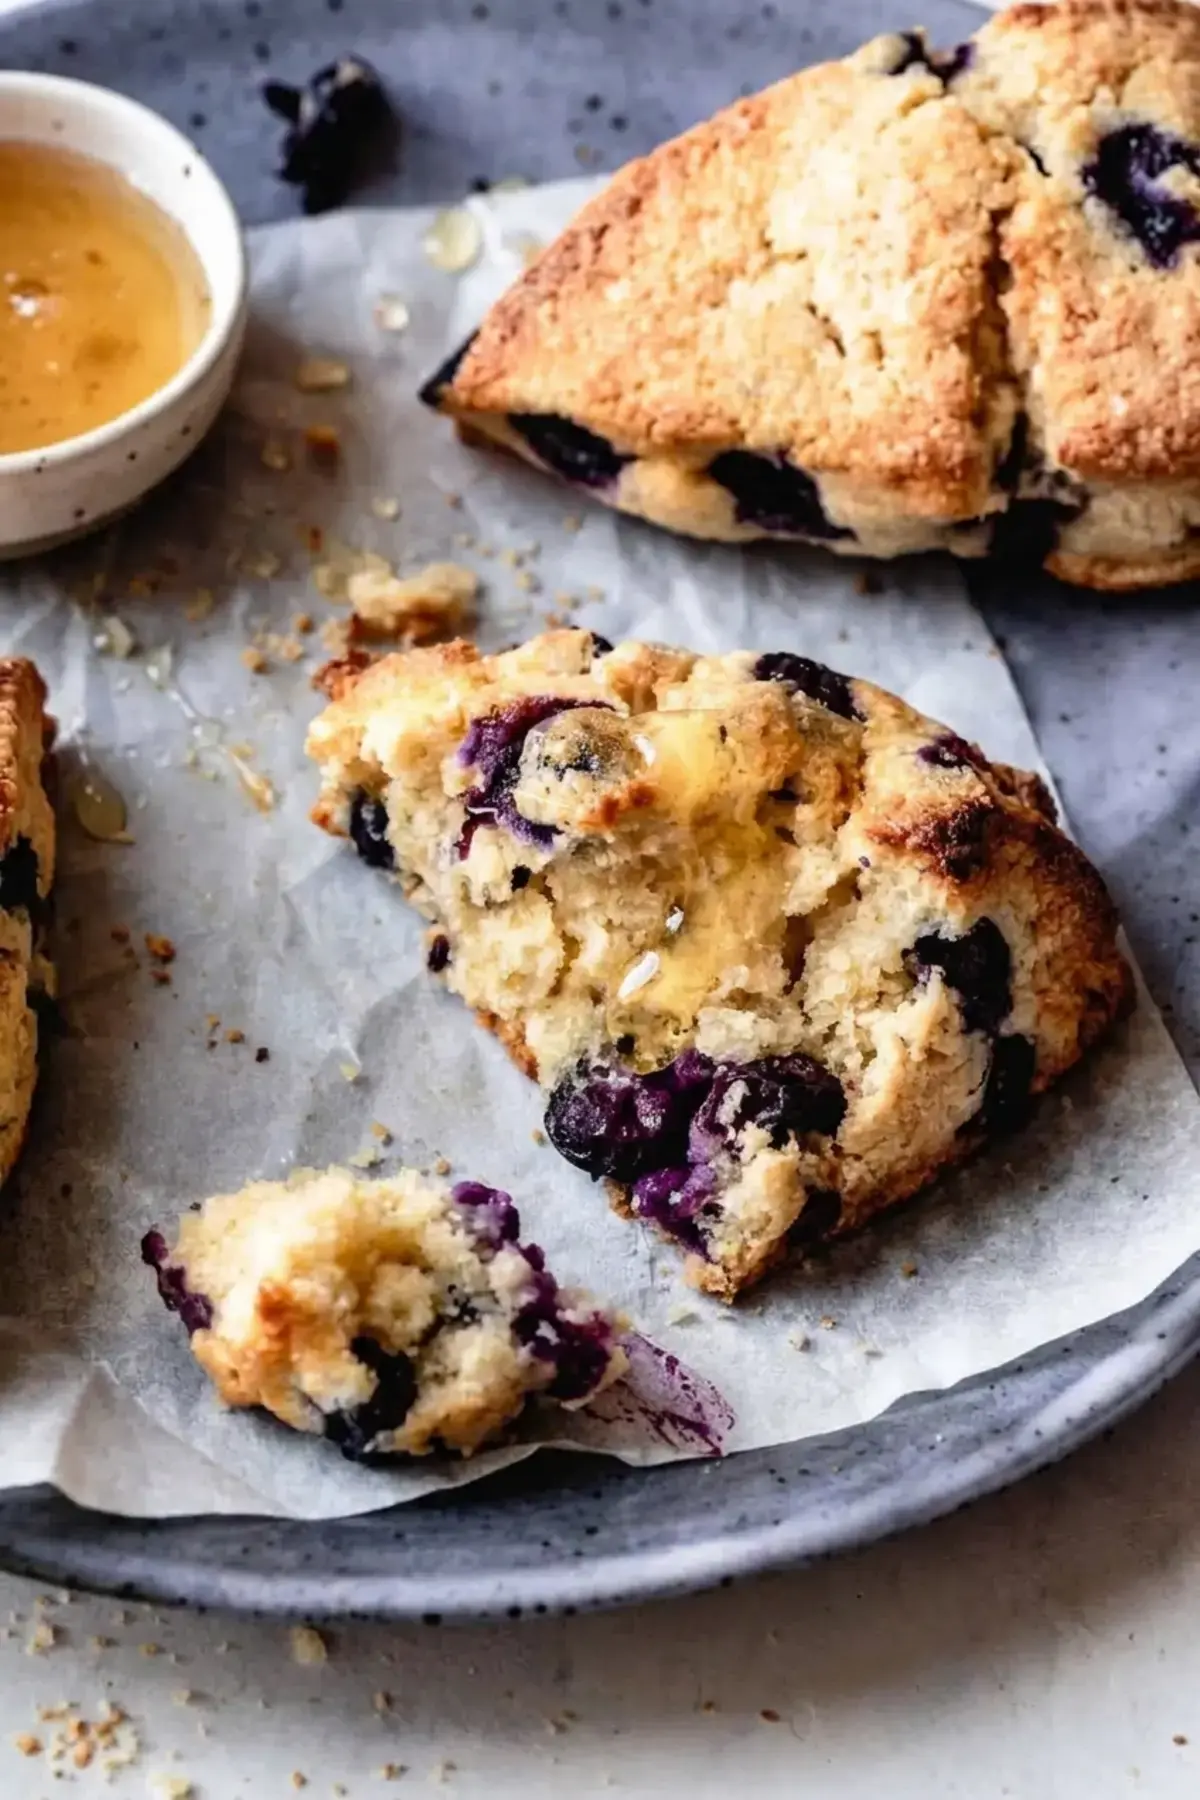
These scones bake up impossibly soft and rich, never dry or crumbly, but you will not believe they are gluten free when you pull them from the oven. The tops crackle into golden peaks while the centers stay tender and almost pillowy.

A gentle sweetness hangs in the background, quiet enough to let butter and jam do their work. If a chocolate chip cookie somehow got scone ified, this would be its elegant, brunch loving cousin.
I have watched die hard wheat lovers reach for seconds, shaking their heads in disbelief, and I swear that is the truest test of a recipe.
What I love most is how this dough feels in your hands. It comes together with about 20 minutes of actual work, a bit of chill time, and then a quick 20 to 25 minute bake.
No stand mixer, no complicated steps, just a bowl, a pastry cutter or your fingertips, and the quiet rhythm of gathering dough into a disk.
You will shape it, brush it with a little cream, and in return the oven will give you eight little pastries with crisp edges and warm, plushy middles.
The recipe leans on a custom blend of flours instead of a store bought mix, and once you taste the difference, you will understand why.
When I am craving something bright, I fold in fresh blueberries and a whisper of vanilla. On mornings when I need a little zing, candied ginger and lemon zest bring a gentle heat that pairs beautifully with a cup of Earl Grey.
And when I want old fashioned comfort, dried currants and orange zest transport me straight to a cozy tea room. No matter which direction you take, each variation shares the same buttery, wheat adjacent soul.
It is the kind of recipe that quietly earns a permanent spot in your binder, dog eared and dusted with flour.
Jump to:
- Tender Gluten Free Scones with Almond Flour
- Fantastic Recipe
- Flour Power
- Other Essentials
- Mix In Madness
- How the Magic Happens
- FAQs
- What is the best gluten free flour for scones?
- How do you keep gluten free scones from falling apart?
- Can you freeze gluten free almond flour scones?
- Why are my gluten free scones dry?
- Tender Gluten-Free Scones with Almond Flour
- Ingredients
- Instructions
- Last Step:
- Nutrition
- Did you make this recipe?
Fantastic Recipe
Some recipes come into your life and feel like they were always meant to be there. That is how I feel about these scones.
When I first pulled a batch from the oven, golden and fragrant, my kitchen filled with the most intoxicating scent of toasted butter and warm almond, and I knew I had stumbled onto something special.
The magic is not in a single ingredient but in the way the almond flour, oat flour, and sweet rice flour hold hands with plenty of cold butter and a splash of cream.
Together they create a crumb that is tender, rich, and just structured enough to split open for a slather of honey butter or a spoonful of lemon curd.
I have served these on lazy Sunday mornings, at bridal showers, and even once at a book club where the host confessed she was terrified of gluten free baking. The plate came back empty, and three people asked for the recipe before dessert was over.
That is the kind of recipe this is, unassuming, friendly, and quietly triumphant. Do not let the word gluten free make you nervous. Think of it instead as a backstage pass to some of the most tender pastries you will ever bake.
And if you are new to working with alternative flours, welcome. You have found a very good place to begin.
Flour Power
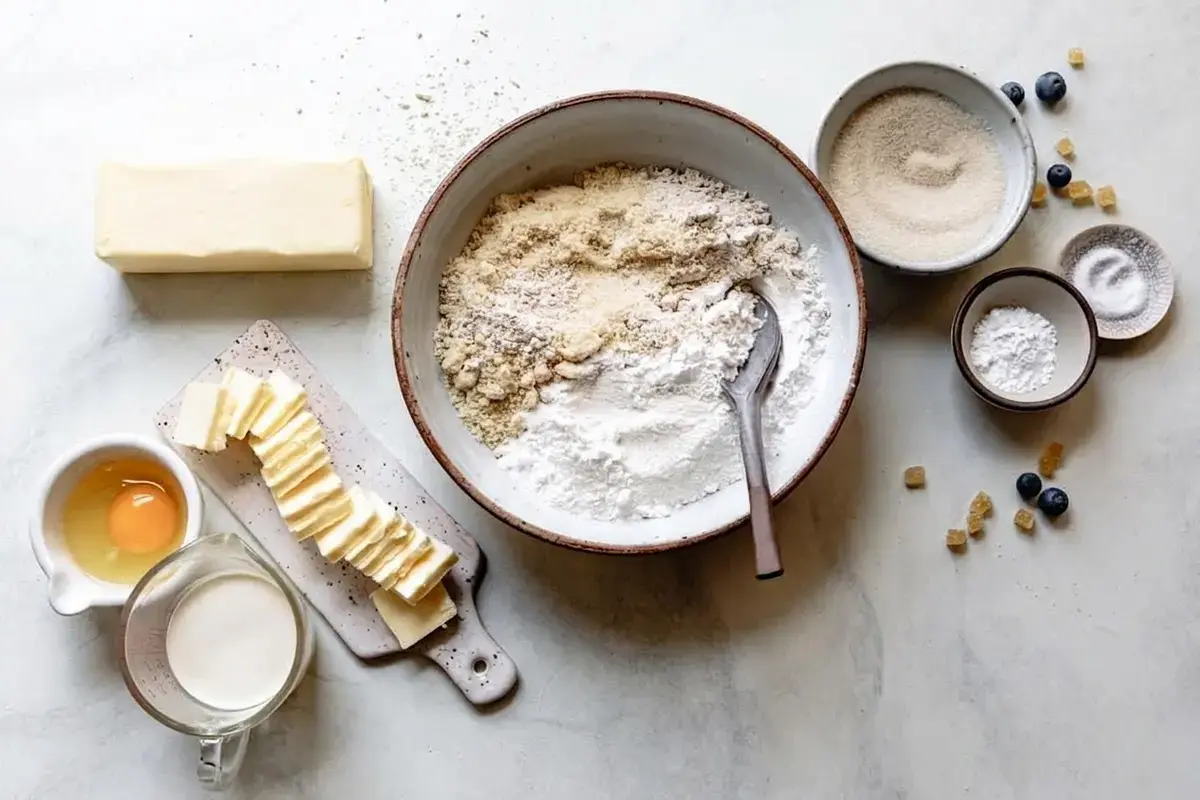
Instead of reaching for a store bought gluten free all purpose blend, this recipe builds its own foundation from four simple ingredients. Each one does something essential, and together they create a texture so tender and wheat like that even skeptics will pause mid bite.
Just be sure every bag you open carries a certified gluten free label to keep your scones safe from cross contamination.
- Blanched almond flour brings richness and structure. It gives the scones body without weighing them down.
- Gluten free oat flour makes the dough tender and remarkably wheat like, with a gentle nutty warmth that plays beautifully with butter.
- Sweet rice flour acts like a quiet binder, holding the dough together so the wedges stay neat and shapely.
- Tapioca starch is the secret behind the light, pillowy interior and those delicate crisp edges that shatter just a little when you bite.
When you whisk these four together, you are not just mixing powders. You are building the architecture of a scone that will feel familiar and comforting, the way the best pastries always do.
Other Essentials
Beyond the flours, a few supporting ingredients step up to the plate. Butter is the star, of course, and any high quality unsalted butter you trust will do a beautiful job here.
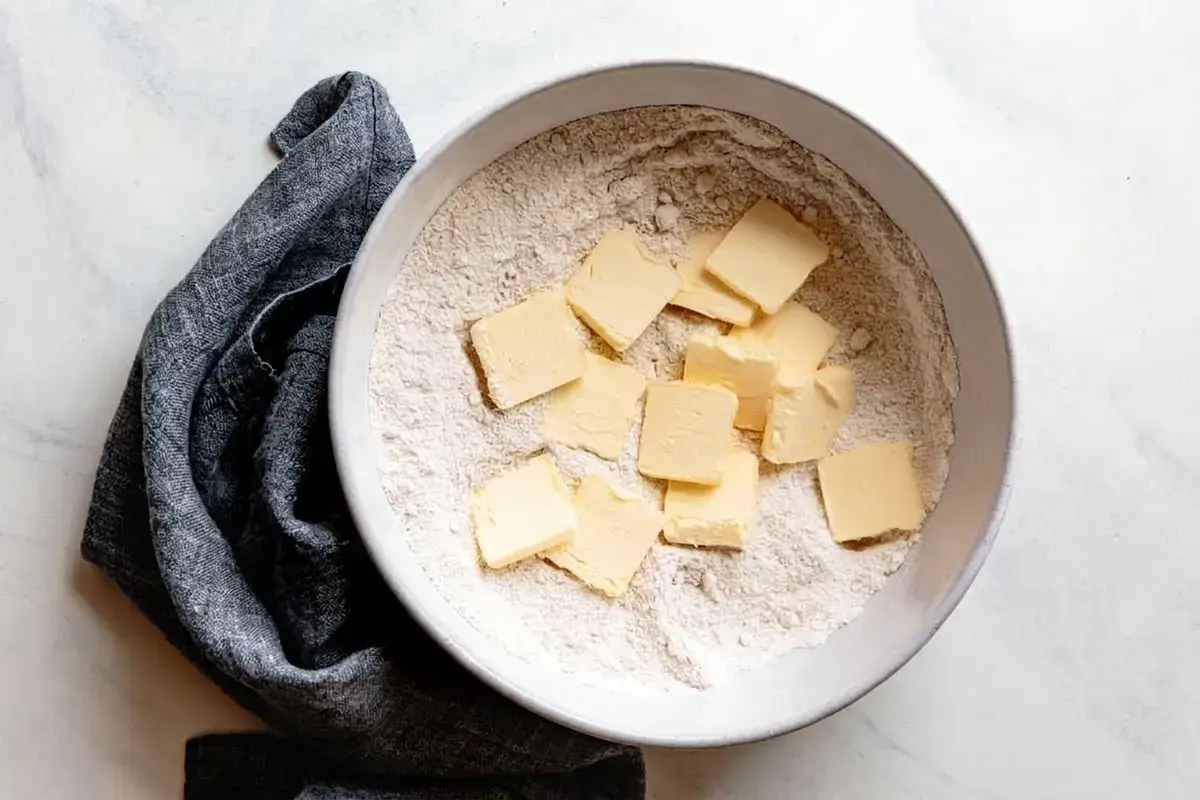
I keep mine sliced thin and cold right up until it hits the flour, because those pea sized pockets of butter are what create flaky layers and crisp edges.
An egg joins the party too, which is a little unusual for a wheat scone but completely necessary in a gluten free dough where it adds welcome structure.
In the recipe notes you will find an egg free option that swaps in a flax egg, so nobody gets left out.

Heavy cream binds everything together with its gentle richness and helps the dough come together into a soft, cohesive round. When I am baking for my dairy free friends, I swap in chilled full fat coconut milk, and honestly the results are still incredibly tender.
The dough feels a touch different under your hands, but once it hits the oven, it rises high and golden just the same. And about those mix ins: they are a beautiful blank canvas for whatever is singing to you at the market.
Fresh berries, dried fruit, chopped chocolate, a handful of toasted nuts, if it sounds good, it probably is.
Mix In Madness
Scones are the ultimate invitation to play. Once you have the base dough down, you can wander through the pantry and pull out nearly anything sweet or savory. I love the way a single batch can become three different pastries, each with its own personality, and these three classic combinations are my most requested.

- Blueberry vanilla is the crowd pleaser. Jammy little berries burst in the oven, staining the crumb purple in the prettiest way, and a splash of vanilla rounds out every bite with cozy warmth.
- Lemon ginger wakes you right up. Chewy bits of candied ginger scatter through the dough while fresh lemon zest brightens the whole affair. It is bold and a little spicy, the kind of scone that pairs perfectly with black tea.
- Orange currant feels like a treasured heirloom. Plump dried currants nestle into the tender crumb, and the orange zest lifts everything into something nostalgic and deeply comforting, like a hug from a grandmother you never had.
If you are feeling adventurous, fold in toasted pecans and dark chocolate, or go savory with crumbled feta, chopped spinach, and a few briny olives. Once you see how flexible this dough is, I suspect you will never run out of reasons to bake another batch.
How the Magic Happens
A single round yields eight generous wedges, and the entire process takes a little over an hour, with 30 minutes of hands off chilling tucked right in the middle. That short rest in the fridge is non negotiable, my sweets.


It firms up the butter, gives the flours time to hydrate, and is the single biggest reason the bottoms stay golden instead of scorching.

The recipe card below includes several make ahead suggestions that have saved me on more busy mornings than I can count.

You can shape the dough disk the night before and let it chill until morning, or even freeze the round for a future baking emergency. On a hectic weekday, pulling a pre made disk from the freezer feels like a tiny gift from Past You.


A quick thaw while the oven preheats, a swipe of cream, and suddenly your kitchen smells like a bakery. That kind of small, edible joy is exactly why I keep coming back to this recipe, and I hope you will too.

FAQs
What is the best gluten free flour for scones?
How do you keep gluten free scones from falling apart?
Can you freeze gluten free almond flour scones?
Why are my gluten free scones dry?

Tender Gluten-Free Scones with Almond Flour
Tender Gluten Free Scones with Almond Flour There is a moment, every single time, just before I open the oven door, where I find myself holding my breath. Baking gluten free has a way of teaching you that hope and doubt can sit side by side like old friends.
- Total Time: 75 min
- Yield: 8 scones 1x
Ingredients
Dry Ingredients
⅔ cup (110 g) sweet rice flour
⅔ cup (75 g) blanched almond flour
⅔ cup (69 g) gluten-free oat flour sorghum flour optional
3 tablespoons (22 g) tapioca flour
¼ cup (50 g) organic granulated sugar
2 ½ teaspoons (7 g) baking powder
½ teaspoon fine sea salt
Wet Ingredients
6 tablespoons (85 g) cold unsalted butter, sliced ⅛-inch thick
6 tablespoons (90 ml) heavy cream, more as needed
1 large egg
1 gluten-free vanilla extract
1 ¼ cup (165 g) blueberries, fresh or frozen
For Serving (optional)
crème fraîche
butter
honey
jam
Instructions
Make the dough
1-In a large bowl, combine the sweet: In a large bowl, combine the sweet rice, almond, oat, and tapioca flours with the ¼ cup sugar, baking powder, and salt. Whisk to combine.
2-Add the butter slices (and citrus zest,: Add the butter slices (and citrus zest, if you’re using any). Blend with a pastry cutter or your fingertips until the butter is broken down into the size of small peas.
3-If you’re using fresh or dried fruit,: If you’re using fresh or dried fruit, toss them in at this time. Pop the flour mixture in the fridge for 10 minutes or longer to cool the butter back down.
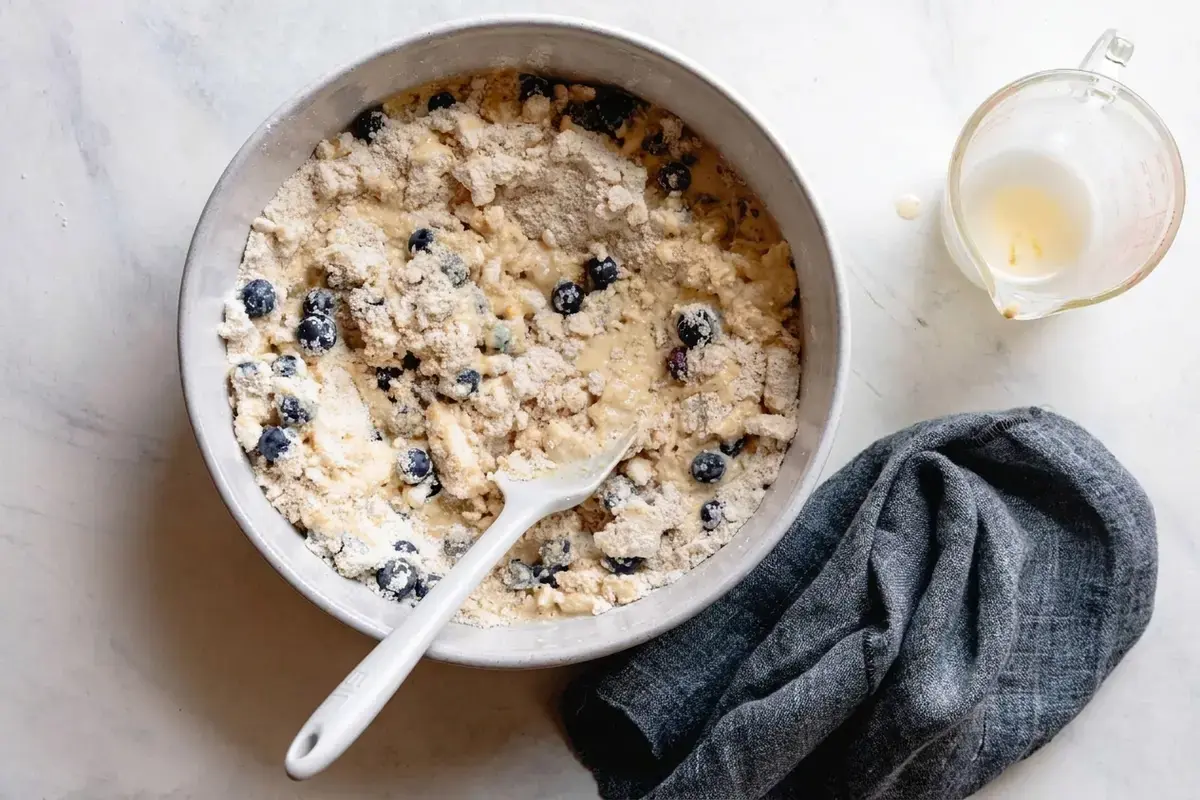
4-Whisk together the 6 tablespoons cream, egg,: Whisk together the 6 tablespoons cream, egg, and vanilla (if using) in a measuring pitcher. Chill until needed.
5-Remove the flour mixture from the refrigerator: Remove the flour mixture from the refrigerator. (If you’re using frozen fruit, toss it in now.) Gradually add the cream mixture, working with a flexible silicone spatula until the dough holds together when you give it a squeeze. If the dough is too dry, add a few drops of cold cream directly to the floury bits.
Shape
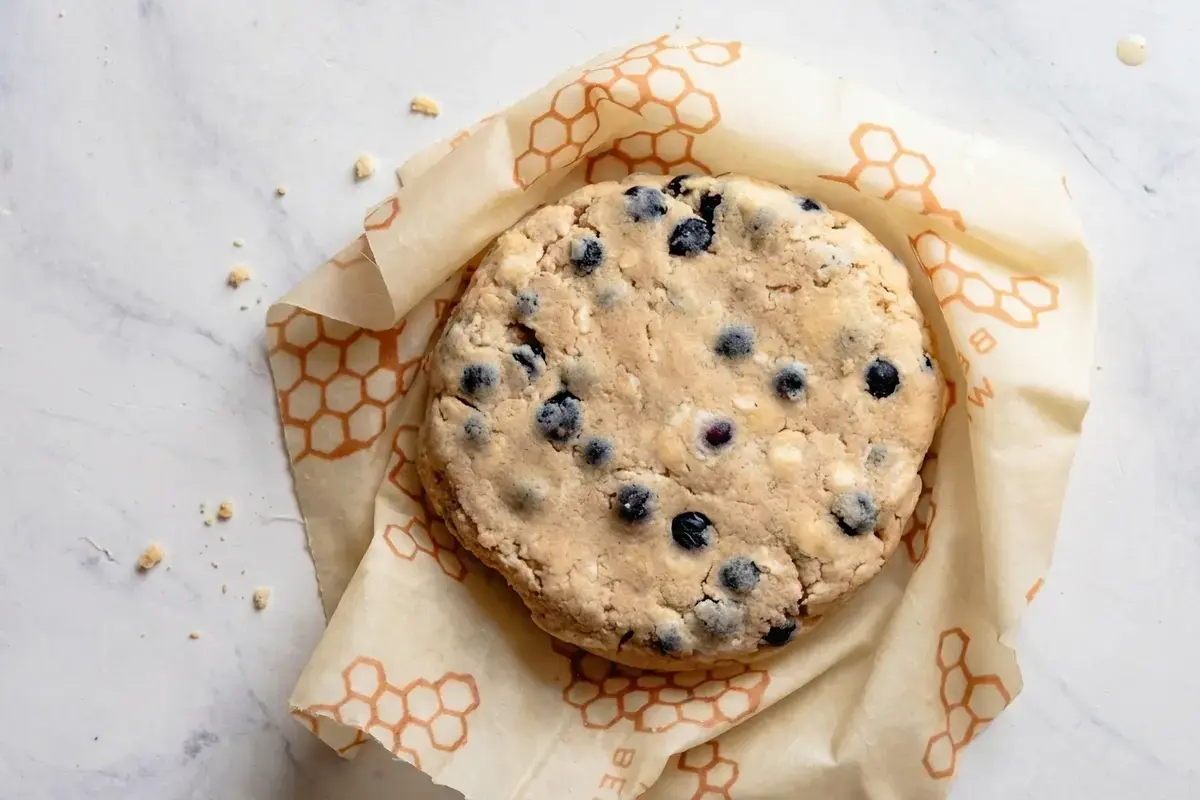
6-Gently but firmly press the dough together: Gently but firmly press the dough together with your hands and shape it into a rough ball. Place on a piece of beeswax wrap or plastic wrap and form it into a disk that measures 6 inches across and about 1 ¼ inches high. Don’t worry about overworking the dough since there isn’t any gluten to toughen here!
7-Wrap and chill the dough disk until: Wrap and chill the dough disk until firm, at least 30 minutes and up to overnight.
Bake
8-When ready to bake, position a rack: When ready to bake, position a rack in the uppermost spot of your oven and preheat to 425ºF. Stack a rimmed baking sheet atop a second rimmed baking sheet and line with parchment paper. This will all keep the scones’ bottoms from over-browning.
9-Remove the dough round from the refrigerator,: Remove the dough round from the refrigerator, unwrap and place on a cutting board dusted lightly with oat flour. Brush the top of the scone with a little cream and sprinkle lightly with sugar. Use a large, sharp chef’s knife to cut the scone into 8 wedges and place the wedges on the prepared baking sheet, spaced well apart.
10-Bake the scones until golden on top: Bake the scones until golden on top and cooked through, 20-25 minutes, rotating the pan after 15 minutes to brown them evenly.
11-Remove from the oven and transfer the: Remove from the oven and transfer the scones to a wire rack. Let cool until warm, 10-20 minutes; they are still baking from residual heat. Serve warm or at room temperature.
Last Step:
Please leave a rating and comment letting us know how you liked this recipe! This helps our business to thrive and continue providing free, high-quality recipes for you.- Prep Time: 20 min
- Cook Time: 25 min
- Method: bake
Nutrition
- Calories: 313kcal
- Sugar: 9g
- Sodium: 358mg
- Fat: 19g
- Saturated Fat: 9g
- Carbohydrates: 32g
- Fiber: 3g
- Protein: 6g
- Cholesterol: 56mg