What Are Crispy Parmesan Chicken Cutlets?
I remember the first time I set a plate of these crispy Parmesan chicken cutlets on the table. My youngest, who usually pokes at anything that is not a chicken nugget, ate two whole pieces and asked for a third.
I knew then that this recipe was a keeper. These cutlets are thin, tender pieces of chicken breast coated in a crunchy, golden brown crust made with panko breadcrumbs, grated Parmesan, and Italian seasoning.

They have that savory, cheesy, garlicky flavor that makes both kids and adults smile, and they come together in about 40 minutes. Honestly, they taste like a giant, fancy chicken nugget that you made in your own kitchen.
The best part? You do not need any special skills. With a few simple steps and a little patience while the oil heats, you can serve a dish that feels like a weeknight treat.
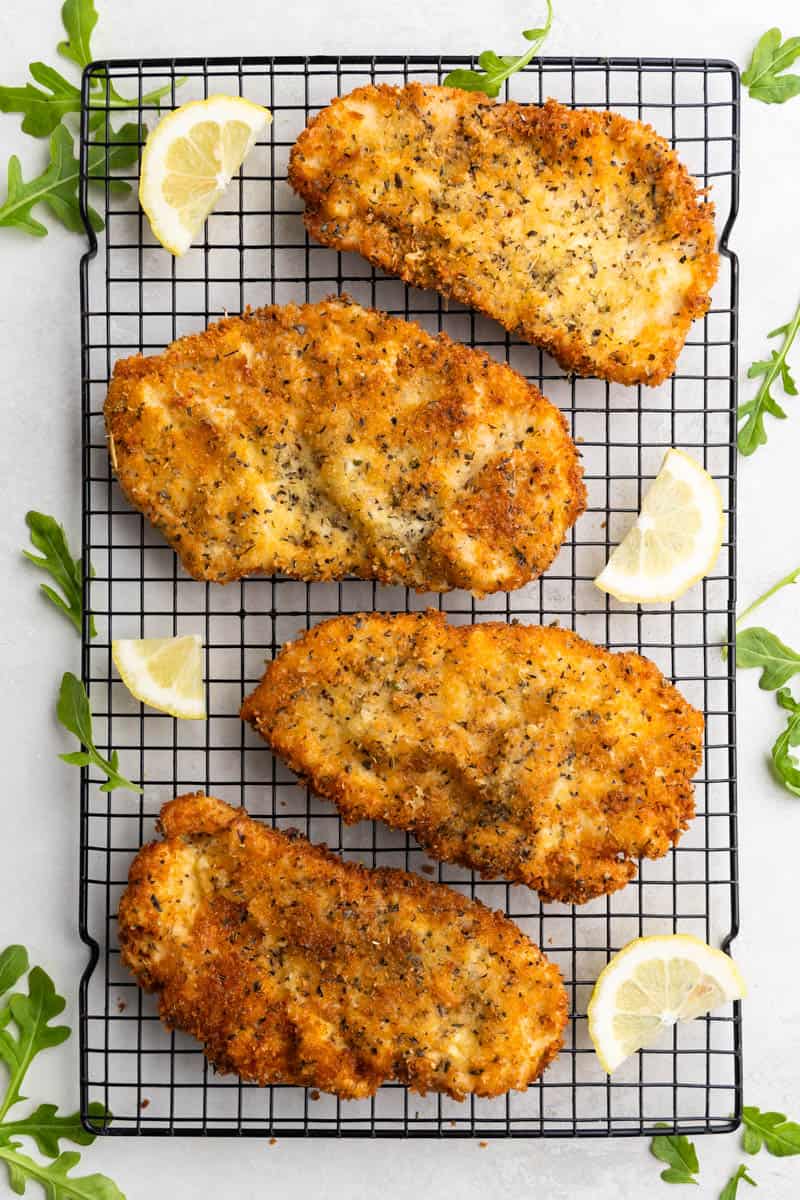
Whether you pair them with a creamy macaroni and cheese, a bright coleslaw, or just a squeeze of lemon, these cutlets quickly become a family favorite.

If you love cheesy chicken and pasta together, my garlic Parmesan chicken pasta bake is another go to meal that always gets rave reviews.
| Recipe Detail | Info |
|---|---|
| Prep Time | 20 minutes |
| Cook Time | 20 minutes |
| Total Time | 40 minutes |
| Servings | 4 pieces |
| Serving Size | 1 cutlet |
Many home cooks enjoy experimenting with different coatings, and while this Parmesan version is our absolute favorite, you can explore other ideas. For a classic take, check out this crispy chicken cutlets recipe that keeps things beautifully simple. Now, let us walk through every detail so you can nail this recipe on your first try.
Jump to:
- What Are Crispy Parmesan Chicken Cutlets?
- Ingredient Notes
- All About Those Chicken Cutlets
- All About That Dredging
- Dredging Tips
- Storage and Reheating Instructions
- How do you make chicken cutlets crispy?
- Can you bake chicken cutlets instead of frying them?
- What should you do if the breading does not stick to chicken cutlets?
- How do you store and reheat leftover chicken cutlets?
- FAQs
- How do you make chicken cutlets crispy?
- Can you bake chicken cutlets instead of frying them?
- What should you do if the breading does not stick to chicken cutlets?
- How do you store and reheat leftover chicken cutlets?
- Crispy Parmesan Chicken Cutlets
- Ingredients
- Instructions
- Last Step:
- Nutrition
- Did you make this recipe?
Ingredient Notes
Great chicken cutlets start with solid ingredients, and a little know how turns them into something special. Here is what you need and why each component matters.
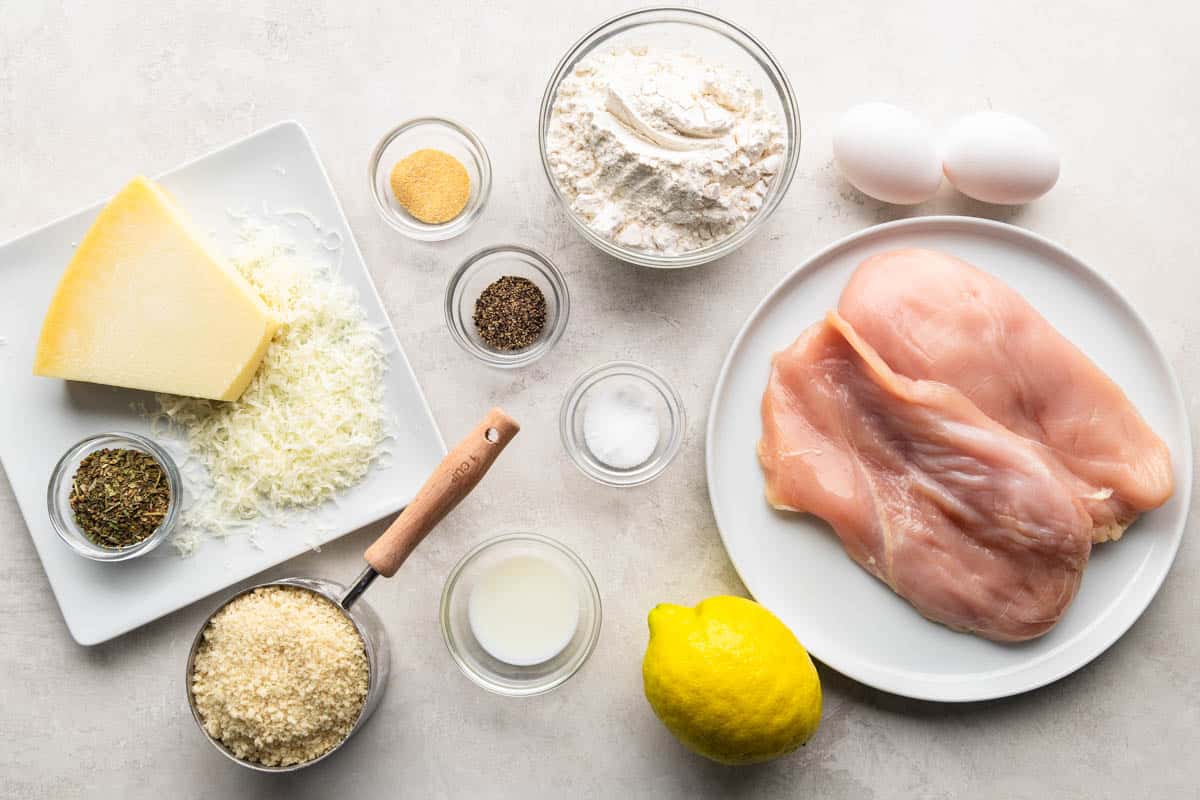
- Chicken: The recipe calls for 2 boneless, skinless chicken breasts. They get sliced in half lengthwise to create four thin cutlets. You can also buy packages labeled “chicken cutlets” at the store, but slicing your own is often more budget friendly.
- Seasonings: Salt, garlic powder, and black pepper wake up the chicken. Do not skip them; they build the savory base before the coating even touches the meat.
- Flour: All purpose flour is the first layer. It dries the surface of the chicken so the egg wash sticks better.
- Egg and milk: Two large eggs whisked with a tablespoon of milk create a glue that helps the breadcrumbs grip tightly.
- Panko breadcrumbs, Parmesan, Italian seasoning: This trio makes the coating crispy and full of flavor. Panko gives an airy crunch, Parmesan adds saltiness and umami, and Italian seasoning ties it all together with herbs.
- Vegetable oil: About 2 cups are used for pan frying. The oil needs to be deep enough to cover the bottom of a large skillet by 1 to 2 inches so the cutlets fry evenly.
- Lemon wedges: Optional, but a fresh squeeze of lemon brightens every bite and balances the richness of the fried coating.
If the breading ever seems to slide off the chicken, do not worry. Place the breaded cutlets in the refrigerator for about 30 minutes before cooking. The cold helps the coating set and stay put during frying.
All About Those Chicken Cutlets
Getting the chicken to the right thickness is one of the most important steps. When the meat is even, it cooks at the same speed, so you never end up with one part dry and another underdone.
I like to start with whole chicken breasts because they are usually less expensive than pre cut packages, and I can control the size.
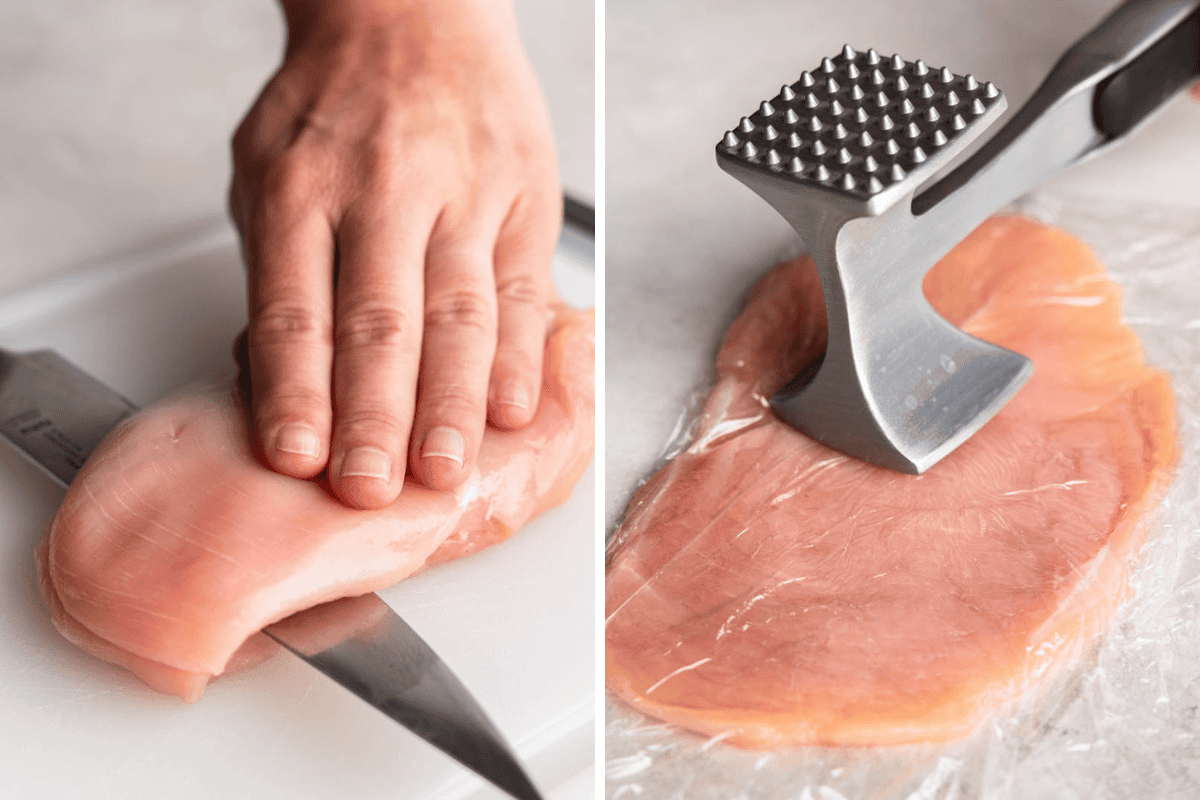
Here is how I do it. Take a boneless, skinless chicken breast and lay it flat on a cutting board. Place your hand on top and carefully slice horizontally through the middle, keeping the knife parallel to the board.
You will end up with two thin pieces of similar weight. If one side is a bit thicker, do not stress.
Lay the cutlets between two sheets of plastic wrap and pound them gently with a meat mallet or even a rolling pin until they are about 1/4 to 1/2 inch thick. Thinner cutlets cook faster and get crispier.
A rolling pin works perfectly if you do not own a mallet. I have used a heavy skillet in a pinch too, and it got the job done.
Once the chicken is thin, season both sides with the salt, garlic powder, and pepper. This layer of seasoning is what separates boring cutlets from ones that taste like they came from a restaurant.
If you prefer baked chicken instead of fried, you might also enjoy my guide on easy ways to bake chicken breasts for tender, juicy results every time.
All About That Dredging
Dredging is just a fancy word for coating the chicken in layers before frying. It might sound intimidating, but once you set up a little station, it feels like an easy rhythm. Think of it as giving each piece of chicken three jackets, and every jacket plays a role.
The order matters: wet meat goes into dry flour, then into a wet egg wash, and finally into the dry breadcrumb mixture. That is why this is called a double dredge. The flour dries the surface, the egg acts like glue, and the panko Parmesan layer delivers the crunch and flavor.
I set up my station using three shallow dishes. Pie plates or cake pans work beautifully because they are wide and your hands can move freely. In the first dish, spread the flour.
In the second dish, whisk the eggs with the milk until smooth. In the third dish, stir together the panko, grated Parmesan, and Italian seasoning. Line them up left to right so you can work in one direction.
This keeps the mess contained and the process quick. With everything ready, you can coat all four cutlets in just a few minutes.
Dredging Tips
A few small habits make the dredging process clean and the coating strong. Over the years, I have learned that the way you handle the chicken at each stage really makes a difference.
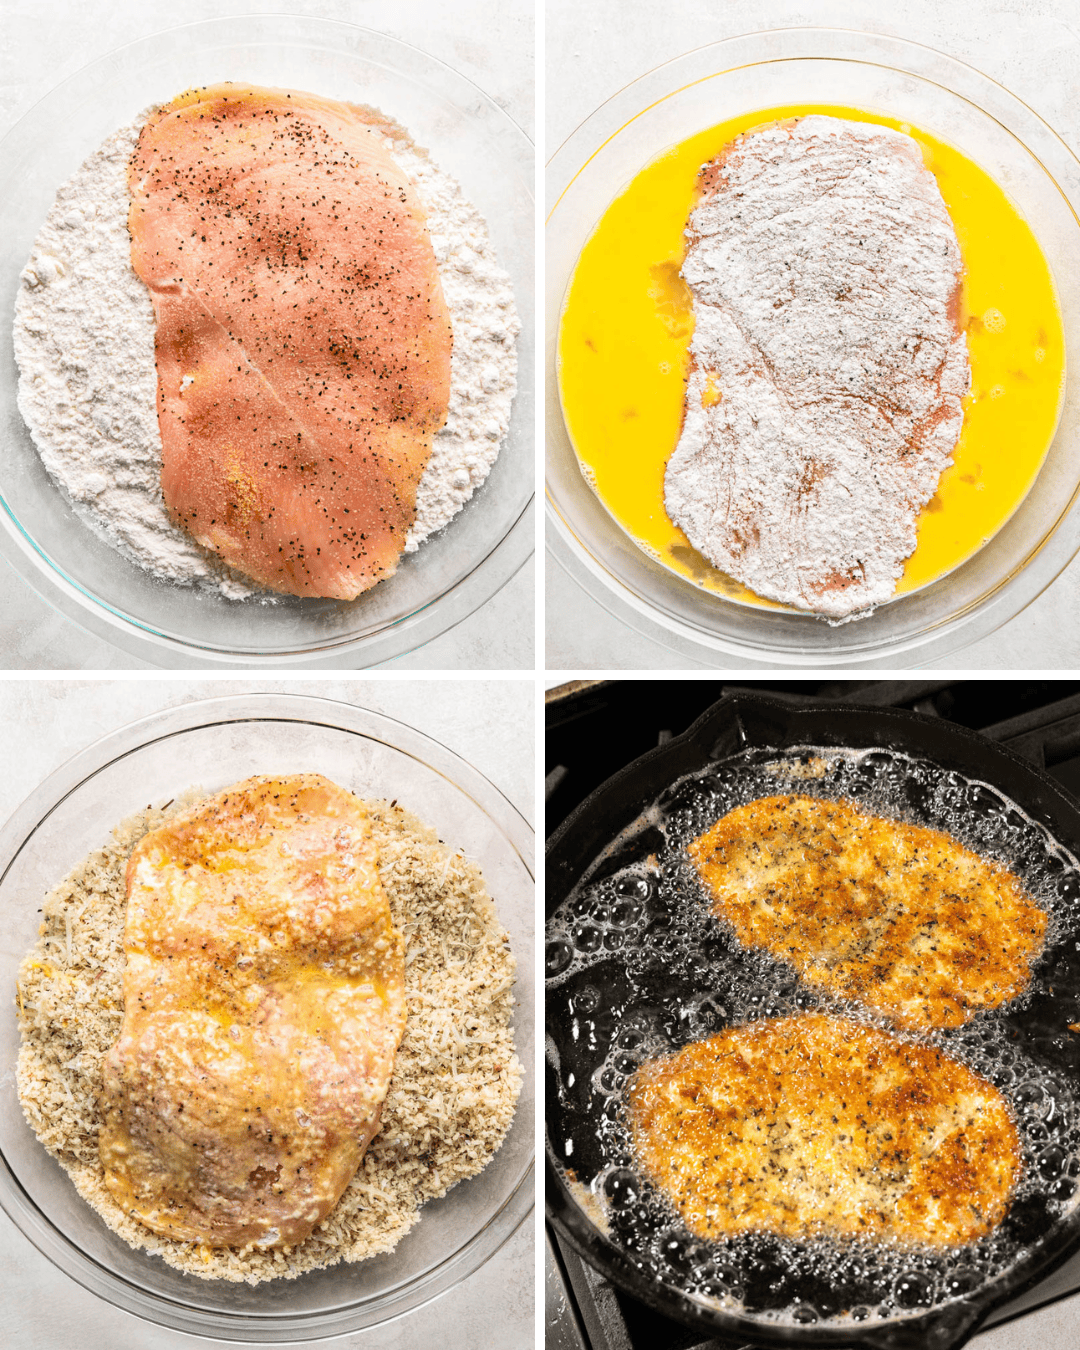
- Use a dry hand and a wet hand. Keep one hand only for the flour and breadcrumbs, and the other hand only for the egg mixture. This stops your fingers from turning into a sticky mess of dough.
- Coat every inch. After dipping in flour, make sure the whole surface is covered. Lift the chicken, give it a gentle shake to let the extra flour fall away. Then submerge it in the egg, and lift it out, letting any puddles of egg drip off. This prevents soggy spots.
- Press the breadcrumbs gently. When you place the cutlet into the panko mixture, use your dry hand to press the crumbs onto both sides. A little pressure helps them stick and creates a more even crust. Do not be rough; just a calm pat will do.
These simple moves turn a good breading into a great one. Every time I skip the extra shake or the gentle press, I notice a few bare patches on the finished cutlet, and that crunch is just not the same.
Storage and Reheating Instructions
Leftover chicken cutlets are like a hidden treasure. You can store them and bring them back to life later, and they still taste almost as good as the day you made them. For short term keeping, place the cooled cutlets in an airtight container and refrigerate for up to 3 to 4 days.
If you want to freeze them, here is the method that preserves the crunch best. First, let the cooked cutlets cool completely on a wire rack. Next, arrange them in a single layer on a baking sheet and pop the sheet into the freezer.
Once they are frozen solid, wrap each cutlet individually in plastic wrap or foil, then place them all into a freezer bag or container. They keep well for 3 to 4 months.
Freezing them flat first prevents them from sticking together, so you can grab just one at a time.
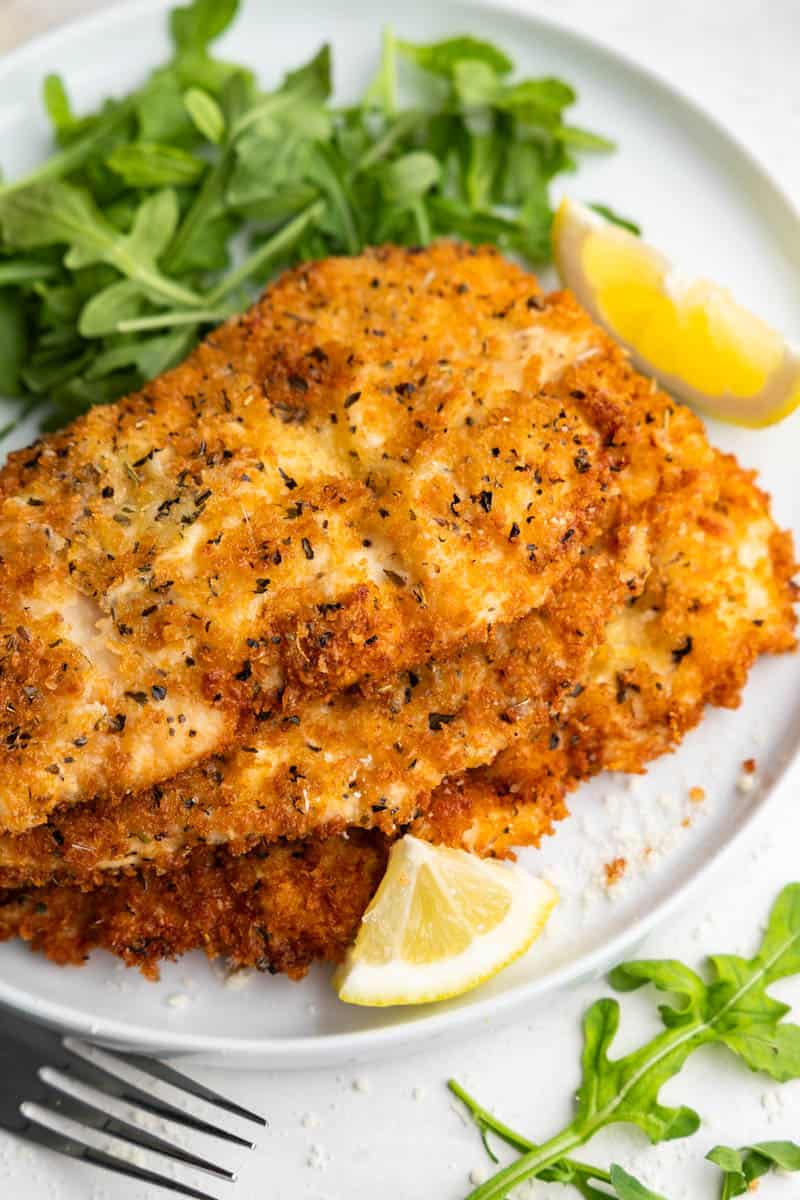
Reheating the right way is the secret to avoiding a soggy coating. The microwave works in a hurry, but it softens the crust.
If you choose the microwave, use 30 second bursts and stop as soon as the chicken is hot (it should not take longer than 2 minutes). For the crispiest results, I always turn to the oven.
Preheat it to 450 degrees Fahrenheit, line a baking sheet with parchment paper, and give the cutlets a light spritz of oil. Bake for 10 to 15 minutes, and the coating will crisp up nicely.
You can also use an air fryer at a similar temperature for a few minutes, which works wonderfully. You can easily make these cutlets ahead of time and reheat them in the oven for a fast weeknight dinner that tastes just as crispy as the day you made them.
How do you make chicken cutlets crispy?
Use thin, even chicken cutlets, then coat them in flour, egg, and panko before cooking. For this recipe, fry the breaded cutlets in vegetable oil heated to 350 375°F until they are browned and crisp, with an internal temperature of 165°F. Let them rest for 5 minutes before serving so the coating stays crunchy.
Can you bake chicken cutlets instead of frying them?
Yes, this recipe includes an oven method. Preheat the oven to 400°F, line a baking sheet with parchment paper, spritz the breaded cutlets with oil, and bake for 20 25 minutes until they reach 165°F. The oil spray helps the coating brown more evenly.
What should you do if the breading does not stick to chicken cutlets?
Make sure each cutlet is coated in flour first, then egg, then the panko mixture, since each layer helps the next one adhere. If the coating still seems loose, chill the breaded cutlets in the refrigerator for about 30 minutes before cooking. That helps the breading set and stay on better.
How do you store and reheat leftover chicken cutlets?
Store leftovers in the refrigerator for 3 4 days or freeze them for 3 4 months after cooling completely. For the best texture, reheat in a 450°F oven for 10 15 minutes with a light spritz of oil, or use an air fryer instead of a microwave when you want the coating to stay crisp. The microwave works faster, but it can make the breading softer.
FAQs
How do you make chicken cutlets crispy?
Can you bake chicken cutlets instead of frying them?
What should you do if the breading does not stick to chicken cutlets?
How do you store and reheat leftover chicken cutlets?
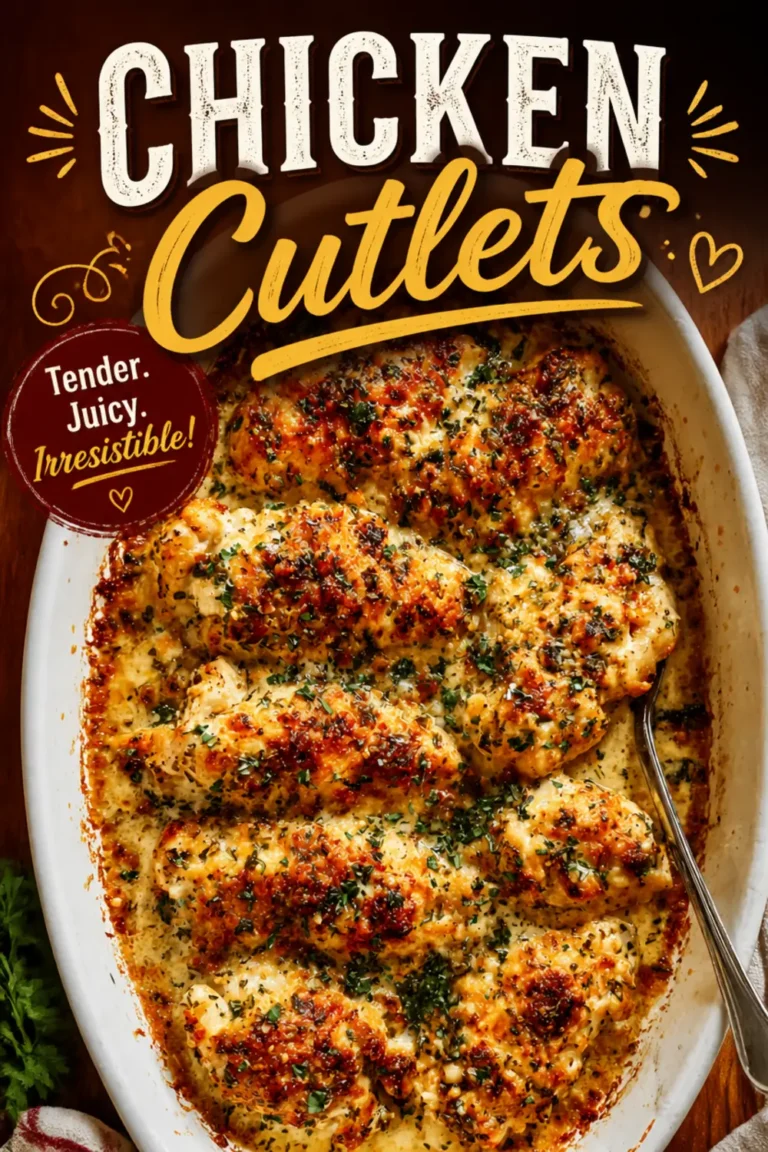
Crispy Parmesan Chicken Cutlets
What Are Crispy Parmesan Chicken Cutlets? I remember the first time I set a plate of these crispy Parmesan chicken cutlets on the table.
- Total Time: 40 min
- Yield: 4 pieces 1x
Ingredients
2 boneless skinless chicken breast
1 teaspoon salt
1 teaspoon garlic powder
1 teaspoon black pepper
1/2 cup all-purpose flour
2 large eggs
1 tablespoon milk
1 cup panko bread crumbs
1/4 cup grated Parmesan cheese
1 tablespoon Italian seasoning
2 cups vegetable oil, for frying
1 lemon wedges, for serving
Instructions
Frying Instructions
1-Trim 2 boneless skinless chicken breast of: Trim 2 boneless skinless chicken breast of any unwanted fat. Horizontally cut chicken in half to make 2 thin cutlets per chicken breast.
2-Lay cut chicken on countertop between two: Lay cut chicken on countertop between two layers of plastic wrap. Pound out chicken until 1/4-1/2 inch thick.
3-Season the thin chicken with 1 teaspoon: Season the thin chicken with 1 teaspoon salt, 1 teaspoon garlic powder, 1 teaspoon black pepper
4-Spread 1/2 cup all-purpose flour into a: Spread 1/2 cup all-purpose flour into a shallow dish. In a separate shallow dish, whisk 2 large eggs together with 1 tablespoon milk. In an additional separate shallow dish, mix together 1 cup panko bread crumbs, 1/4 cup grated Parmesan cheese, and 1 tablespoon Italian seasoning.
5-Pour enough 2 cups vegetable oil into: Pour enough 2 cups vegetable oil into a deep, large skillet to cover the bottom with 1 to 2 inches of oil. Bring oil to 350-375℉ (177-190℃) over medium-high heat. Watch the temperature closely using a thermometer and adjust the heat setting to maintain the temperature of the oil.
6-While oil is coming to temperature, dip: While oil is coming to temperature, dip chicken in the flour to coat both sides, then immediately dip into eggs to cover. Let any excess egg drip off then dip in the panko mixture, ensuring all parts of chicken are evenly coated.
7-Place breaded chicken into the hot oil: Place breaded chicken into the hot oil and fry 2-3 minutes. Work in batches if needed, based on size of pan. Chicken should not crowd the pan.
8-Gently flip and cook for an additional: Gently flip and cook for an additional 2-4 minutes until chicken reaches an internal temperature of 165 Fahrenheit, and is browned and crisp.
9-Remove from oil and let rest for: Remove from oil and let rest for 5 minutes. Serve with 1 lemon wedge and enjoy!
Air Fryer Instructions
10-Preheat an air fryer to 350 degrees: Preheat an air fryer to 350 degrees Fahrenheit.
11-Place chicken pieces in the basket of: Place chicken pieces in the basket of the pre-heated air fryer. Spray the tops with nonstick cooking spray.
12-Air fry for 10 minutes: Air fry for 10 minutes. Flip chicken pieces over using a spatula and spray the tops with nonstick cooking spray. Cook for 8 minutes more. Transfer chicken to a cutting board and slice.
Oven Instructions
13-Preheat oven to 400 degrees Fahrenheit: Preheat oven to 400 degrees Fahrenheit. Line a baking sheet with parchment paper. Spritz chicken with oil and bake for 20-25 minutes until 165 degrees Fahrenheit.
Last Step:
Please leave a rating and comment letting us know how you liked this recipe! This helps our business to thrive and continue providing free, high-quality recipes for you.- Prep Time: 20 min
- Cook Time: 20 min
- Method: stovetop
Nutrition
- Serving Size: 1 cutlet
- Calories: 288kcal
- Sugar: 2g
- Sodium: 871mg
- Fat: 10g
- Saturated Fat: 3g
- Carbohydrates: 28g
- Fiber: 3g
- Protein: 21g
- Cholesterol: 124mg