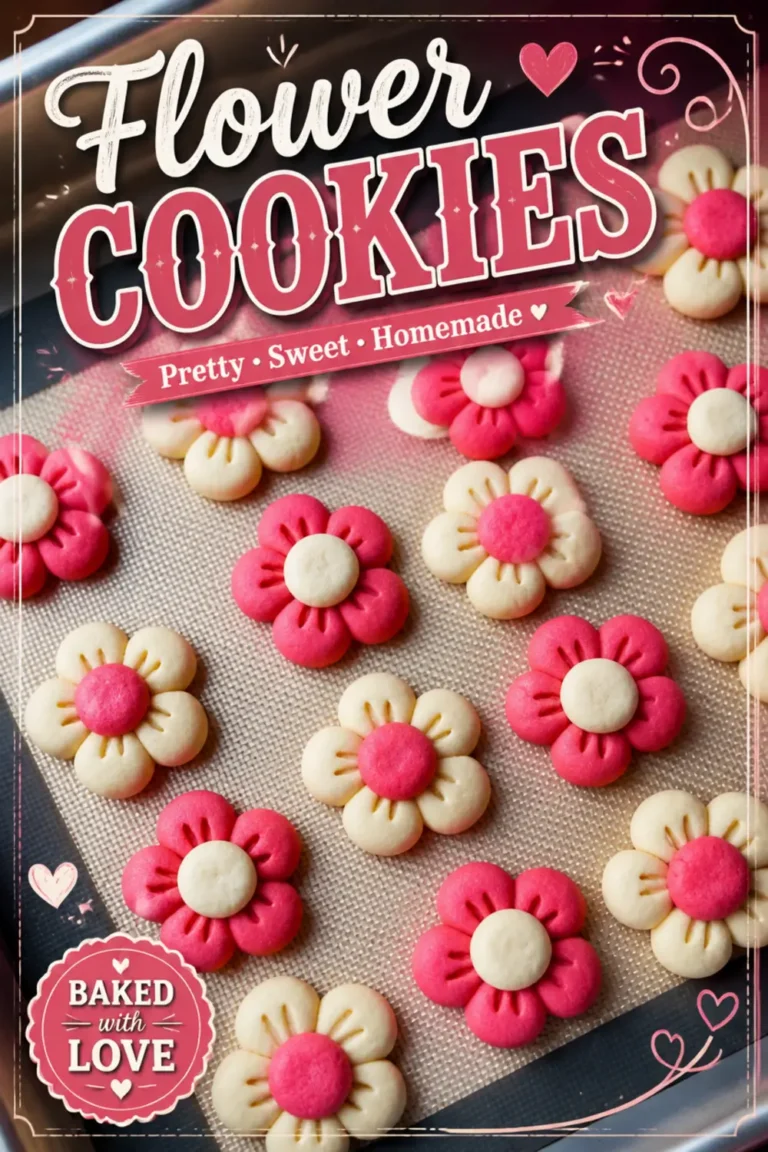
These flower cookies are the perfect way to welcome Spring! And the best part? They’re surprisingly simple to create. No fancy equipment or piping skills needed!
I first made these on a rainy Saturday when I wanted something cheerful to brighten our kitchen table. With just a few pantry staples and a little bit of patience, you can shape delicate butter cookie blossoms that look like they came from a bakery window.
The pink and white petals are entirely edible art, and the gentle almond flavor makes them unforgettable.
Each cookie is formed by rolling tiny dough balls into a circle of five petals and pressing a contrasting center piece on top. The technique is so approachable that even a beginner baker can nail it on the first try.
Whether you want an easy Easter cookie, a Mother’s Day gift, or simply a pretty homemade treat, these flower cookies deliver all the charm without any stress.
Let’s walk through each step of this recipe to make sure it turns out as amazing as possible. Not all of these are mandatory, but they make the process a lot easier. If you don’t have all these things on hand, feel free to improvise and work with what you have.
Here is the gear that makes shaping and baking smooth:
Electric stand mixer or hand mixer, essential for creaming the butter and sugar until fluffy.
Two large baking sheets, you need plenty of space because the cookies hold their shape and don’t spread much.
Parchment paper or silicone baking mats, prevents sticking and makes cleanup effortless.
A small measuring spoon (1/2 tsp), the secret to uniform petals that bake evenly.
A flat bottomed glass or ramekin, used to press the petals together without flattening them completely.
A toothpick or scribe, for adding delicate vein lines on each petal.
Once you gather your tools, the real fun begins. The butter cookie dough is silky, forgiving, and holds its shape beautifully after a quick chill. If you love classic butter treats, you might also enjoy my Homemade Butter Cookies recipe for another foolproof option.
Step 1: Make the Cookie Dough
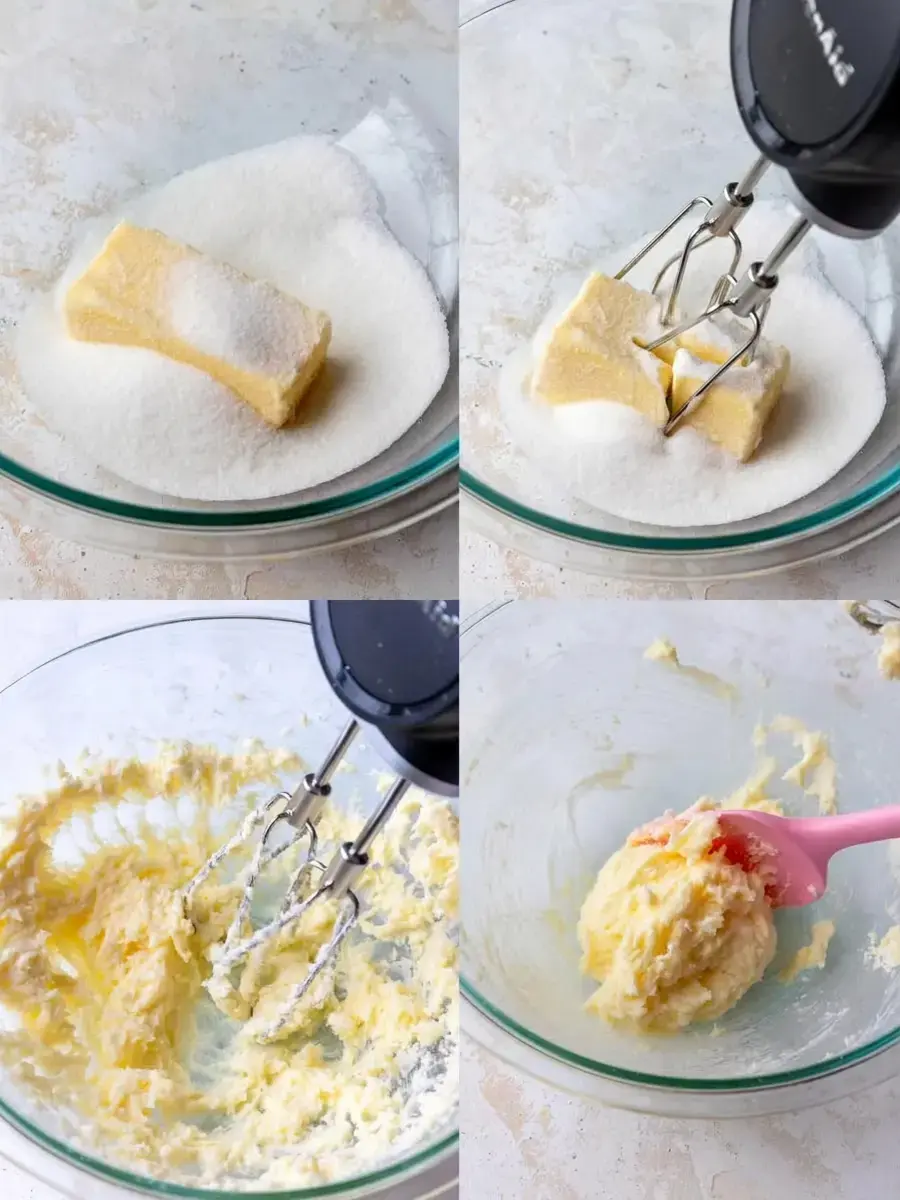
We start by creaming 1/2 cup of softened unsalted butter with 1/2 cup granulated sugar. Beat them together on medium high speed for 1 to 2 minutes until the mixture lightens in color and looks fluffy. This step incorporates air, which gives the cookies their tender texture.
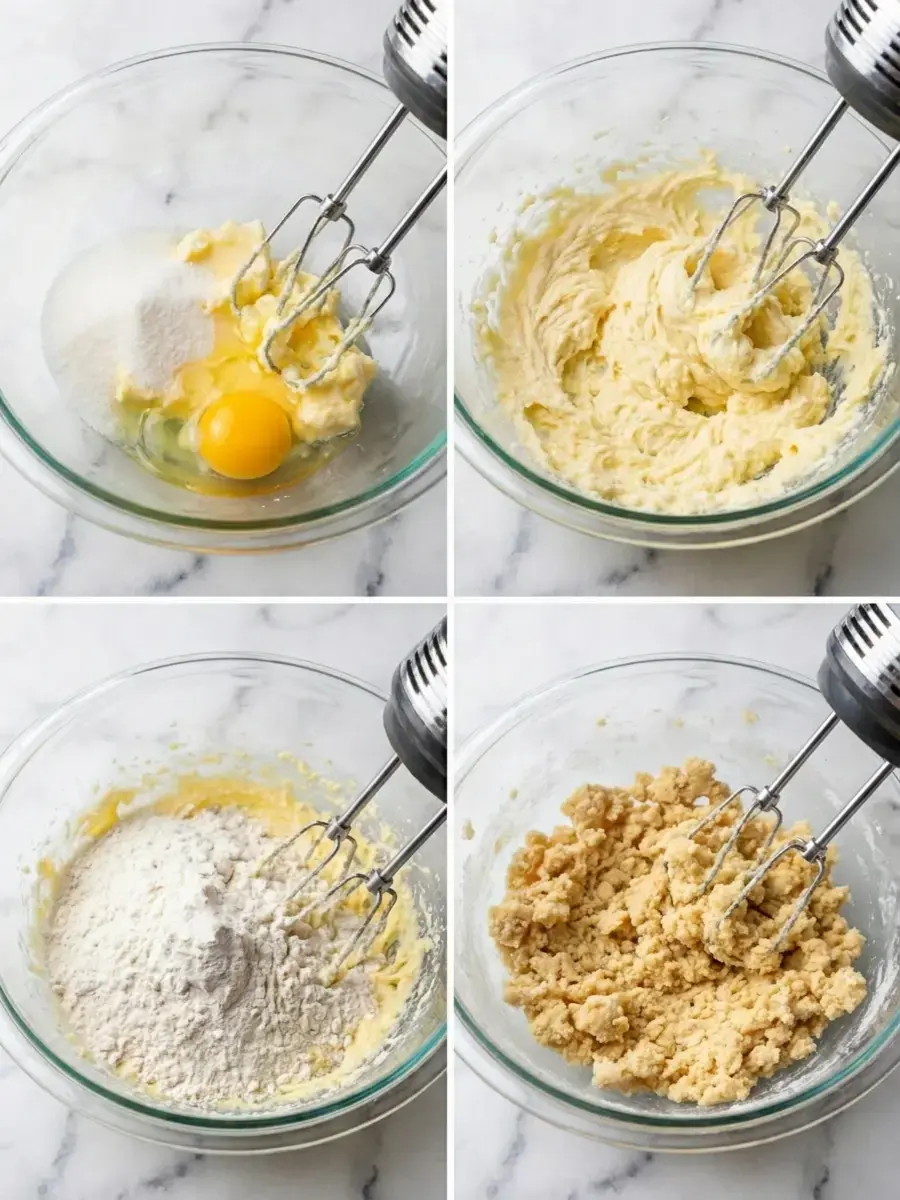
Next, add one large egg (at room temperature), 1 1/2 teaspoons of almond extract, and 1 teaspoon of vanilla extract. Beat until everything is combined, scraping the sides and bottom of the bowl with a rubber spatula as needed.
Now for the dry ingredients: add 2 cups of all purpose flour, 2 tablespoons of cornstarch, and 1 teaspoon of fine salt. Mix on low speed just until the flour disappears.
The secret to these cookies’ perfect consistency is not overworking the dough once you add the flour. Mix just until combined for the most tender texture! Scrape around the bowl once more with the spatula to catch any stray flour pockets.
Step 2: Scooping the Dough and Creating the Flowers
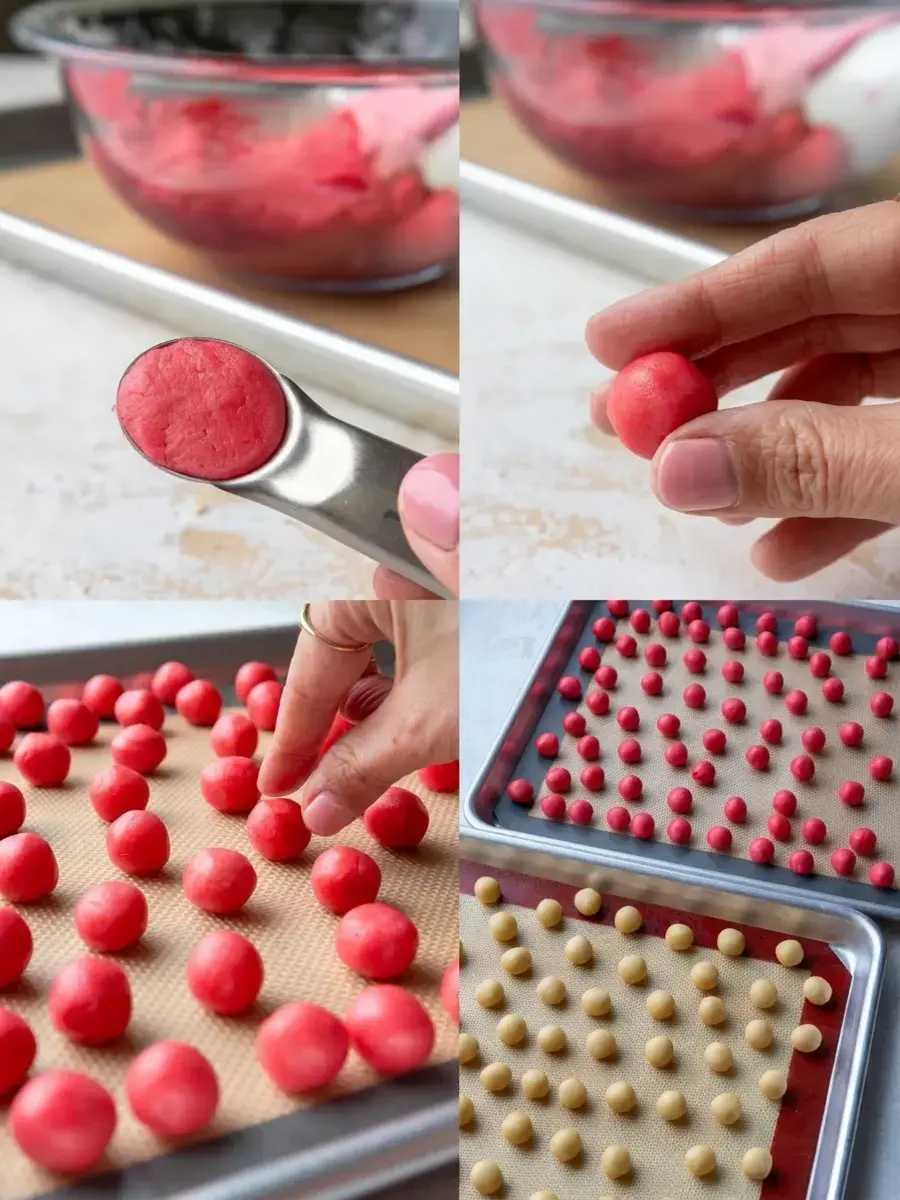
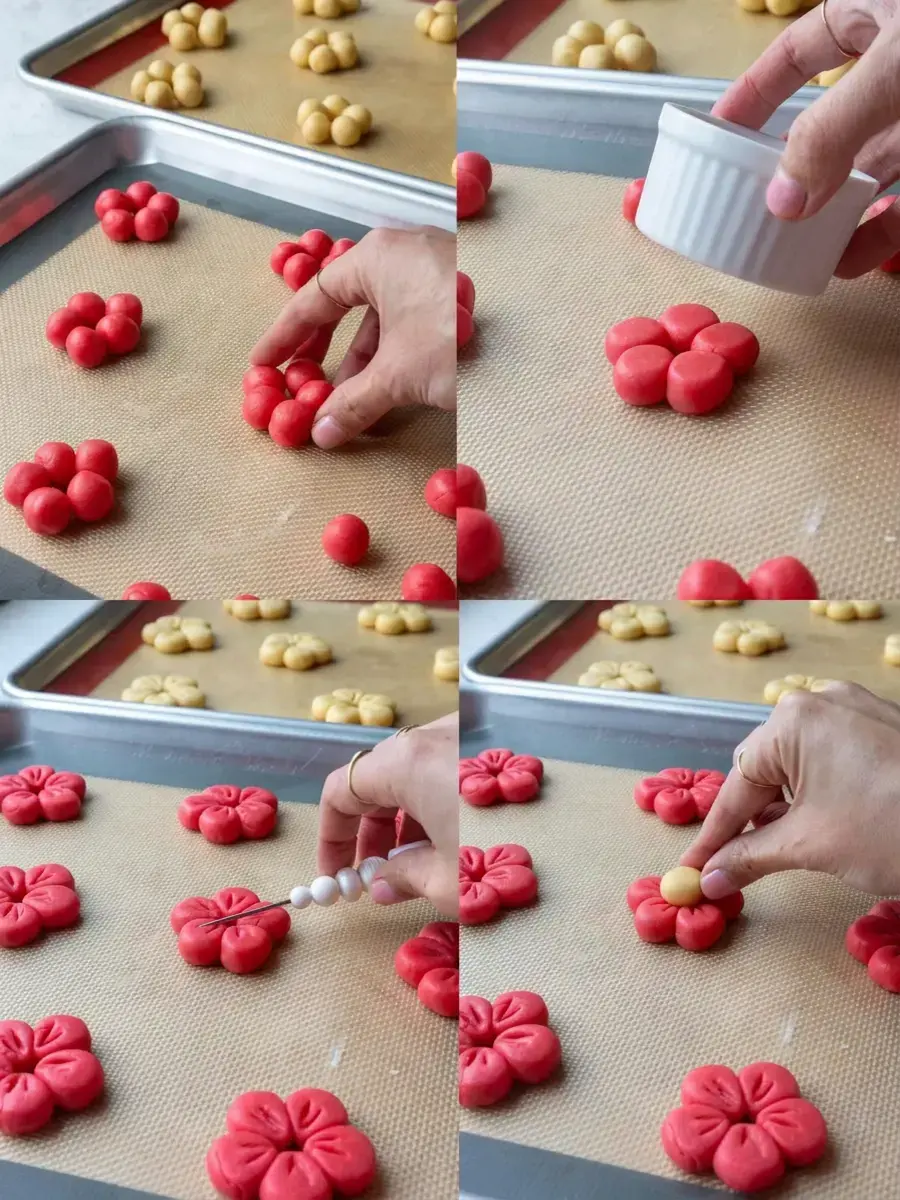
Divide the dough in half with a rubber spatula. Using a 1/2 teaspoon measuring spoon, scoop out uniformly sized bits of dough and repeat until you’ve portioned out half of the uncolored dough. Roll each bit into a smooth ball with your hands and place them on one of the prepared baking sheets.
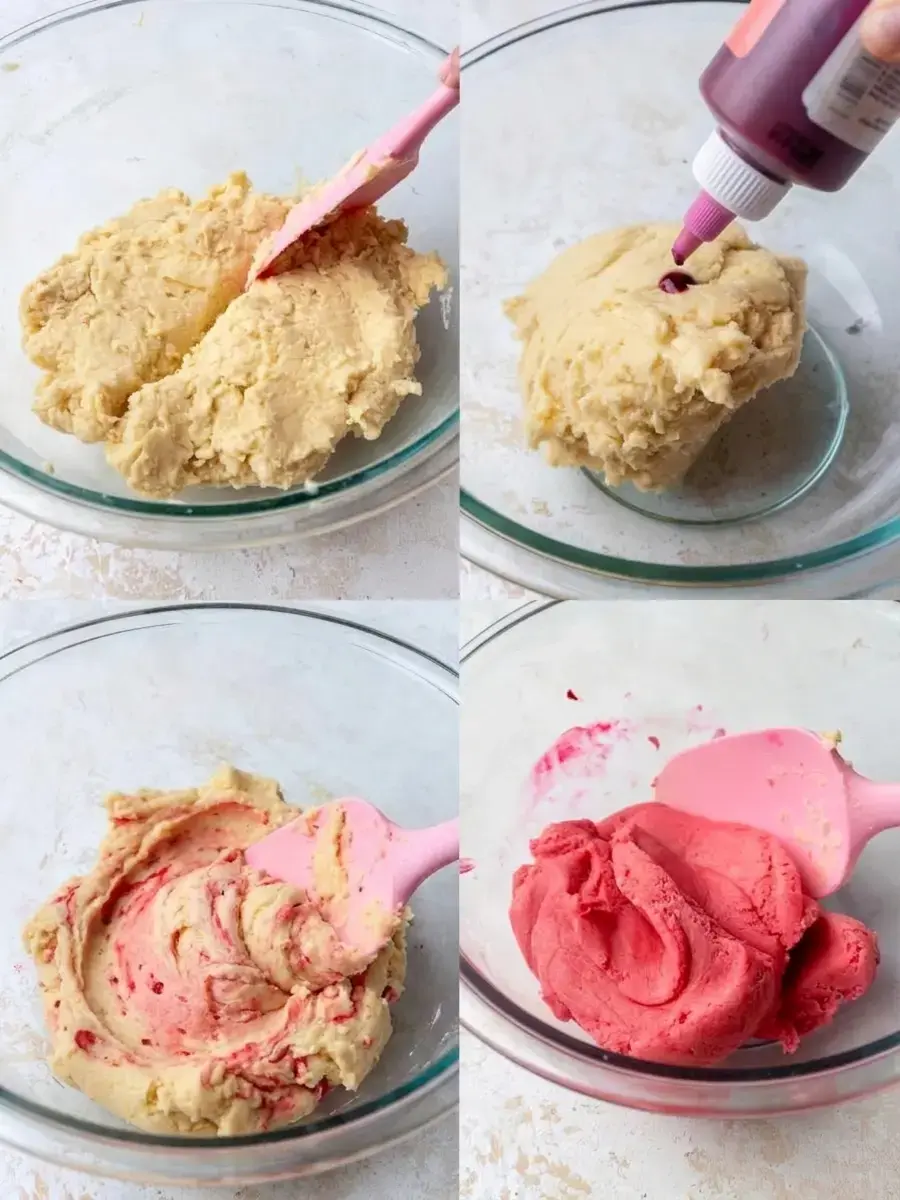
Now add a squirt of deep pink gel food coloring to the remaining dough and mix with the spatula until the color is evenly distributed. I like to do this by hand to avoid overmixing, but a mixer on the lowest setting works too.
Then, scoop and roll the pink dough into identical tiny balls and set them on the second baking sheet.
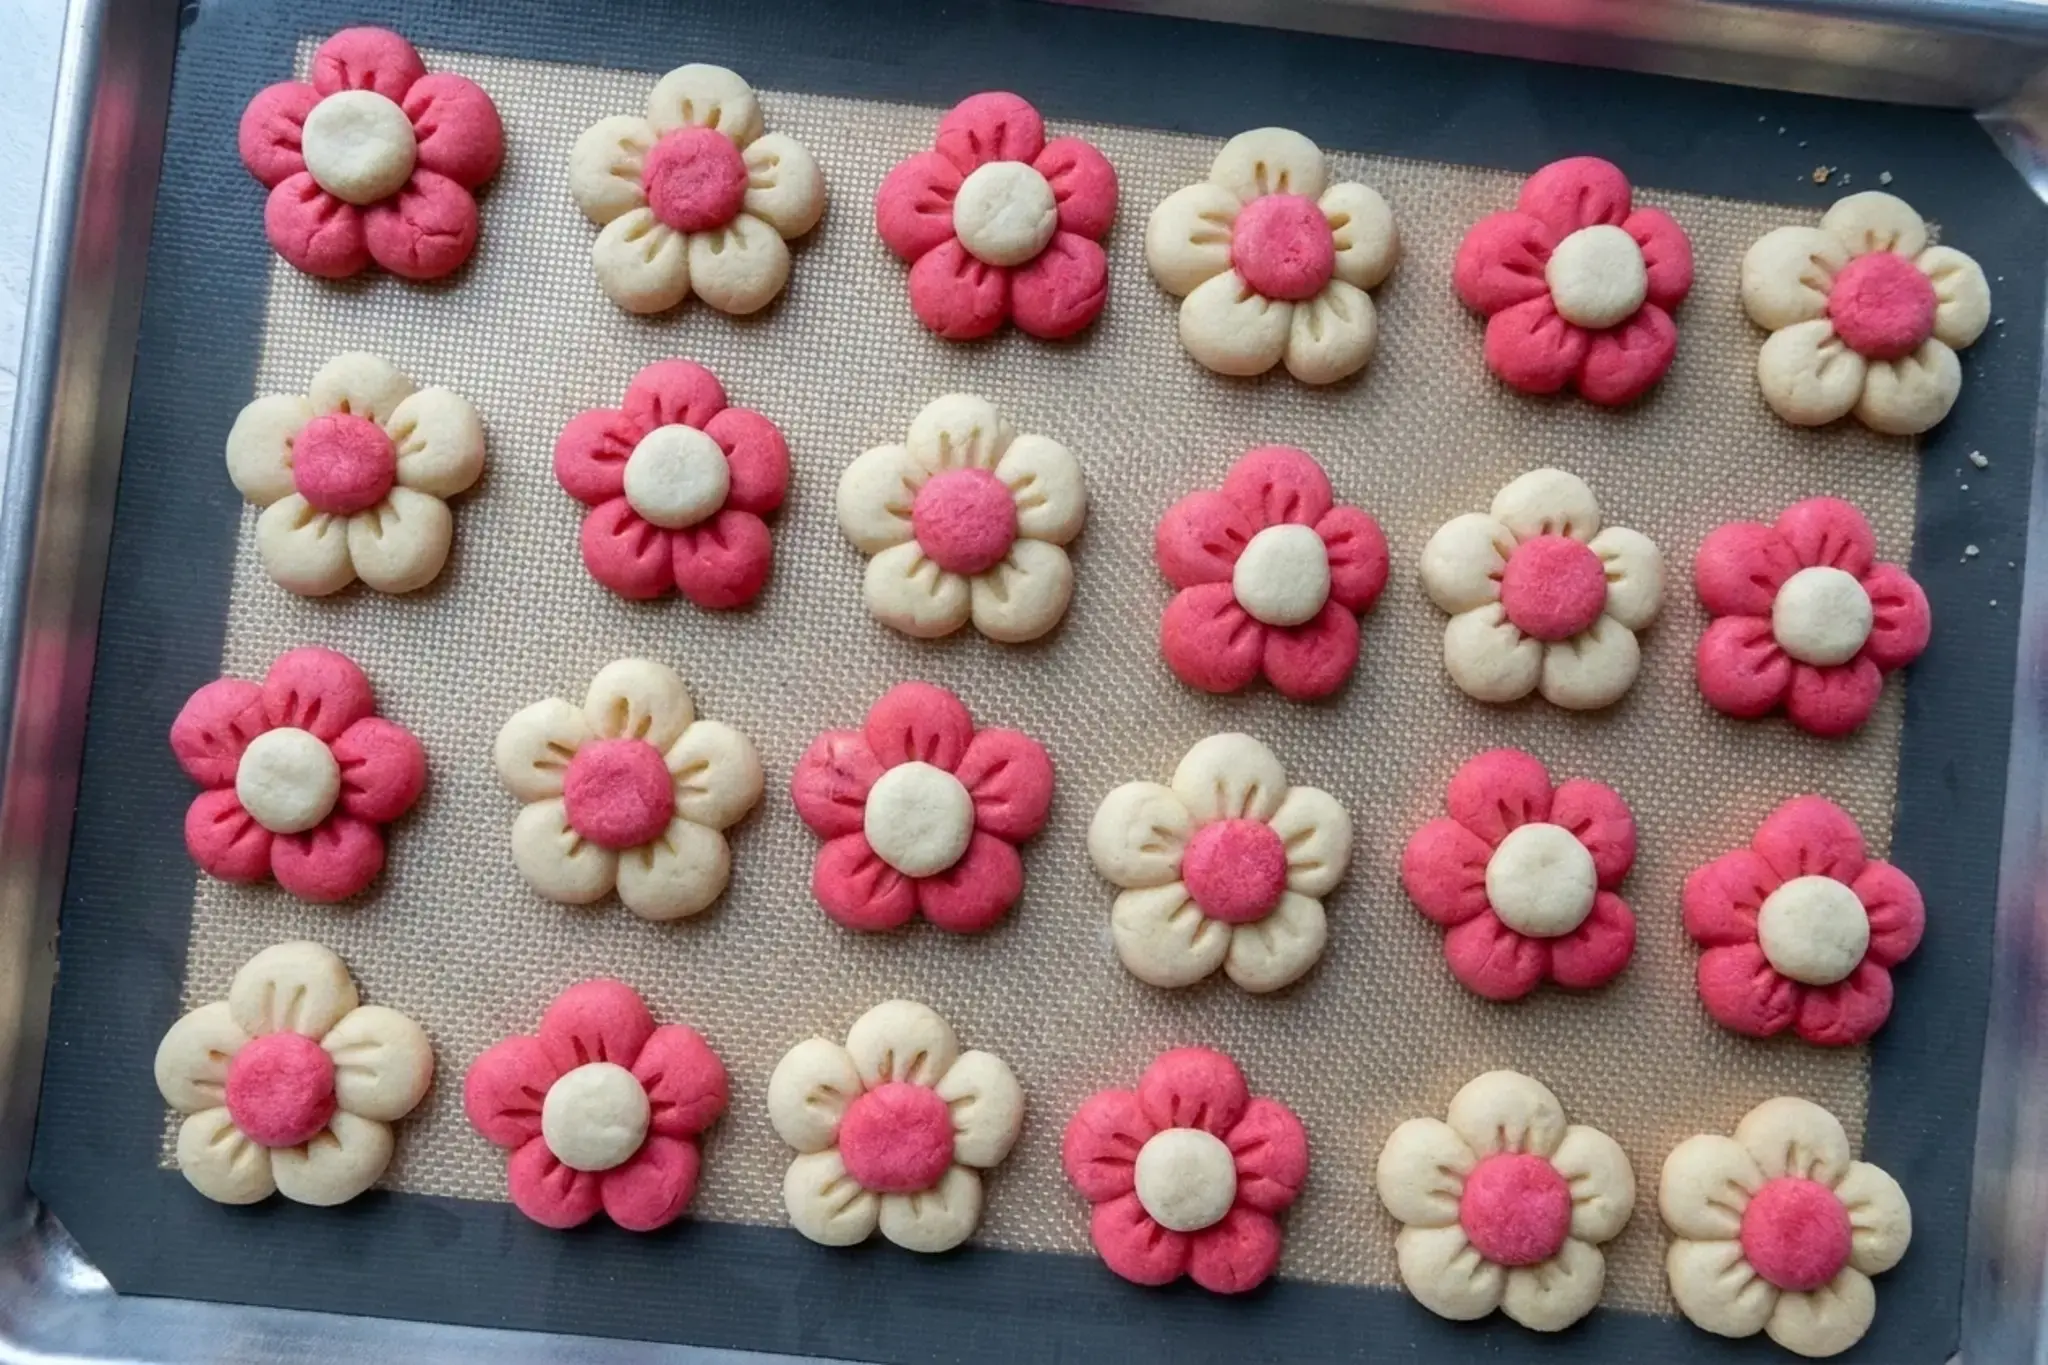
Arrange five dough balls of the same color into a circle with a small opening in the center. Repeat until you have 12 white flowers and 12 pink flowers, spacing them a couple of inches apart. You’ll still have leftover dough balls of each color, and those become the flower centers.
Spray the bottom of a flat bottomed glass with a little non stick spray and gently press each flower to help the petals stick together. Don’t flatten them completely, just a light kiss of pressure.
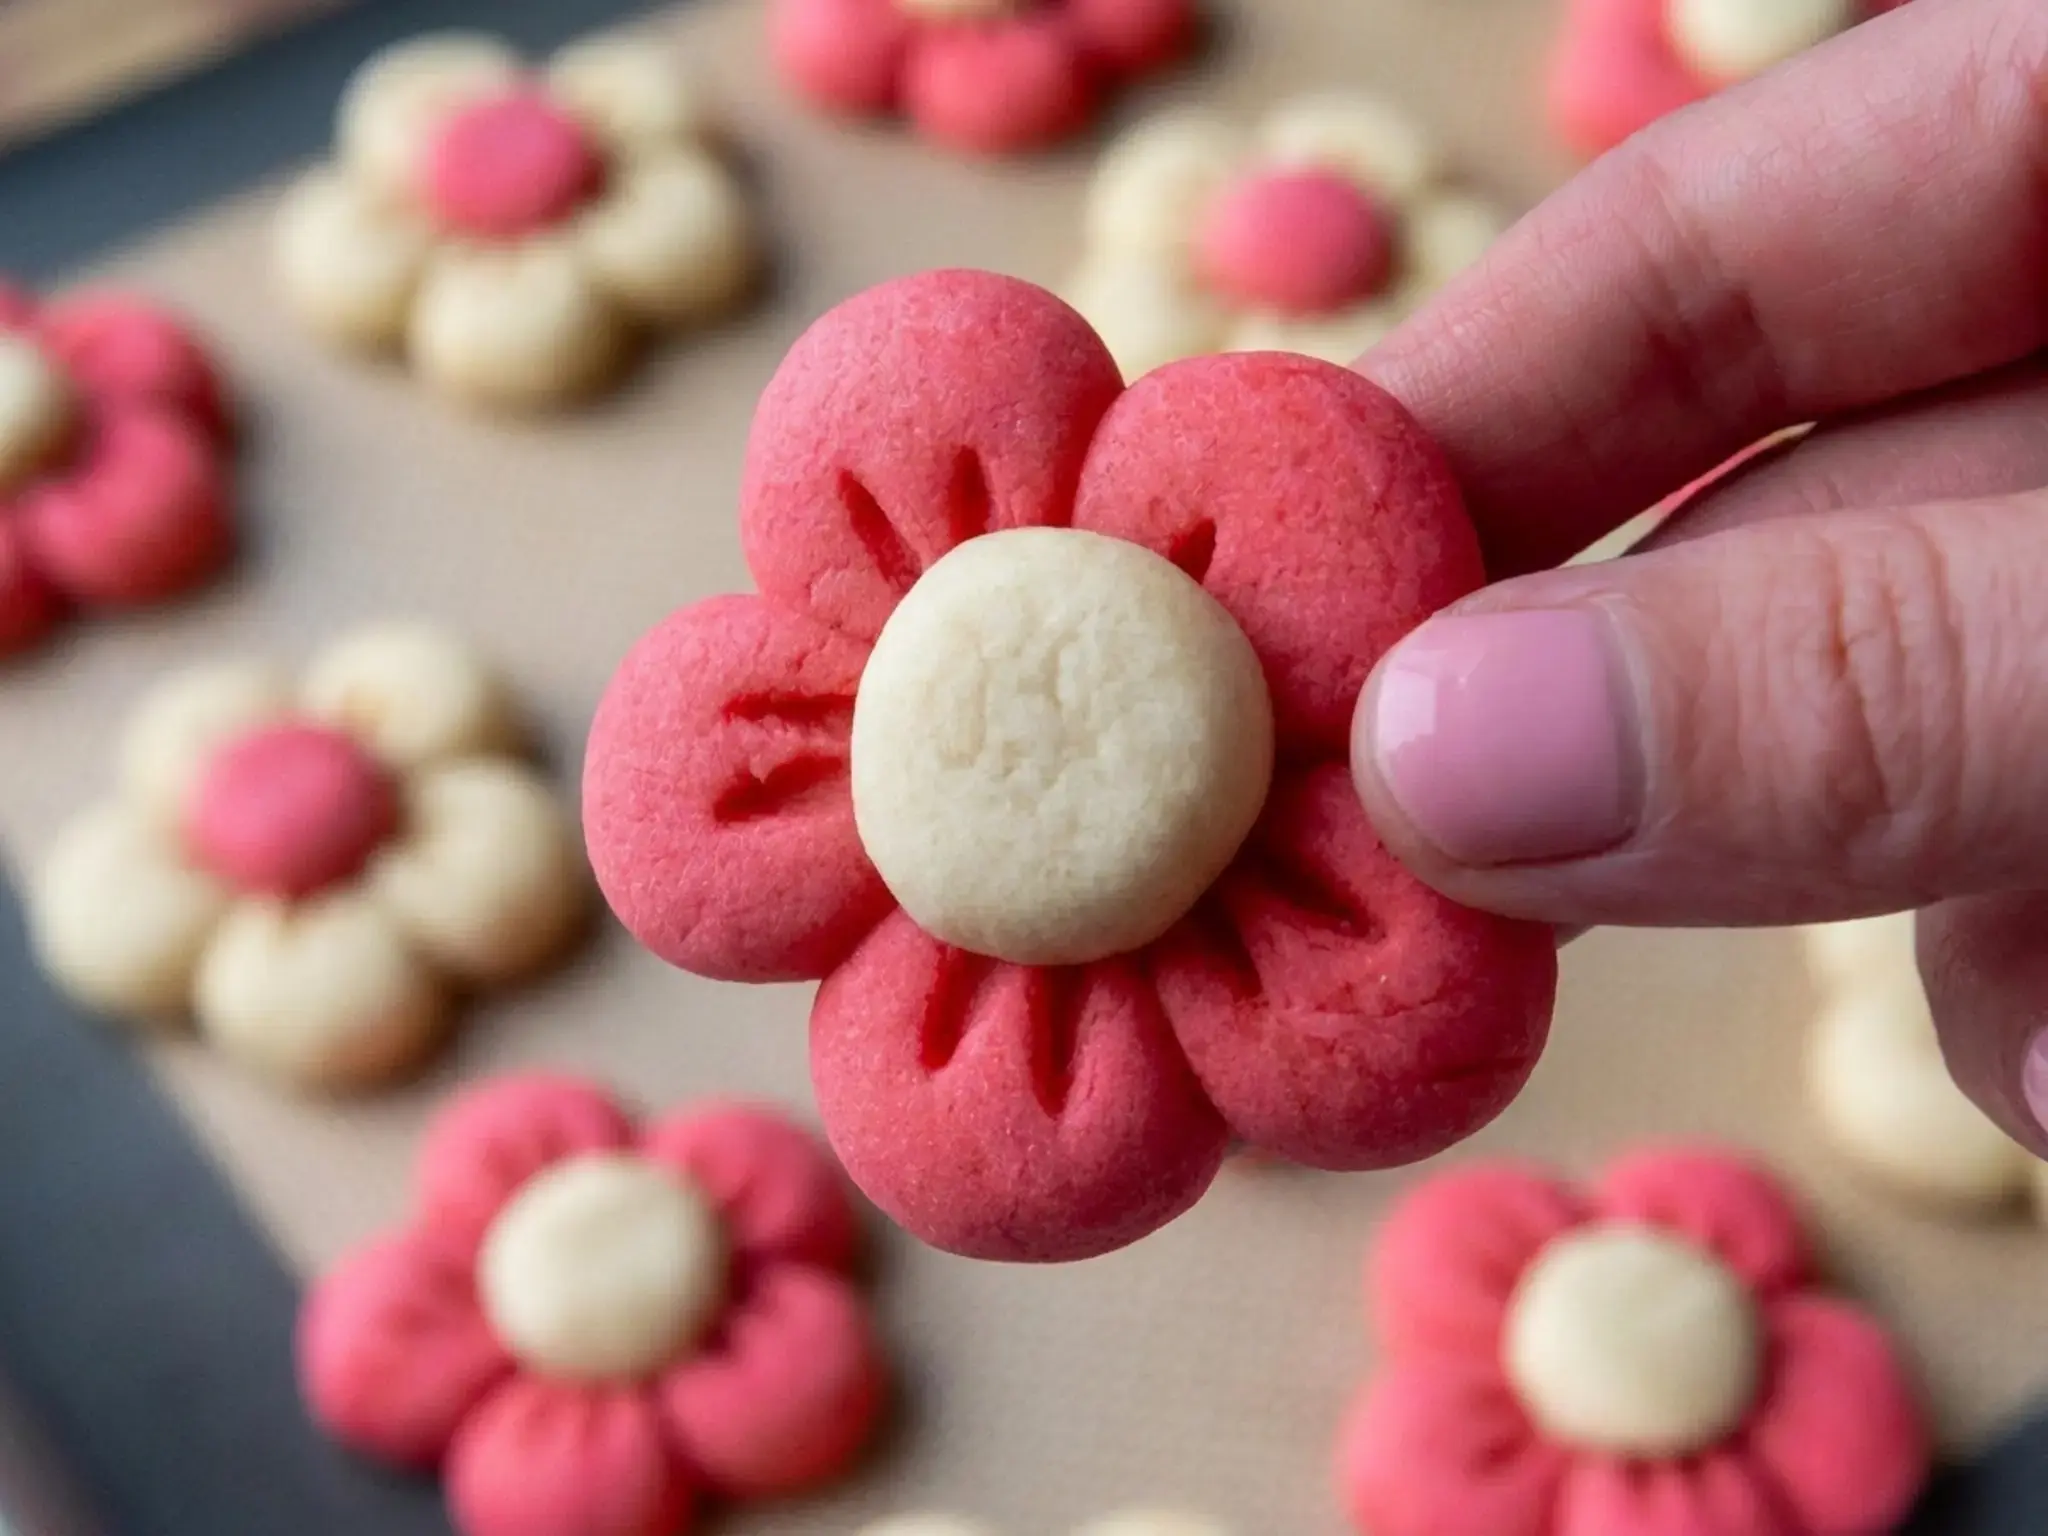
Then use a toothpick to draw two thin lines from the center partway up each petal. Finally, press a ball of the opposite color into the center of each bloom.
Making these little blossoms feels almost meditative, and I always smile when I see a full tray of flowers ready for the oven.
Step 3: Chilling and Baking the Cookies
After the cookies are assembled, they’ll need a quick chill in the refrigerator for 30 minutes or the freezer for 10 minutes, pan and all! This step is absolutely essential and it prevents the cookies from spreading in the oven and helps them keep their shape.
Never skip the chilling. Cold dough is the number one secret to flower cookies that hold their petal definition.
While the cookies chill, preheat the oven to 350°F (175°C). Once the oven is fully preheated, bake the chilled cookies for 11 to 12 minutes. I recommend baking one tray at a time on the middle rack.
The edges should be set, but you must take them out before any browning appears because we want those colors to stay bright and vibrant. Let the cookies cool completely on the baking sheet. They firm up as they cool and become wonderfully buttery.
Substitutions and Variations
Need to tweak the ingredients? Here are some easy swaps to make this recipe work for different dietary needs.
Unsalted Butter, For a dairy free version, use plant based butter sticks (not the tub kind) at room temperature. If the alternative butter contains salt, simply omit the salt the recipe calls for. You can also use salted butter and skip the extra salt.
Almond Extract, If you have nut allergies or simply don’t care for the flavor, you can just omit it. The vanilla alone still gives a lovely taste.
Egg, For an egg free version, use 3 tablespoons of aquafaba (the liquid from canned chickpeas) or a commercial egg replacer. The dough will be slightly softer, so chill it a few extra minutes.
All Purpose Flour, To make gluten free flower cookies, use a cup for cup gluten free baking flour blend that contains xanthan gum. The texture remains tender.
Cornstarch, You can replace it with an equal amount of arrowroot powder or simply use an extra tablespoon of flour. The cornstarch adds softness, but the recipe still works without it.
Food Coloring, Gel food coloring is best, but you can also use natural powders such as beet powder for pink, matcha for green, or turmeric for yellow. Start with a small amount and add more until you reach the desired shade.
Making These Flower Cookies in Advance
These cookies can easily be made in advance if you’re short on time. The dough can be refrigerated for up to 3 days before shaping, or you can refrigerate the already shaped dough on the pan for 3 days. Just cover it tightly with plastic wrap.
You can also freeze the dough for up to a month. Portion it into balls, flash freeze on a tray, then transfer to a freezer bag. Thaw overnight in the fridge before arranging and baking.
Baked cookies will keep in an airtight container at room temperature for 5 days. If you want to freeze baked cookies, layer them with parchment paper and freeze for up to 3 months. They taste fresh and buttery even straight from the freezer.
How Many Cookies Does This Recipe Make?
This recipe makes about 24 delicate flower cookies if you use a 1/2 teaspoon measure to scoop the cookie dough. That amount is perfect for a small gathering or a spring cookie box. If you want larger cookies, use a 1 teaspoon scoop instead and you’ll end up with 12 bolder blossoms. They look stunning on a dessert platter.
If you’re baking for a crowd or putting together a cookie exchange, double the ingredients and follow the same directions. The dough doubles beautifully and the shaping process is just as fun with a bigger batch.
Flavor Variations
I love using almond extract to flavor these cookies, but it is a super versatile recipe, and you can flavor them in so many different ways. Below are a few variations I recommend:
Citrus Zest, Add 1 tablespoon of fresh lemon or orange zest to the dough for a bright, sunny twist. The citrus oils complement the buttery crumb perfectly.
Subtle Spice, Mix in 1/4 teaspoon of ground cinnamon for a warm, cozy note that pairs beautifully with a cup of tea.
Tropical Coconut, Replace the almond extract with coconut extract and add 1/4 cup of finely shredded unsweetened coconut. The texture becomes slightly chewy and tastes like a vacation.
Almond Vanilla Classic, For pure, nostalgic butter cookies, stick with the original almond and vanilla combination. This dough is similar to my Basic Butter Cookies, but the almond extract makes it extra special.
Color Variations
In addition to different flavors, you can also make these in just about any color! While I love the classic pink and white combination, don’t be afraid to play with other colors. Below are a few different versions I’ve made that turn out so cute:
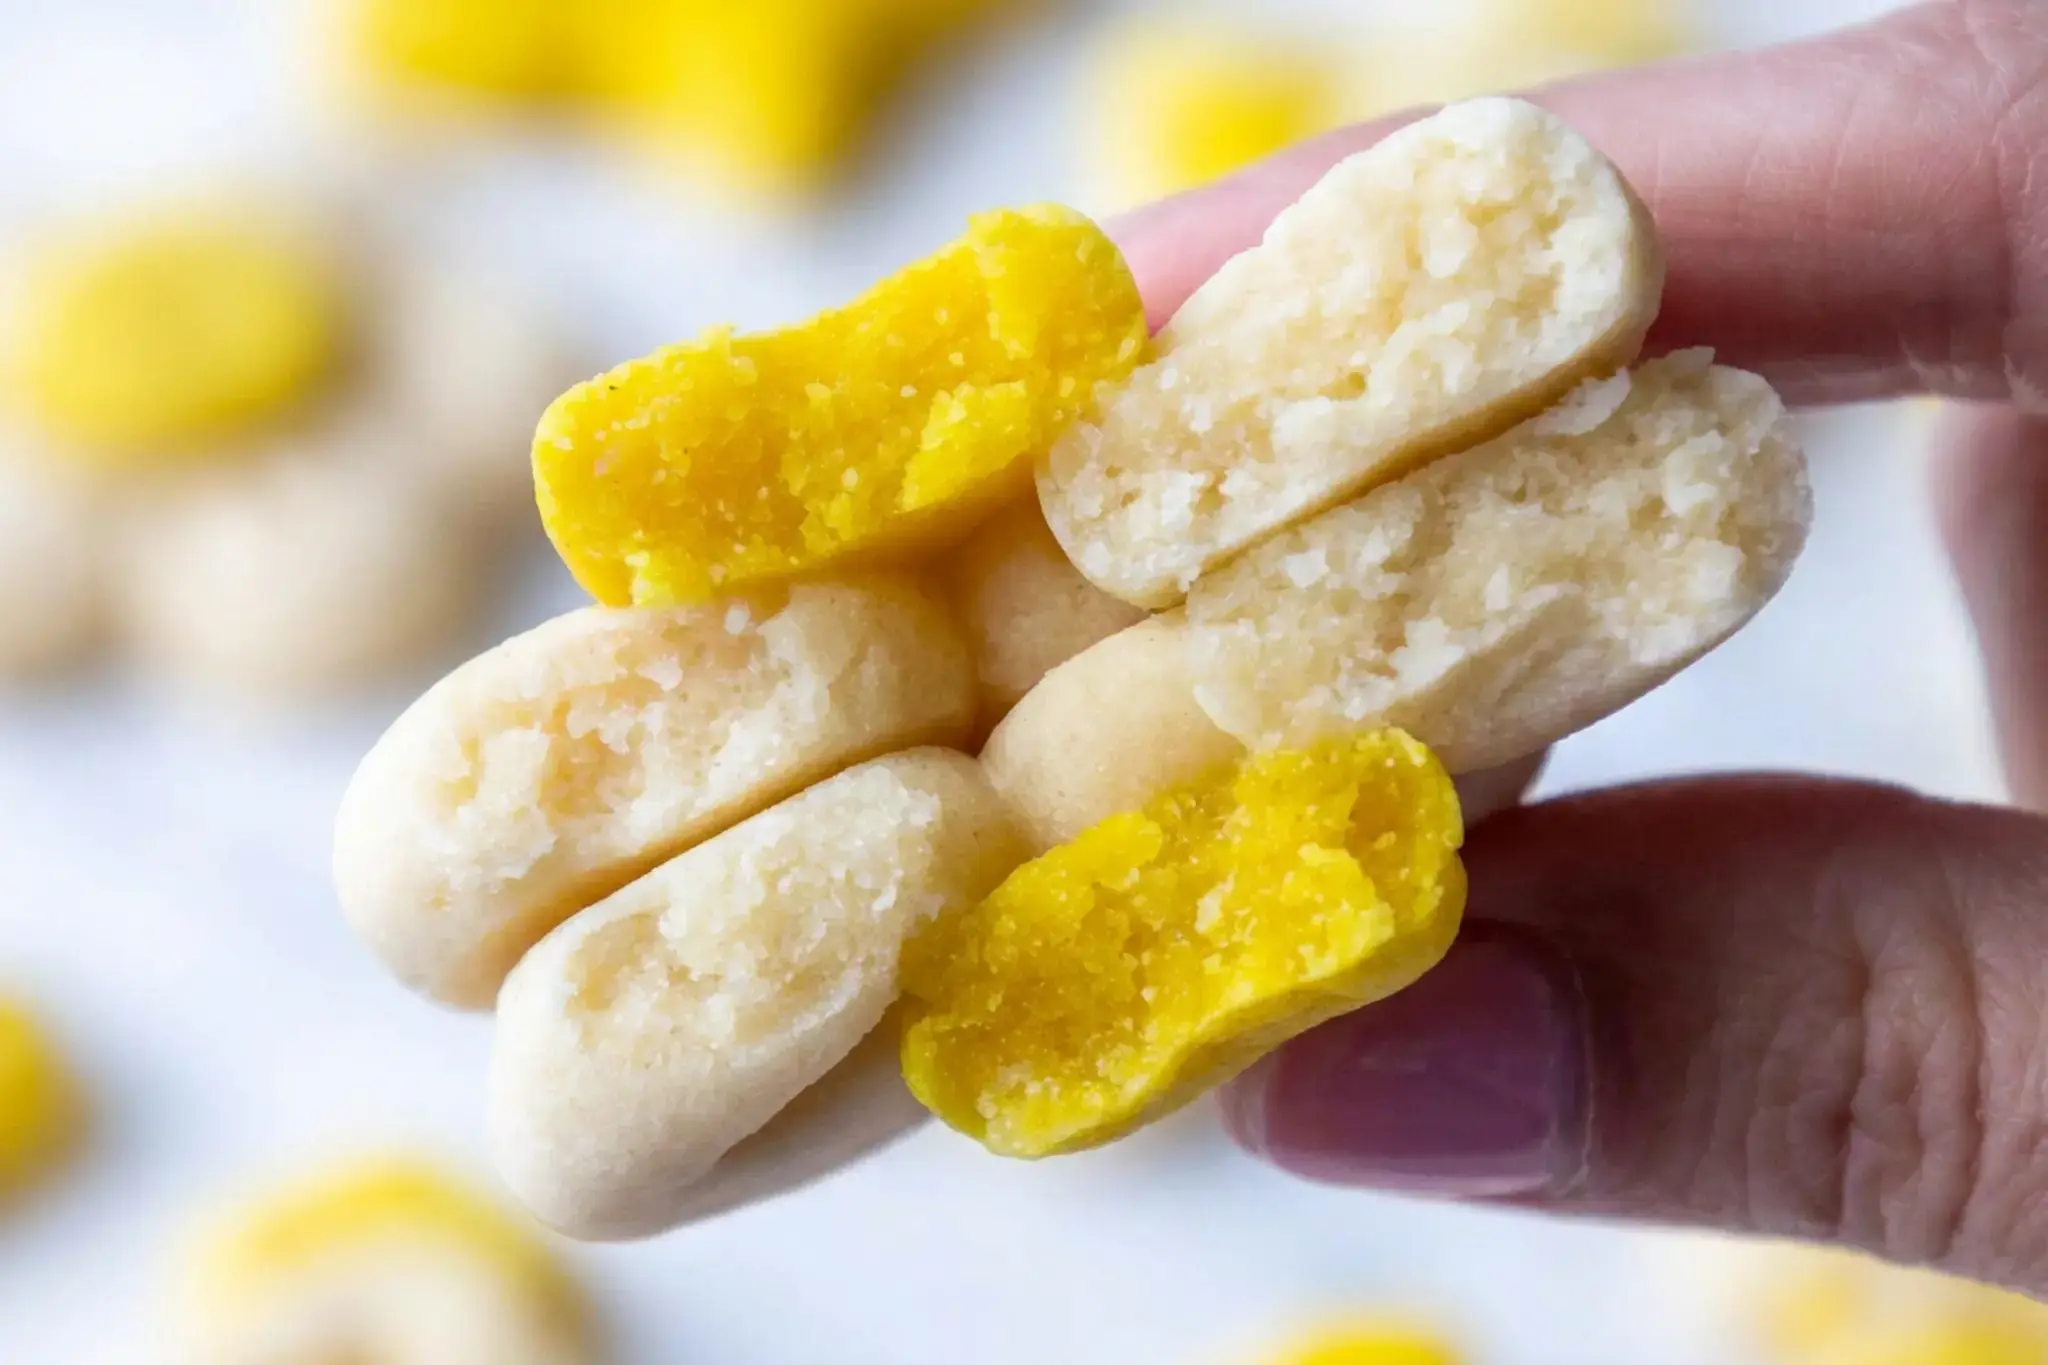
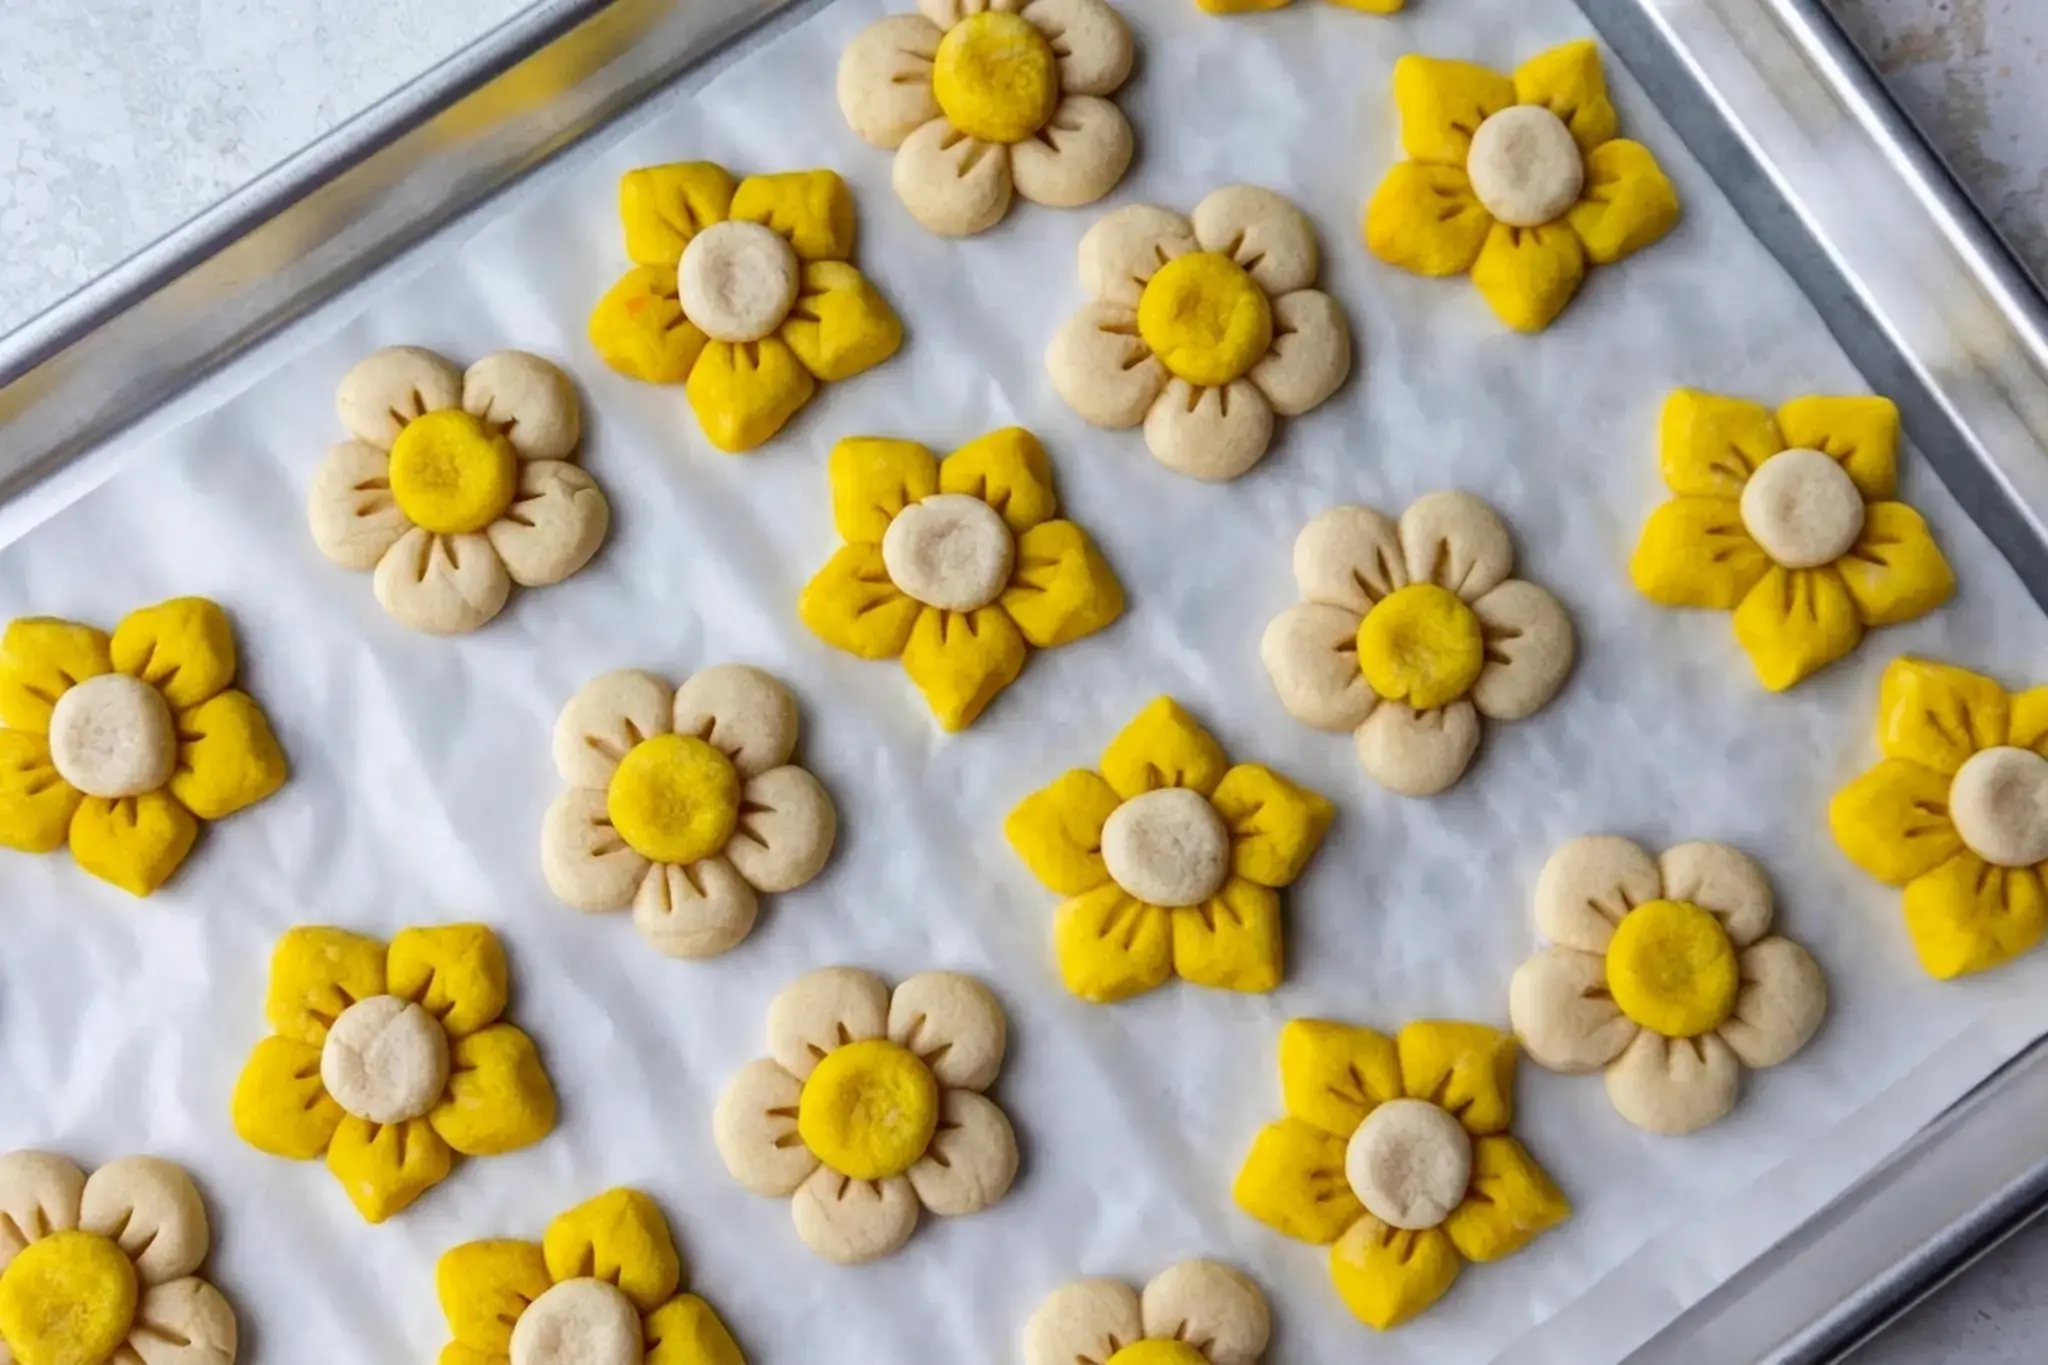
Yellow and White, Use a sunny yellow for the petals and white centers to create daffodil inspired cookies that scream spring.
Pastel Rainbow, Soft lavender, mint green, baby blue, and pale peach make an Easter cookie tray that looks like a meadow.
Red and White, Perfect for Valentine’s Day or Christmas. The bold contrast is festive and eye catching.
School Colors, Match your graduate’s school colors for a graduation party or a sports themed cookie platter.
Multi Colored Petals, Roll different colored doughs into tiny balls and alternate them around the circle for a whimsical bouquet effect.
How do you make flower cookies without a cookie cutter?
You can shape flower cookies by rolling the dough into small, even balls and arranging five balls in a circle to form each petal. Gently press the petals together with a flat bottomed glass, then add a dough ball in the center. This method gives the cookies a flower shape without any special cutters or piping tools.
Why do flower cookies spread or lose their shape in the oven?
Flower cookies usually spread when the dough is too warm, the flour is undermeasured, or the cookies are baked without chilling. Chill the shaped cookies for 30 minutes in the refrigerator or 10 minutes in the freezer before baking. Also, bake them just until the edges are set and avoid browning them.
Can you make flower cookies ahead of time and freeze the dough?
Yes, the shaped dough can be chilled before or after shaping for up to 3 days, or frozen for up to 1 month. If you freeze it, thaw the dough overnight in the refrigerator before baking. Baked cookies can also be frozen for up to 3 months, with parchment between layers if stacked.
What food coloring and extract work best for flower cookies?
Gel food coloring works best because it gives a vivid color without thinning the dough. The recipe uses almond extract plus vanilla extract, but you can swap in other flavorings if needed, such as vanilla alone, citrus zest, or coconut extract. Using liquid food coloring is less ideal because it can change the dough consistency.
FAQs
How do you make flower cookies without a cookie cutter?
You can shape flower cookies by rolling the dough into small, even balls and arranging five balls in a circle to form each petal. Gently press the petals together with a flat-bottomed glass, then add a dough ball in the center. This method gives the cookies a flower shape without any special cutters or piping tools.
Why do flower cookies spread or lose their shape in the oven?
Flower cookies usually spread when the dough is too warm, the flour is undermeasured, or the cookies are baked without chilling. Chill the shaped cookies for 30 minutes in the refrigerator or 10 minutes in the freezer before baking. Also, bake them just until the edges are set and avoid browning them.
Can you make flower cookies ahead of time and freeze the dough?
Yes, the shaped dough can be chilled before or after shaping for up to 3 days, or frozen for up to 1 month. If you freeze it, thaw the dough overnight in the refrigerator before baking. Baked cookies can also be frozen for up to 3 months, with parchment between layers if stacked.
What food coloring and extract work best for flower cookies?
Gel food coloring works best because it gives a vivid color without thinning the dough. The recipe uses almond extract plus vanilla extract, but you can swap in other flavorings if needed, such as vanilla alone, citrus zest, or coconut extract. Using liquid food coloring is less ideal because it can change the dough consistency.
What Is Flower Cookies? These flower cookies are the perfect way to welcome Spring!
Total Time:71 min
Yield:24 cookies 1x
Ingredients
Scale
Flower Cookies 1/2 cup unsalted butter, softened 1/2 cup granulated sugar 1 large egg, room temperature 1 1/2 tsp almond extract 1 tsp vanilla extract or vanilla bean paste 2 cups all-purpose flour 2 Tbsp cornstarch 1 tsp fine salt food coloring, Deep Pink
Instructions
Flower Cookies 1-Wait to preheat the oven until the: Wait to preheat the oven until the cookies are chilling (step 12). Line two large baking sheets with parchment paper or silicone mats. Set aside. 2-Use a large mixing bowl and hand: Use a large mixing bowl and hand mixer or the bowl of your stand mixer fitted with a paddle attachment to combine 1/2 cup (1 stick) unsalted butter and 1/2 cup granulated sugar. Beat at medium-high speed for 1-2 minutes until the mixture lightens in color and looks fluffy. 3-Add 1 large egg, 1 1/2 tsp: Add 1 large egg, 1 1/2 tsp almond extract, and 1 tsp vanilla extract and beat until combined. Scrape the sides and bottom of the bowl with a rubber spatula as needed. 4-Then add 2 cups of all-purpose flour,: Then add 2 cups of all-purpose flour, 2 Tbsp cornstarch, and 1 tsp fine salt. Mix at low speed until the dry ingredients are just incorporated. Scrape around the sides and bottom of the bowl with a rubber spatula to make sure everything is properly combined. 5-Divide the dough in half with a: Divide the dough in half with a rubber spatula. Use a 1/2 tsp measuring spoon to scoop out uniformly sized bits of dough, repeating the process until you’ve portioned out half of the uncolored dough. Then, roll the bits of uncolored dough into balls with your hands and place them on one of the prepared baking sheets. 6-Next, mix a squirt of pink gel: Next, mix a squirt of pink gel food coloring into the remaining dough with a rubber spatula and mix until the dough is evenly colored. I like to do this by hand to avoid overimxing, but it can also be done with an electric mixer. 7-Repeat the scooping and rolling process with: Repeat the scooping and rolling process with the pink cookie dough, using 1/2 tsp to scoop out uniformly sized bits of dough. Then, roll the bits of dough into balls with your hands and place them on the other prepared baking sheet. 8-Arrange 5 dough balls that are the: Arrange 5 dough balls that are the same color in a circle with a small opening in the center (see pictures above). Repeat this process until you have 12 white flower cookies and 12 pink flower cookies, spacing them out a couple of inches apart. These cookies don’t spread much as they bake, and you should be able to fit 12 cookies on a 9×13-inch baking sheet. You should still have some leftover dough balls of each color, which will end up being the centers of the flowers in a few steps! 9-Spray the bottom of a flat-bottomed glass: Spray the bottom of a flat-bottomed glass or ramekin with a bit of non-stick spray, then gently press the glass on top of each flower to just slightly flatten it. If you don’t have non-stick spray, you can also place a small piece of paper between the cookie dough and the glass. The goal isn’t to completely flatten the dough, we just want to help the petals of the flower stick together once the cookies are baked (see pictures above). 10-Then, use a toothpick or scribe to: Then, use a toothpick or scribe to make 2 thin lines on each petal to give it a bit of dimension. Start in the center and make the lines go about halfway up each petal. 11-Count out the remaining balls of dough: Count out the remaining balls of dough and make sure you have enough to make a center for each flower – you want to use the opposite color of dough for the center of each flower. If you’re short on either color, you can divide the dough into smaller portions to make it work or break up one of the flowers and use the petals to be centers. Gently press a dough ball into the center of each flower. 12-Chill the cookies in the fridge for: Chill the cookies in the fridge for 30 minutes or in the freezer for 10 minutes, pan and all! This helps the cookies keep their shape. While the cookies chill, preheat the oven to 350°F / 175°C. 13-Once the oven is fully preheated, bake: Once the oven is fully preheated, bake the chilled cookies for 11-12 minutes. I recommend baking one tray at a time. The edges should be set, but they shouldn’t have any browning. Let the cookies cool fully on the baking sheet, then enjoy! Leftover cookies can be stored in an airtight container at room temperature for up to 5 days.
Last Step:
Please leave a rating and comment letting us know how you liked this recipe! This helps our business to thrive and continue providing free, high-quality recipes for you.