Ingredients
– 1 pound fresh salmon
– 1 teaspoon salt
– 1 serving yuzu aioli made with olive oil
– sushi rice
– wasabi
– soy sauce
– 1 lemon
– cucumbers
– avocado
– oil for frying the skin
Instructions
1-First Step: Dry and salt the salmonPat the salmon dry with a paper towel. Sprinkle 1 teaspoon salt per pound over the fish, then let it sit for 20 minutes. This gentle salt step helps draw out extra moisture and gives the salmon a cleaner taste.
2-Second Step: Rinse and dry againAfter the 20 minutes are up, rinse the salmon under running water. Pat it dry again with paper towels. This keeps the outside neat before freezing and helps you get a better texture later.
3-Third Step: Pack it for freezingPlace the salmon in a freezer bag. If you want to avoid freezer burn, use a vacuum-sealed bag or double-bag it before freezing. That small extra step can help the salmon stay in better shape during the long freeze.
4-Fourth Step: Freeze at the right temperatureFreeze the salmon at -4°F (-20°C) for at least 7 days to help kill parasites. This is the longest part of the recipe, but it is also one of the most important parts for raw serving. If your salmon was already pre-frozen, still confirm it has been frozen for 7 or more days and still go through the salt step.
5-Fifth Step: Defrost in the refrigeratorWhen the freezing time is done, move the salmon to the refrigerator and let it defrost overnight. Slow thawing helps keep the texture more even and keeps the fish easier to slice the next day.
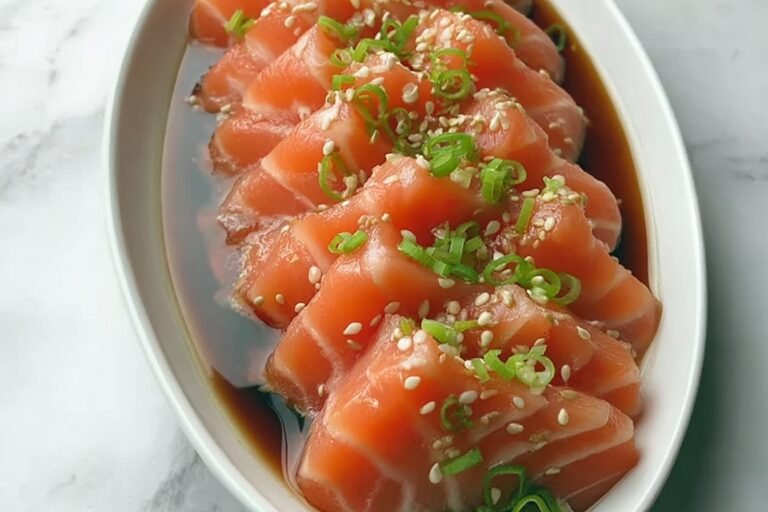
6-Sixth Step: Slice and serveOnce the salmon is thawed, pat it dry one more time. Use a sharp knife to thinly slice the fish into clean pieces. Arrange the slices with sushi rice, wasabi, and soy sauce. If you like a softer, richer finish, add yuzu aioli made with olive oil, plus lemon, cucumbers, and avocado.
7-Seventh Step: Cook the skin if neededIf the salmon skin is still on, you can fry it in oil for 5 to 7 minutes until crispy. This creates crunchy salmon skin chips, which make a fun topping or snack on the side. It is a great way to use the whole piece of fish.
8-Eighth Step: Plate and enjoyServe the sliced salmon right away after cutting. Homemade salmon sashimi tastes best when the texture is fresh and cool. For a beautiful plate, fan out the slices, tuck in cucumber rounds, add avocado, and finish with a small bowl of soy sauce or a drizzle of yuzu aioli.
Last Step:
Please leave a rating and comment letting us know how you liked this recipe! This helps our business to thrive and continue providing free, high-quality recipes for you.Notes
🛒 Source sushi-grade or farmed salmon from trusted fish markets for safety.
🔪 Always use a sharp knife and slice against the grain for perfect thin slices.
⚠️ Consult a doctor if pregnant; confirm pre-frozen salmon was frozen 7+ days.
- Prep Time: 10 minutes
- Freezing + Defrost Time: 7 days
- Category: Appetizer
- Method: No Cook
- Cuisine: Japanese
- Diet: Pescatarian
Nutrition
- Serving Size: 4 oz
- Calories: 161 kcal
- Sugar: 0g
- Sodium: 631mg
- Fat: 7g
- Saturated Fat: 1g
- Unsaturated Fat: 5g
- Trans Fat: 0g
- Carbohydrates: 0g
- Fiber: 0g
- Protein: 22g
- Cholesterol: 62mg