What Is Keto Zucchini Lasagna?
Keto zucchini lasagna is everything I love about a hearty Italian bake, minus the heavy pasta and the carb crash. Instead of traditional noodles, this dish uses paper thin zucchini strips that layer right alongside a savory meat sauce and a trio of melty cheeses.
The first time I pulled one out of the oven, I was honestly nervous it would slide apart on the plate. It didn’t. It held its shape beautifully, something I had only dreamed about after a few soggy attempts in the past.
The secret is in a few small, deliberate steps that tame the zucchini’s natural moisture. When those steps are followed, you get a low carb comfort meal that actually cuts into clean, neat slices.

Each bite gives you seasoned ground beef, creamy ricotta, stretchy mozzarella, and a hint of anise that makes the sauce taste remarkably like the Italian sausage bakes I grew up with.
The whole casserole clocks in at about 3.8 grams of net carbohydrates per serving, so it fits perfectly into a keto lifestyle without leaving you feeling deprived.
I keep this recipe in heavy rotation because it works for both busy weeknights and casual Sunday dinners. You can prep it ahead, double it for guests, and even freeze leftover portions.
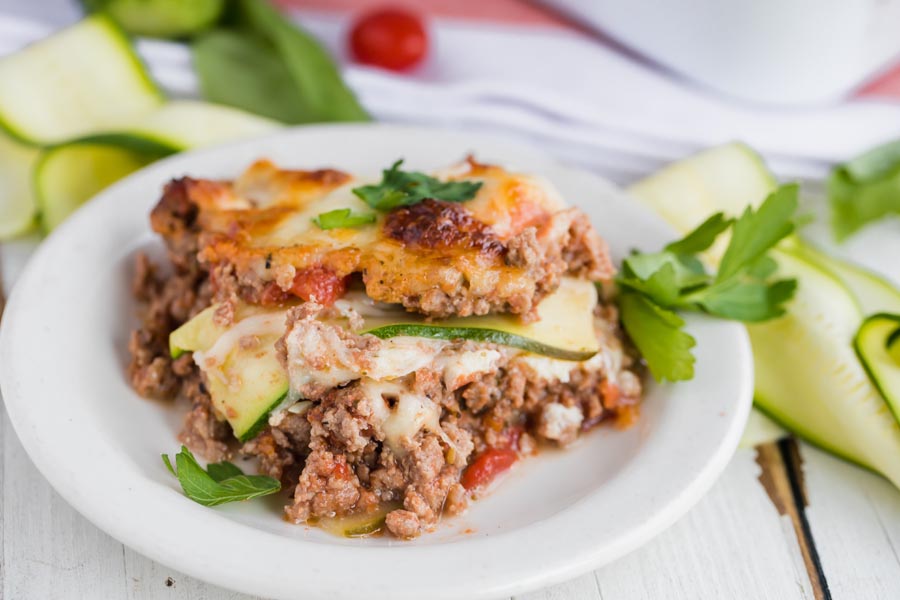
The full step by step approach was inspired by a detailed guide on KetoFocus, and over time I have made it my own with little tweaks learned right in my kitchen.
What makes it different: It isn’t just a pile of vegetables and cheese. The anise seeds in the meat sauce deliver that authentic Italian bake aroma, and a beaten egg whipped into the ricotta acts as a binder so the filling sets firm in the oven.
Once you taste a slice that stands up on its own, you might never look back.
Jump to:
- What Is Keto Zucchini Lasagna?
- The Moisture Control Method
- The Three Cheese and Anise Difference
- Building the Layers
- Baking and Serving
- FAQs
- How do you prevent keto zucchini lasagna from turning out watery?
- Can you freeze keto zucchini lasagna?
- Can I use cottage cheese instead of ricotta in keto zucchini lasagna?
- Why do you add an egg to the ricotta mixture for keto lasagna?
- Keto Zucchini Lasagna
- Ingredients
- Instructions
- Last Step:
- Nutrition
- Did you make this recipe?
The Moisture Control Method
If there is one thing that has ruined more keto zucchini creations than anything else, it is pooled water at the bottom of the dish. I learned this the hard way the first time I tried to wing a zucchini lasagna without any prep.
I poured off nearly half a cup of liquid before serving, and the leftovers turned into a soupy mess. The fix is simple but non negotiable.
Slice the zucchini as thin as you can get it. A mandoline is your best friend here. I aim for strips that are somewhere between paper thin and a dime’s thickness.
When the slices are that thin, they trap far less moisture between the layers and they cook through without turning to mush. I have even used a sturdy vegetable peeler in a pinch, and it works surprisingly well.
Once I have a neat pile of zucchini ribbons, I lay them out on a clean cutting board or a couple of plates and sprinkle them lightly with salt. This isn’t for flavor; it is purely for moisture control.
The salt draws out the natural water inside the zucchini. I let them sit for a full 15 minutes while I prep everything else. After that rest, you will actually see tiny beads of water on the surface.
I take a few paper towels and blot every strip firmly on both sides. I don’t rush this step. If you skip the salting and blotting, no amount of cheese or careful layering will save you from a watery result.
Why thinner equals better: When the zucchini is sliced thick, it acts like a tiny water balloon trapped between the sauce and cheese. It releases liquid as it bakes and creates those miserable puddles.
Paper thin strips, on the other hand, release most of their water during the salting phase and then bake up soft and sauce soaked without flooding the pan.
I have tested both ways side by side, and the difference in the final slice is night and day.
The single biggest favor you can do for your keto lasagna is salt and blot the zucchini. Skipping this step guarantees a watery casserole, no matter how perfectly you build the rest of the dish.
Another option I read about is quickly grilling the zucchini strips before assembly. That method drives off moisture and adds a nice smoky edge, but I find grilled slices are a little less flexible for tight layering. For everyday cooking, the salt method remains my go to because it is fast and foolproof.
The Three Cheese and Anise Difference
The cheese blend in this lasagna isn’t just for gooey texture. Each cheese plays a specific job, and together with the anise they deliver a flavor profile that tastes like a restaurant quality Italian meal.
Ricotta and the egg trick. I used to skip the egg in my ricotta mixture, thinking I could save a step. Every single time, the white layer slid around and oozed out when I tried to serve a slice.
Now I always beat one large egg into a quarter cup of ricotta along with a quarter cup of grated Parmesan and a teaspoon of garlic powder.
The egg sets during baking and binds everything into a creamy but firm ribbon that holds the layers together. It doesn’t make the lasagna eggy at all; it just gives the ricotta structure.
Mozzarella that matters. I slice a full 12 ounces of fresh mozzarella instead of using pre shredded bags. Fresh mozzarella melts into those gorgeous, stretchy pockets you expect from a comfort food bake. I layer it generously between the sauce and the ricotta mixture, and it forms a golden, slightly blistered top after baking.
The anise seed secret. This tiny spice is what makes the meat sauce smell and taste like real Italian sausage without any added carbs or fillers.
I add just a quarter teaspoon of anise seeds to the ground beef as it browns, along with salt, pepper, Italian seasoning, and a little garlic powder. The anise blooms in the hot skillet and gives the sauce that unmistakable savory sweet note.
If you have ever wondered what makes a traditional lasagna taste so deep and aromatic, it is often the fennel or anise in the sausage. By using this simple trick, we get the same effect with plain ground beef.
Together, the three cheeses create richness and structure, and the anise seeds tie the whole dish to its Italian roots. It is a combination that never fails to impress, even the skeptics who think keto food can’t taste indulgent.
Building the Layers
Once the zucchini is dried, the meat sauce is simmering, and the ricotta mixture is stirred together, the assembly is quick and satisfying. I always build the lasagna in a small casserole dish, but the layering logic works for any size pan.
The order matters. The first thing to hit the dish is a thin coat of marinara sauce. I pour half a cup of low carb marinara right into the bottom.
This keeps the zucchini from sticking and starts the layers off with a burst of tomato flavor. Next, I arrange a single layer of the salted, blotted zucchini strips. I let them overlap slightly just like you would with pasta sheets. No gaps, but no heavy stacking either.
On top of the zucchini, I spread half of the cooked ground beef mixture. The beef is already coated with the remaining cup of marinara, so it’s rich and not dry.
Then I dollop half of the ricotta egg Parmesan mixture across the meat and gently spread it with the back of a spoon. It doesn’t have to be perfect; it will melt and settle as it bakes.
After that, I cover everything with half of the fresh mozzarella slices.
I repeat the exact sequence: another layer of zucchini strips, the rest of the meat sauce, the remaining ricotta mixture, and finally the last of the mozzarella. Two full, tidy rounds and the dish looks like a compact, colorful mosaic ready for the oven.
If I am adding extras like fresh spinach, I tuck the leaves right between the zucchini and the meat layer. They wilt beautifully during baking and don’t require any pre cooking. For mushrooms, I always sauté them first in a dry pan to sweat out their water; otherwise they introduce too much liquid.
Baking and Serving
I preheat the oven to 400°F and slide the assembled lasagna onto the middle rack. The bake time is 25 to 30 minutes, and I start checking at the 25 minute mark. The top should be bubbly and golden, and the edges should look set.
The kitchen will smell like a cozy Italian Sunday dinner, even on a hectic Tuesday night.
Resting is not optional. I know it is hard to wait, but after I pull the dish from the oven, I let it cool on the counter for at least five full minutes.
This brief rest allows the melted cheeses and the ricotta binder to finish setting. If you slice too soon, the layers will still be hot and a little loose.
Those five minutes make the difference between a serving that slides apart and one that lifts out in a clean, impressive square. I use that time to toss a simple green salad or pour myself a glass of cold sparkling water.
One batch gives me about eight generous servings, which works perfectly for our family of four with planned leftovers. On nights when I am feeding a crowd, I double the entire recipe and bake it in a 9 by 13 inch pan.
The doubled version needs about 10 extra minutes in the oven, and I keep an eye on the top to make sure the cheese doesn’t burn before the center is hot.
Make ahead and storage. This lasagna is one of those rare dishes that tastes even better the next day. I often assemble it up to two days ahead, cover it tightly, and store it in the refrigerator.
When I bake it straight from the fridge, I add 5 to 10 extra minutes to the cook time. Leftovers stay fresh in the fridge for up to five days, and I have a reader, Karen, who swears the slices hold together beautifully even when she packs them cold for a potluck.
For freezing, I bake the lasagna first, let it cool completely, then wrap individual portions tightly. They keep for up to three months.
To reheat, I either thaw overnight in the fridge and warm at 375°F for about 20 minutes, or I bake a frozen portion at 375°F for 25 to 30 minutes until it’s steaming in the center.
A final note on ingredients: the nutrition numbers stay wonderfully keto friendly. According to the source recipe, a single serving comes in around 333 calories, 25.5 grams of fat, 19.9 grams of protein, and only 3.8 grams of total carbohydrates. That’s a comfort meal that fits my goals without making me feel like I’m missing out on anything.
FAQs
How do you prevent keto zucchini lasagna from turning out watery?
Can you freeze keto zucchini lasagna?
Can I use cottage cheese instead of ricotta in keto zucchini lasagna?
Why do you add an egg to the ricotta mixture for keto lasagna?
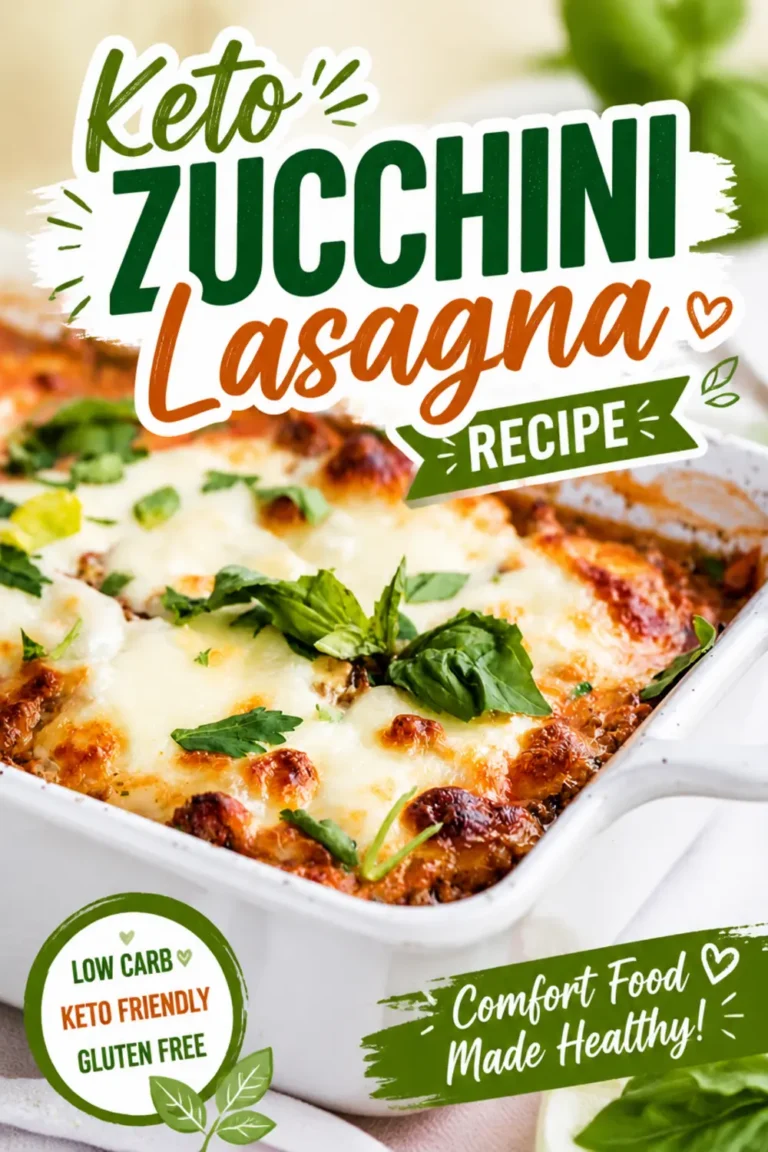
Keto Zucchini Lasagna
What Is Keto Zucchini Lasagna? Keto zucchini lasagna is everything I love about a hearty Italian bake, minus the heavy pasta and the carb crash.
- Total Time: 45 min
- Yield: 8 1x
Ingredients
1 zucchini
2 tablespoons olive oil
1 pound ground beef
1 teaspoon salt
1/2 teaspoon pepper
1 tablespoon Italian seasoning
1/4 teaspoon anise seeds
1 1/2 cups low-carb marinara sauce, divided
1/4 cup ricotta cheese
1/4 cup grated parmesan cheese
1 egg
1 teaspoon garlic powder
12 oz fresh mozzarella cheese, sliced
Instructions
1-Preheat the oven to 400 degrees: Preheat the oven to 400 degrees
2-Slice the ends of the zucchini: Slice the ends of the zucchini. Using a mandoline slicer, cut the zucchini into thin strips lengthwise.
3-Lay the zucchini down on a plate: Lay the zucchini down on a plate or cutting board and a very thin layer of salt over the zucchini. Let sit for 15 minutes. Blot moisture out of zucchini afterwards.
4-While zucchini is dehydrating, add olive oil: While zucchini is dehydrating, add olive oil to a skillet over medium heat. Add ground beef and cook for 2-3 minutes. Season with salt, pepper, Italian seasoning and anise. Continue cooking until ground beef has cooked through. Pour in 1 cup marinara sauce. Simmer for 1-2 minutes. Remove from heat and set aside.
5-In a small bowl, combine ricotta, egg,: In a small bowl, combine ricotta, egg, parmesan and garlic powder.
6-Pour 1/2 cup marinara sauce in the: Pour 1/2 cup marinara sauce in the bottom of a small casserole dish. Lay down a layer of zucchini noodles.
7-Top with half the ground beef mixture: Top with half the ground beef mixture. Spread half the white sauce on top. Layer half the mozzarella cheese down. Repeat the layers.
8-Bake at 400 degrees for 25 to: Bake at 400 degrees for 25 to 30 minutes. Let sit for 3-5 minutes to cool before serving.
Last Step:
Please leave a rating and comment letting us know how you liked this recipe! This helps our business to thrive and continue providing free, high-quality recipes for you.- Prep Time: 15 min
- Cook Time: 30 min
- Method: baking
Nutrition
- Calories: 333
- Fat: 25.5g
- Carbohydrates: 3.8g
- Protein: 19.9g