
Tessa’s Recipe Rundown
I will confess something right away: I spent years convinced scones were not worth the trouble. Too many of them were bland, dense little hockey pucks that tasted like they had been sitting under a coffee shop heat lamp since dawn.
Then I tasted a truly great scone, and everything shifted. One bite of something buttery, flaky, and impossibly tender, and I became a full convert on the spot.
That moment is exactly why this recipe exists. These scones are ultra buttery with a hint of sweet tanginess, and every bite is pure heaven. The best part is the whole thing comes together in 35 minutes flat, start to finish.

You read that correctly. From the moment you measure your flour to the moment you pull golden, towering scones from the oven, you are looking at less than half an hour of active work plus a brief bake.
What makes these different from biscuits? It comes down to eggs and sugar. Scones contain both, which makes them sturdier and heartier than their biscuit cousins. Biscuits are light and pillowy, built for savory gravy. Scones have structure, a gentle sweetness, and enough backbone to hold their own alongside a cup of tea or coffee without any accompaniment at all.
One reader wrote in to say she followed the detailed instructions, then added diced ham, shredded cheddar, and fresh chives while skipping the sugar topping entirely. That is the beauty of this recipe. It is a canvas.
You can fold in nuts, citrus zest, chocolate chips, or dried fruit such as raisins and currants. You can serve the finished scones with flavored butter, fruit jam, or even clotted cream if you want to lean into a more traditional afternoon tea vibe.

It is worth noting that this recipe is distinctly American in style. American scones are richer and denser than British scones, which tend to be lighter and plainer, designed specifically to be split and served with clotted cream and jam.
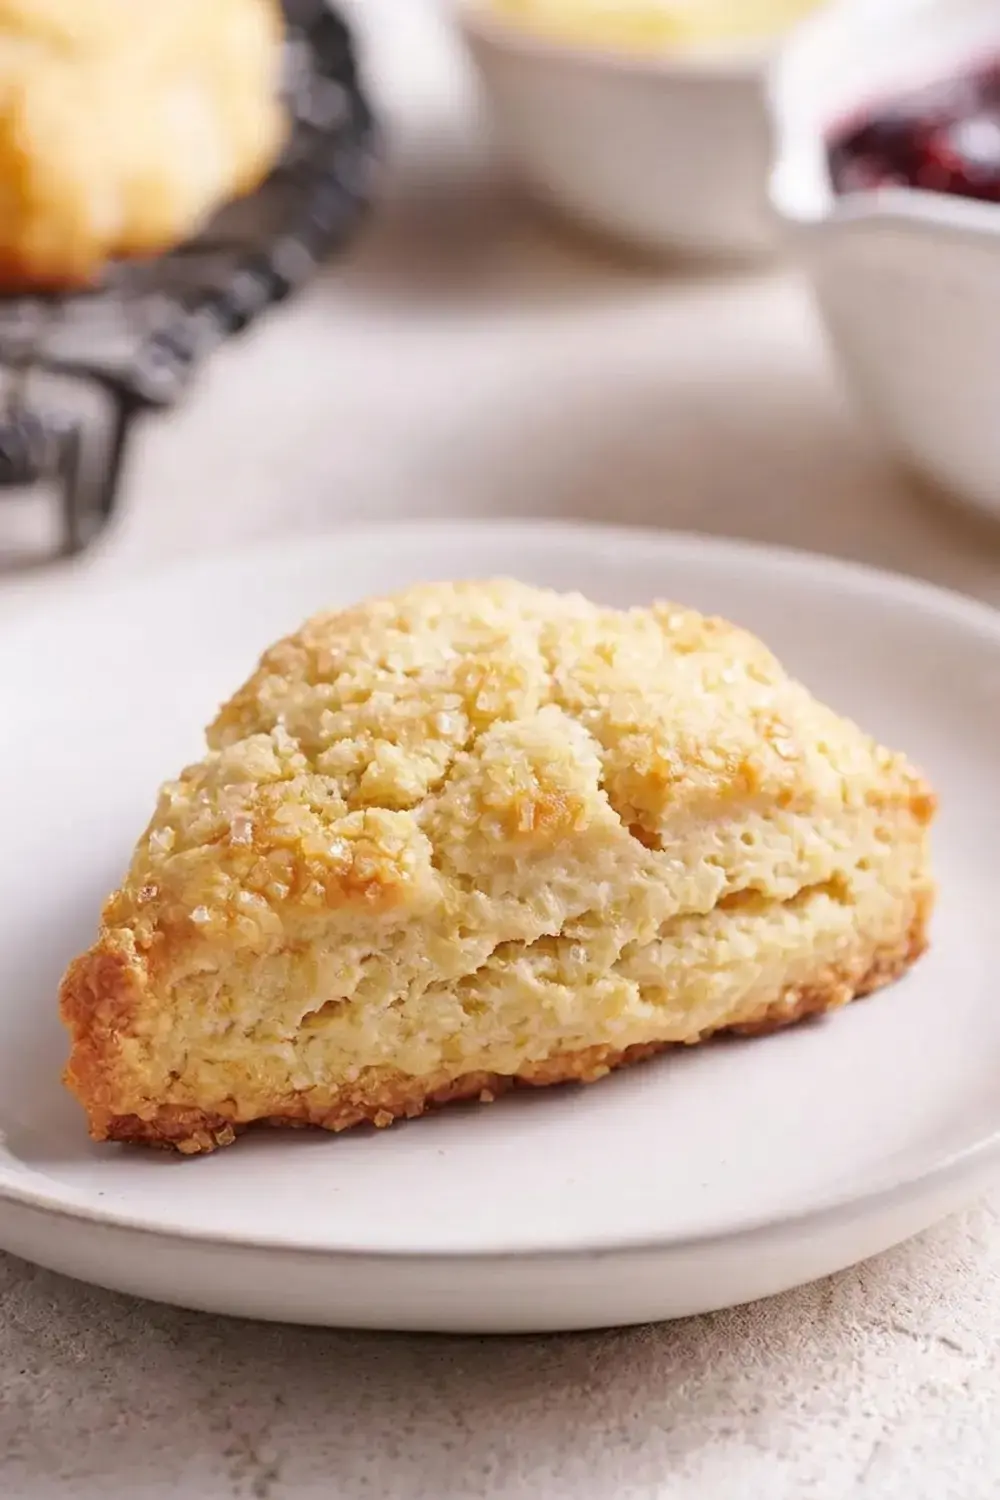
Both styles have their place, but if you are looking for that sturdy, bakery style scone with a crisp golden edge and a tender, layered interior, this is the one you want.
You can also make the dough ahead of time, which means these scones are just as practical for a lazy Sunday morning as they are for a holiday brunch with guests. Shape them the night before, tuck them in the fridge, and bake them straight from cold the next morning. The smell alone will get everyone out of bed.
Jump to:
- Tessa’s Recipe Rundown
- Ingredient Notes
- Tessa’s Tips for Scone Dough
- Sprinkle of Science
- The secret to tall, flaky scones
- How to “laminate” your scone dough
- Storage & Make Ahead
- Flavor Variations
- How to Make A Glaze
- FAQs
- What is the secret to making flaky and tender scones?
- Can I use heavy cream instead of buttermilk in scones?
- How do you keep homemade scones from getting dry?
- Can you freeze unbaked scones for later?
- Classic Scones
- Ingredients
- Instructions
- Last Step:
- Did you make this recipe?
Ingredient Notes
Every ingredient in this recipe earns its place, and a few choices matter more than you might expect. Let us walk through them.
Flour. All purpose flour is the way to go here. Gold Medal AP flour is my preferred choice because it has a slightly lower protein content than brands like King Arthur, and that lower protein translates directly into a more tender scone.
If you do not have a kitchen scale and are measuring by cup, spoon the flour into your measuring cup and level it off with a straight edge.
Never scoop directly from the bag, or you will pack in far too much flour and end up with dry, heavy scones.
Sugar. A relatively small amount of granulated sugar gives these scones just enough sweetness without making them taste like dessert. Sugar also helps those edges turn a lovely light golden color in the oven, which is part of what separates a scone from a biscuit.
Baking powder and baking soda. You will use a full tablespoon of baking powder, which might seem like a lot, but that is what creates tall, light scones that rise impressively in the oven. A smaller amount of baking soda works alongside it, helping with leavening and contributing to that light golden crust.
Butter. This is the ingredient where you cannot cut corners. Your butter must be cold when it goes into the dough, and it needs to stay cold until the moment the scones hit the oven heat.
Cold butter creates steam as it bakes, and that steam is what produces flaky layers. If your butter softens or gets greasy during mixing, the scones will be flat and dense.
Buttermilk. Buttermilk is the preferred liquid in this recipe, and for good reason. Its acidity reacts with the baking soda to create lift, it tenderizes the dough, and it adds a subtle tangy depth of flavor that plain milk simply cannot match.
A DIY buttermilk substitute (milk plus lemon juice or vinegar) is not recommended here. If you absolutely cannot find buttermilk, kefir is your best alternative. Heavy cream will work in a pinch, but it changes both the taste and the texture.
Eggs. Eggs add richness, structure, and a warmer color to the finished scone. This is another key difference between scones and biscuits, which typically contain no egg at all.
Vanilla extract. Do not skip the vanilla unless you are making a savory variation. It rounds out the flavor and makes the scone taste complete.
Coarse sugar. This is an optional topping, but I highly recommend it. A sprinkle of coarse sugar before baking gives the scones a sparkly, crunchy exterior that makes them look like they came straight from a bakery display case.
Tessa’s Tips for Scone Dough
Two things will make or break your scones: overmixing and warm dough. Avoid both, and you are golden.
When you combine the wet and dry ingredients, mix only until everything comes together. Every extra stir develops gluten in the flour, and gluten means tough, rubbery scones. You want a shaggy, slightly crumbly dough that just barely holds together. That is exactly right.
Temperature is equally critical. If the dough gets too warm, the butter softens and melts into the flour instead of staying in distinct little pieces. Without those cold butter pockets, you lose the flaky layers entirely. The scones will be flatter, tougher, and far less flaky.
A bladed pastry blender is my favorite tool for cutting butter into the flour by hand. It makes quick work of the job and keeps your hands off the butter, which means less heat transfer.
If the butter starts looking greasy or melty at any point during the process, do not panic. Just pop the whole bowl of dough into the freezer for 10 to 15 minutes, then continue where you left off.
On hot days, you can place ice water in sealed ziptop bags underneath your countertop or pastry board to keep the surface cool. Wipe everything dry before you turn out the dough. A marble pastry board is another excellent investment if you bake often, because marble stays naturally cool.
Once your scones are shaped and on the baking sheet, you can refrigerate or even freeze them while the oven preheats. This extra chill keeps the butter cold right up to the moment it hits the heat, and it makes a noticeable difference in how tall and flaky the scones turn out.
Sprinkle of Science
The secret to tall, flaky scones
The secret comes down to one simple principle: cold butter plus a hot oven equals steam. When cold butter hits a 400 degree oven, the water inside the butter turns to steam almost instantly.
That steam pushes the surrounding dough upward and outward, creating distinct layers. The leavening duo of baking powder and baking soda provides additional lift, while the acidity of buttermilk reacts with the baking soda to maximize rise.
Keep the butter cold, mix gently, and let the oven do the heavy lifting.
How to “laminate” your scone dough
If you want to take flakiness to the next level, there is an optional lamination step that mimics the technique used in croissant baking. After mixing, turn the craggly dough out onto a floured surface and shape it into a rough rectangle.
Fold it horizontally in thirds, like a letter going into an envelope. Flatten it gently, then fold it in thirds again in the opposite direction. This process creates distinct butter layers without requiring you to overmix the dough.
It also helps bring the dough together into a cohesive disk. This step is entirely optional. Skip it and your scones will still be delicious, but if you want those bakery style layers, it is worth the extra minute.
Storage & Make Ahead
Scones are always best served warm, or within a few hours of baking. That is when the texture is at its peak and the butter flavor is most pronounced.
Fortunately, this dough is very make ahead friendly. You can shape the unbaked scones, wrap them tightly in plastic wrap, and refrigerate them overnight. The next morning, bake them directly from the fridge exactly as the recipe directs. No thawing, no waiting, no fuss.
For longer storage, freeze the shaped unbaked scones in an airtight container for up to one month. When you are ready to bake, put them straight into the oven while still frozen. Just add about 2 extra minutes to the baking time. This means you can always have fresh scones ready with almost zero morning effort.
Flavor Variations
This recipe is wonderfully adaptable. You can fold about 3/4 cup of dried fruit, chocolate chips, nuts, or other add ins into the dough right after combining the wet and dry ingredients. Dried fruit and frozen berries (such as raspberries) work far better than fresh berries, which release too much water and make the dough soggy.
Popular variations include cranberry orange, pumpkin, blueberry, and chocolate chip scones. Here are two specific combinations to try:
- Lemon Poppy Seed: Add 3 tablespoons of poppy seeds and 2 tablespoons of grated lemon zest directly to the dough.
- Cinnamon Sugar: Mix 3 tablespoons of granulated sugar with 1/2 teaspoon of ground cinnamon and sprinkle it over the scones right after applying the egg wash.
How to Make A Glaze
A simple glaze takes these scones from breakfast to dessert in the best possible way. Whisk together 1 1/2 cups (188 grams) of powdered sugar, 2 tablespoons of water, milk, or citrus juice, 2 tablespoons of melted unsalted butter, and 2 teaspoons of vanilla extract or another extract of your choice. Add citrus zest to taste if desired.

Whisk everything until the glaze is thick but still pourable. Spread or drizzle it over completely cooled scones, then let them stand until the glaze sets into a smooth, shiny finish.
FAQs
What is the secret to making flaky and tender scones?
Can I use heavy cream instead of buttermilk in scones?
How do you keep homemade scones from getting dry?
Can you freeze unbaked scones for later?

Classic Scones
Tessa’s Recipe Rundown I will confess something right away: I spent years convinced scones were not worth the trouble. Too many of them were bland, dense little hockey pucks that tasted like they had been sitting under a coffee shop heat lamp since dawn.
- Total Time: 35 min
- Yield: 16 scones 1x
Ingredients
3 cups all-purpose flour, measured correctly
1/3 cup granulated sugar
1 teaspoon fine sea salt
1 tablespoon baking powder
1/2 teaspoon baking soda
1 1/2 sticks unsalted butter, cold and cubed
1 cup buttermilk
2 large eggs, divided
1 teaspoon vanilla extract
Coarse sugar, for topping
Instructions
1-Adjust the oven rack to the center: Adjust the oven rack to the center position and preheat to 400°F. Line two baking pans with parchment paper.
2-In a large bowl, combine the flour,: In a large bowl, combine the flour, sugar, salt, baking powder, and baking soda.
3-Add the butter and cut with a: Add the butter and cut with a pastry cutter or a fork until the butter is the size of large peas.
4-In a separate bowl, whisk together the: In a separate bowl, whisk together the buttermilk, 1 egg, and vanilla extract.
5-Make a well in the middle and: Make a well in the middle and add the liquid mixture. Mix until just combined. Don’t over mix. If adding in dried fruit, nuts, chocolate, or other flavorings, do so now.
6-Transfer the dough to a floured surface: Transfer the dough to a floured surface. *Optional Step: See Recipe Notes for lamination instructions.
7-Divide into 2 equal parts: Divide into 2 equal parts. Lightly knead each into 3/4-inch thick, 6-inch diameter rounds. Cut each round into 8 wedges and place on your prepared baking pans. Space them out about 2 inches apart.
8-In a small bowl, combine the remaining: In a small bowl, combine the remaining egg with 1 teaspoon water. Brush over the scones. Sprinkle with the coarse sugar.
9-Bake for 12 to 15 minutes or: Bake for 12 to 15 minutes or until lightly browned. The scones are best served warm, or within a few hours of baking.
Last Step:
Please leave a rating and comment letting us know how you liked this recipe! This helps our business to thrive and continue providing free, high-quality recipes for you.- Prep Time: 20 min
- Cook Time: 15 min
- Method: bake