
Plain Scones
There is something undeniably comforting about a plain scone, still warm from the oven, waiting to be split open and topped with a generous spoonful of jam.
I remember my first proper taste of a British afternoon tea years ago, in a small, cozy tearoom tucked away on a side street in London.
Between museum visits and poking through the shops, I made it my mission to try as many scones as I could. The simplicity of a perfectly baked, slightly crumbly scone paired with a strong cup of tea left a lasting impression on me.
Ever since, I have loved recreating that feeling at home, pulling a tray of golden, fluffy scones from my own oven and sitting down for a quiet moment, no matter how busy the day has been.
Living in a city where scones are not exactly a bakery staple turned out to be a gift. It pushed me to develop my own easy recipe, one that would deliver that same tender, light crumb I remembered from London.
After testing batch after batch in my small Zurich kitchen, I landed on a dough that comes together quickly, bakes up beautifully, and brings a little bit of that English tea room magic right to my table.
A simple, warm scone is more than a baked good; it is an invitation to slow down, pour your favorite drink, and enjoy a few moments of pure comfort.
Jump to:
- Plain Scones
- Plain Scone Recipe
- Why This Recipe Works
- Easy Scone Recipe
- How to Make Scones
- How to Eat Scones
- What to Serve with Scones
- Update
- FAQs
- What is the secret to making light and fluffy scones?
- Should you twist the cutter when cutting scones?
- Can you freeze unbaked scone dough?
- What is the best way to serve plain scones?
- Plain Scones
- Ingredients
- Instructions
- Last Step:
- Nutrition
- Did you make this recipe?
Plain Scone Recipe
My love affair with scones began on a rainy afternoon in London. I had been exploring the city for days, walking through grand museums and ducking into shops along the High Street, but my most vivid memory is of my first Devonshire Tea.
A simple, unassuming plain scone arrived at my table, split in half and piled high with strawberry jam and a billowy cloud of cream. I took one bite and immediately understood why this tradition has endured for generations.
The contrast of the warm, soft crumb with the cool cream and sweet jam was pure alchemy.
Back home in Zurich, that memory stayed with me. Unlike in London, where scones pop up on nearly every café menu, finding a fresh, well made scone in my neighborhood proved almost impossible.

I started craving them on quiet Sunday mornings and during chilly afternoons when I wanted something special but not too fussy. The craving grew so strong that I knew I had to figure out how to make them myself.
I wanted to capture the exact texture I remembered: a golden top, a tender, fluffy inside, and that unmistakable fresh from the oven aroma that fills the whole kitchen.
Once I perfected the recipe, it became a regular ritual in my home. There is something deeply satisfying about pulling a tray of warm scones from the oven and gathering the family around the table.
My kids love helping cut the dough and, of course, piling on the toppings. It has become our little piece of the British countryside, right here in Switzerland, and every bite takes me straight back to that cozy London tearoom.
Why This Recipe Works
Over the years, I have tested more scone recipes than I can count, and this one has earned a permanent spot in my kitchen notebook for three solid reasons. First, it is genuinely quick.
You can measure, mix, and shape the dough in about ten minutes, which means you are never far from a fresh batch of scones, even on a busy morning. Second, the texture is exactly what you want: light, fluffy, and tender, never dense or dry.
The secret is in how little you handle the dough and the clever use of cold fat rubbed into the flour. Finally, these scones are incredibly freezer friendly.
I often make a double batch, freeze half of the unbaked rounds on a tray, and then pop them straight into the oven whenever a scone craving strikes.
No need to thaw, just add a few extra minutes to the baking time and you will have something hot and fresh in no time.
Easy Scone Recipe
For a long time, my go to scone recipe was a famous one from Nigella Lawson’s cookbook, How to be a Domestic Goddess.
Her Lily’s Scones were wonderfully fluffy and always got compliments, but the recipe called for cream of tartar, an ingredient that turned out to be frustratingly difficult to find in Zurich.
While it is common in the UK, the United States, and Australia, I would wander the aisles of my local supermarkets here searching for a tiny jar that simply did not exist. Every time I wanted to make scones, I faced the same hurdle.

Instead of giving up, I decided to experiment. I wanted a recipe that would work just as well without any hard to source ingredients, something straightforward that would still give me that high, tender crumb I loved.
I tweaked the ratios, tested different fats, and paid close attention to the mixing method. After a few tries and a lot of happy tasting, I landed on this easy scone recipe.
A full batch now comes together in under thirty minutes from start to finish, and the results are consistently reliable. It has become my everyday scone, the one I scribble on recipe cards for friends and pull out whenever I need a quick, comforting bake.
How to Make Scones
The beauty of scones lies in their simplicity, but a few careful steps make all the difference between a good scone and a truly great one. It all starts with cold fat.
You want to cut your butter into small cubes and keep it chilled until the very last second. In my kitchen, I often grate frozen butter straight into the flour mixture on particularly warm days.
This trick keeps everything cold and makes rubbing it in practically effortless.

Once you combine the flour, salt, sugar, and baking powder in a large bowl, add those cold cubes of butter, along with a little lard or vegetable shortening if you want an extra tender result.
The lard is optional, but it contributes a softness that I find irresistible. Using your fingertips, or the flat paddle attachment of a stand mixer, rub the fat into the dry ingredients until the whole mixture looks like damp sand.
This is your signal that the fat is evenly distributed and ready to create those lovely flaky layers.
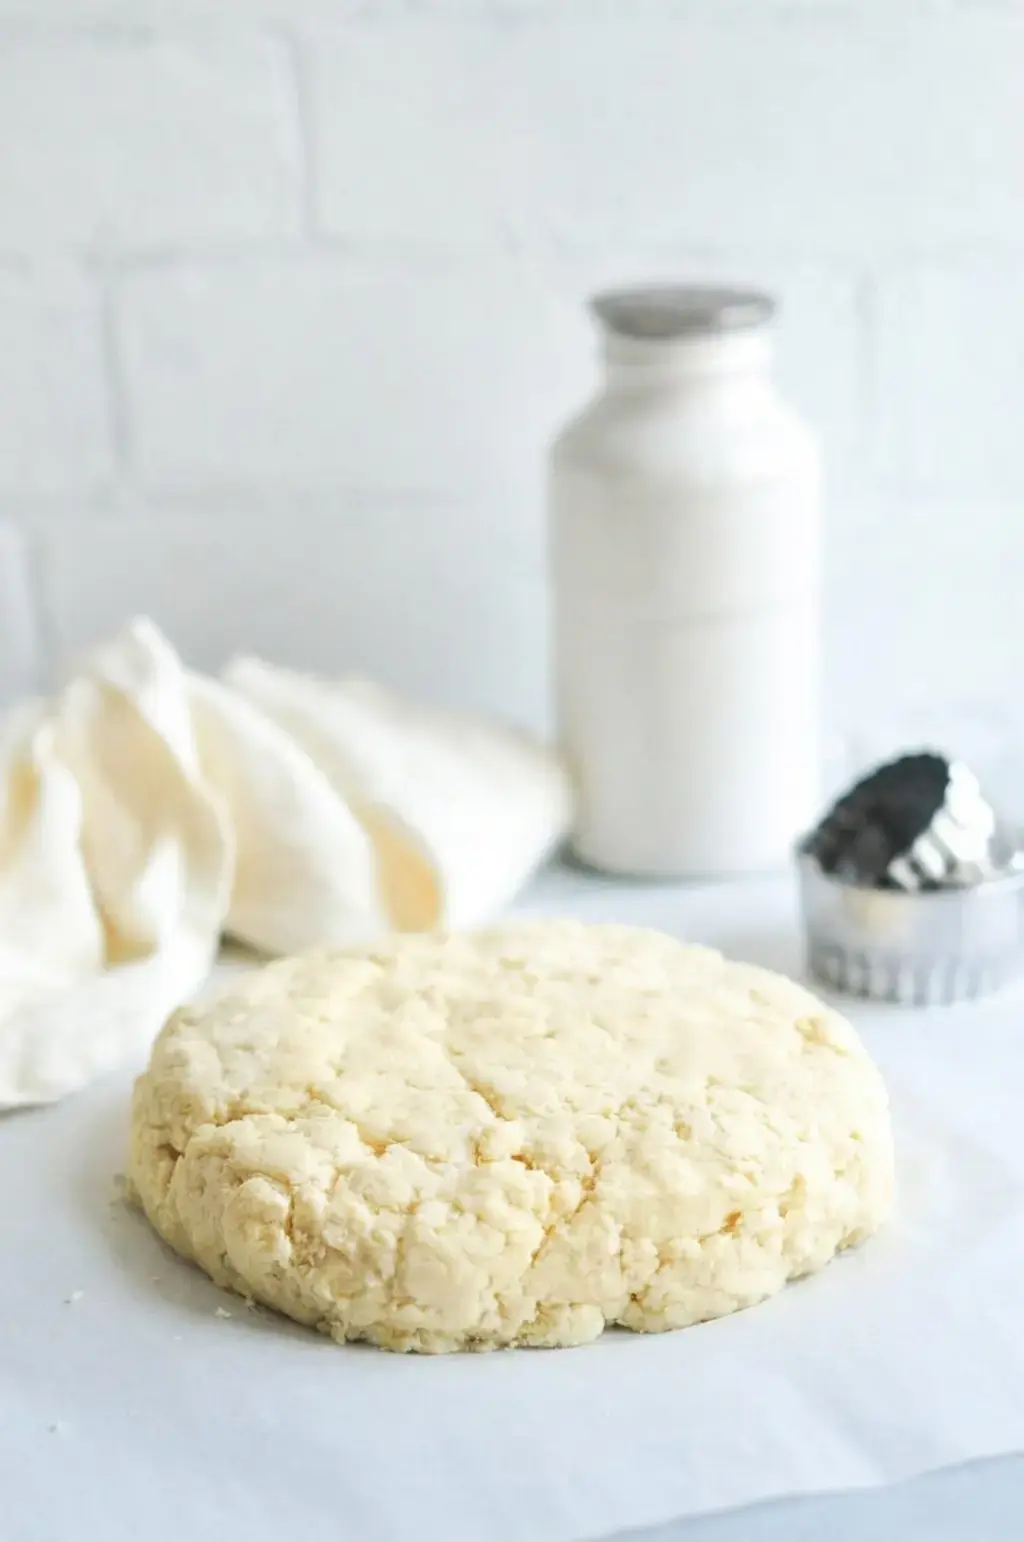
Now comes the milk. Pour it in slowly while you mix, stopping the moment the dough just comes together into a shaggy, rough mass.
Resist the urge to keep mixing; overworking the dough at this stage will develop the gluten and lead to tough, chewy scones. The dough should feel soft and slightly sticky.
Turn it out onto a lightly floured surface and gently pat it into a rectangle or circle about 3 cm, or roughly 1 inch, high. There is no kneading here, only a light, patient touch.
Every fold and press you skip now means a higher, airier scone later.
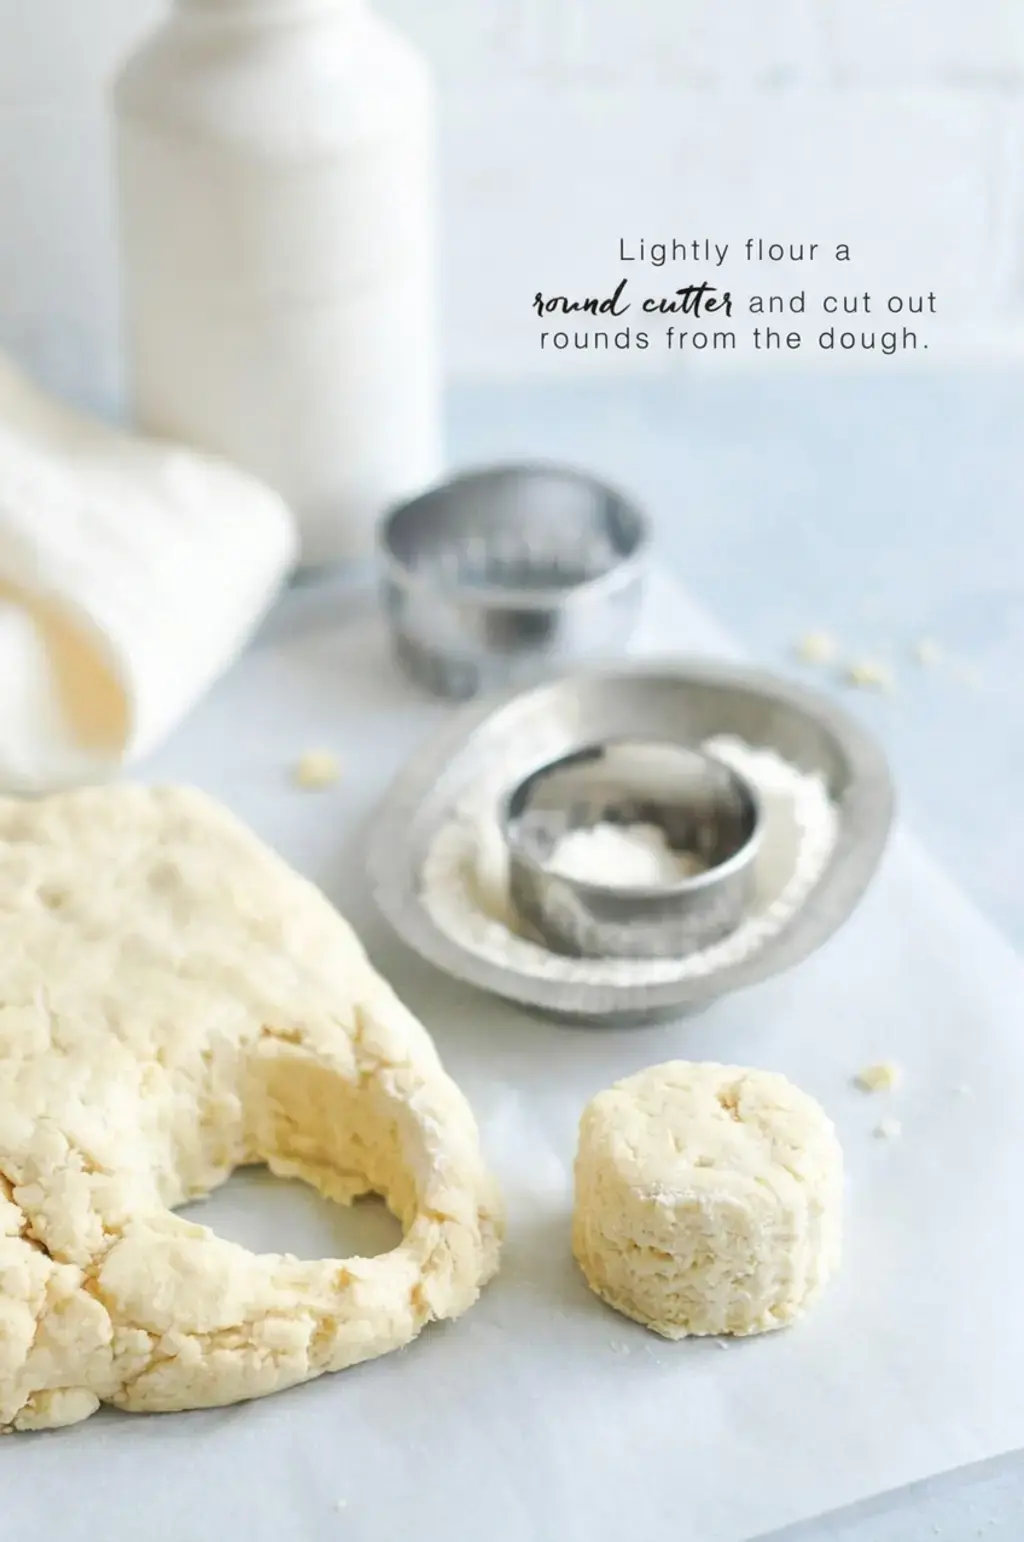
Cutting the scones is my favorite part because there are no strict rules. I use a 6 cm crinkle edged cookie cutter, but a smooth cutter, a teacup, or a small inverted glass jar works just as beautifully.
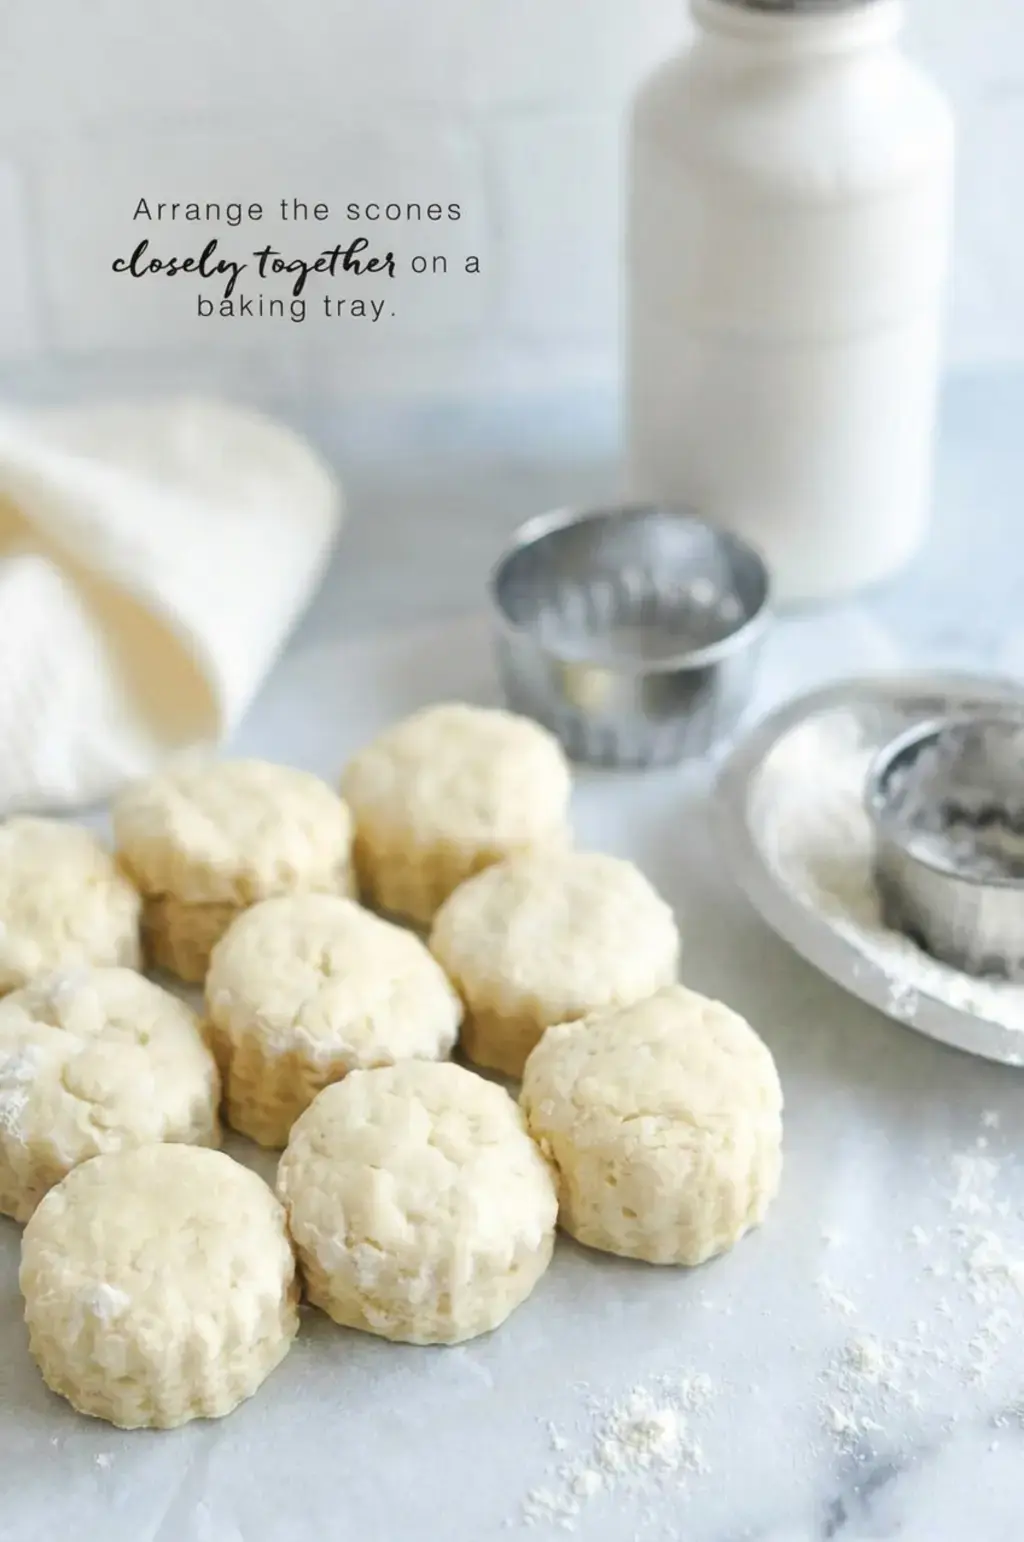
Dip the cutter in flour between each press to get a clean cut. Arrange the rounds closely together on your baking tray so they touch ever so slightly. This close arrangement encourages them to rise upward and creates wonderfully soft sides.
If you prefer a crunchy exterior all around, space them further apart so the oven heat can circulate around each one.
Before they go into the hot oven, brush the tops gently with a simple egg wash made from one beaten egg and a tablespoon of milk. This gives them that classic glossy, golden brown finish.
Bake the scones until they are puffed and deeply golden, and if you are ever unsure, an instant read digital thermometer inserted into the center of a scone should read around 85°C, or 185°F.
When the scones emerge, my favorite trick is to wrap them right away in a clean tea towel. The towel traps the escaping steam and keeps the crust beautifully soft, so every bite melts in your mouth rather than crumbling away. This small step transforms them into the tender, comforting treat I remember from that first London tearoom.
How to Eat Scones
Over the years, I have learned that how you eat a scone can be a surprisingly personal choice, almost as debated as the recipe itself. My own method is simple and, I think, deliciously logical. First, I never cut a scone with a knife.
Instead, I gently split it open with my hands, pulling apart the top and bottom to reveal the soft, fluffy layers inside.
A knife has a way of flattening those delicate air pockets, and you lose so much of the lovely texture you worked to create.
Once the scone is split, I spread a thin layer of strawberry jam across each warm half. The heat from the scone softens the jam just slightly, making it glossy and fragrant. Then comes the cream.

I dollop a generous spoonful of softly whipped Chantilly cream right on top of the jam. Placing the cream first, I have found, creates a slippery foundation that sends the jam sliding right off the side.
Jam first acts as a delicious, slightly sticky anchor, holding everything in place until the very last bite.
If I am keeping things simpler or just ran out of cream, I reach for the butter. There is something deeply satisfying about spreading a thick layer of cold, salted butter onto a hot scone half and watching it melt into every nook and cranny.
I top that with a spoonful of jam and, honestly, I do not miss the cream one bit. It is a slightly different experience, more rustic and direct, but every bit as comforting.
What to Serve with Scones
A batch of warm, plain scones is an invitation to play with your favorite toppings. While strawberry jam is my nostalgic favorite, there are so many wonderful homemade accompaniments that deserve a spot on the table.
A jar of tangy apricot jam brings a bright, sunny flavor that cuts through the richness, while a dollop of silky homemade clotted cream makes the whole experience feel like a true special occasion.
For those days when I want something a little more vibrant, lemon curd is the answer. Its sharp, buttery citrus notes pair beautifully with the mild scone. A peach and raspberry jam is another favorite, combining sweet summer stone fruit with a gentle tartness.
Whichever spread you choose, a plain scone is the perfect canvas, ready to soak up all those beautiful, homemade flavors.
Update
This recipe has become a staple in my kitchen over the past few seasons since I first shared it. I have tested it in different ovens, with different flours, and in all kinds of weather, and the results remain beautifully consistent and rewarding every time.
FAQs
What is the secret to making light and fluffy scones?
Should you twist the cutter when cutting scones?
Can you freeze unbaked scone dough?
What is the best way to serve plain scones?

Plain Scones
Plain Scones There is something undeniably comforting about a plain scone, still warm from the oven, waiting to be split open and topped with a generous spoonful of jam. I remember my first proper taste of a British afternoon tea years ago, in a small, cozy tearoom tucked away on a side street in London.
- Total Time: 20 min
- Yield: 12 1x
Ingredients
For the Scones
500 g plain flour (all-purpose flour)
6 g fine salt
25 g caster sugar (superfine sugar)
10 g baking powder
50 g unsalted butter, cold and cut into cubes
25 g lard or vegetable shortening
250–300 ml milk
For the Egg Wash
1 egg
1 tablespoon milk
For the Chantilly Cream
250 ml double cream (heavy cream)
1–2 teaspoons caster sugar or vanilla sugar
Instructions
For the Scones
1-Preheat the oven to 220°C (430°F) (without: Preheat the oven to 220°C (430°F) (without fan).
2-Place a baking tray in the middle: Place a baking tray in the middle shelf of the oven to warm up while you are making the scones.
3-Place the flour, salt, sugar and baking: Place the flour, salt, sugar and baking powder into the bowl of a KitchenAid or stand mixer.
4-Add the butter and lard (or vegetable: Add the butter and lard (or vegetable shortening), and briefly mix with the flat paddle attachment until the mixture resembles damp sand. Alternatively, you can do this by hand by simply rubbing the fats into the flour with your fingertips.
5-Slowly add the milk and quickly mix: Slowly add the milk and quickly mix everything together. You may not need all of the milk – just add enough milk until the mixture just comes together into a rough dough. Try not to overwork the dough as this may lead to tough scones later.
6-Place the dough onto a floured work: Place the dough onto a floured work surface and pat it into a rectangle or circle shape about 3 cm (1 inch) high.
7-Cut your scones with a round cutter: Cut your scones with a round cutter. You could also use a teacup or small glass to shape your scones. Dip the cutter into some flour to prevent the dough from sticking to it.
8-You can make the scones as little: You can make the scones as little or as big as you like, adjusting the baking time accordingly. I use a 6 cm (2.5 inch) crinkle-edged cookie cutter to make fairly small scones.
9-Lightly re-shape the dough as necessary, but: Lightly re-shape the dough as necessary, but try to handle the dough as little as possible.
10-Arrange the scones closely together on a: Arrange the scones closely together on a baking tray.
11-Make an egg wash by lightly beating: Make an egg wash by lightly beating together the egg and milk.
12-Brush the scones with some egg-wash: Brush the scones with some egg-wash.
13-Bake the scones in the oven for: Bake the scones in the oven for about 10-15 minutes (depending on size), or until they are lovely and golden.
14-You may need to test a scone: You may need to test a scone to make sure that it is fully cooked through in the centre. A digital thermometer inserted in the centre of a scone should read about 85°C (185°F).
15-These scones are best served hot or: These scones are best served hot or warm, but they are also lovely served at room temperature.
16-Serve the scones with some Chantilly Cream: Serve the scones with some Chantilly Cream (recipe below) and strawberry jam.
17-To stop the scones from developing a: To stop the scones from developing a hard crust as they cool, cover the warm scones with a clean tea towel. The steam trapped under the tea towel will help to keep the scones soft.
For the Chantilly Cream
18-Place the cream and sugar into a: Place the cream and sugar into a large bowl and whisk until until soft peaks form.
19-The cream should be soft, but still: The cream should be soft, but still be able to hold its shape.
Last Step:
Please leave a rating and comment letting us know how you liked this recipe! This helps our business to thrive and continue providing free, high-quality recipes for you.- Prep Time: 10 min
- Cook Time: 10 min
- Method: bake
Nutrition
- Calories: 219
- Sugar: 1.4
- Sodium: 420.6
- Fat: 6.6
- Carbohydrates: 33.8
- Fiber: 1.1
- Protein: 5.5
- Cholesterol: 20